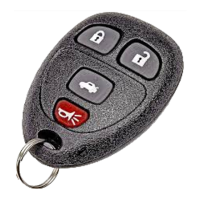
APDTY 24843 Replacement Key Fob (Replaces GM 15252034 Only)
Programming Instructions (Do-It-Yourself Version; Read & Understand These Instructions & your Factory
Owners Manual Before Attempting Programming, The owners manual contains valuable information
regarding the keyless entry system, any custom function setup, & key fob battery reset information.
Preparation Tip #1: The vehicles keyless entry system must be in proper working condition and simply
need a replacement key fob. The key fob simply transmits a signal to a receiver inside the vehicle. This
receiver talks to the body control module, powertrain control module, and other components to
perform a function like lock or unlock. The vehicle must be in proper working condition with no fuses
blown and no check engine or service dashboard lights illuminated. The vehicle receiver can have a
blown fuse and this must be inspected before purchasing a new key fob. A dashboard light must be
diagnosed before attempting programming. If you have a key fob low battery light showing in the DIC
(drive information center), you must reset the battery warning light through the DIC after programming
the new remotes. You can install a brand new battery in your key fob and still have a low battery
indicator if it is not reset.
Preparation Tip #2: A proper working 12V battery and alternator are required. Battery terminals must be
clean and free of corrosive buildup that can potentially damage the flow of electricity into the battery
from the alternator or form the battery to the vehicle systems.
Preparation Tip #3: All currently programmed and new remotes must be reprogrammed to the vehicle
during the same programming session. Please have all remotes in hand at time of programming. Once
plugging in the programmer you will have 2 minutes to program all new and existing remotes to the
vehicle. After 1 minute of idle time your session will time out and your vehicle will no longer be in
programming mode. Programmer will work for no more than 3 successful sessions.
1. Locate the OBD port under the driver side of the dashboard so you are ready to insert the
programmer. It may be covered by a faceplate that will easily pop off. The programmer is brand
new and will be tightly fitted to the clip on the OBD2 port. Have a small flat head screw driver
handy to release the tab to be able to remove the programmer. Do a test fit and Install and
remove the programmer.
2. Get in the vehicle and shut the door.
3. After the dome light goes out, Insert ignition key into ignition and turn to IGN ON. (Do not crank)
4. Insert programmer into your vehicle’s OBD2 Port
5. Once the programmer is inserted, wait for a chime or orange light on the Programmer to come
on. This will indicate that the unit is ready to program the first remote.
6. Press and hold the lock and unlock button on the remote simultaneously until you hear a chime,
buzzer, or the door locks cycle (approximately 10-15 seconds).
7. Program each additional remote, repeating step 6.
8. Remove Programmer when all remotes have been programmed.