15
3. Point W Waste water connection:
Tubing color: Black tubing. Connect the BLACK tubing from the RO to the Drain Saddle.
Fitting type: Quick-Connect fitting on drain saddle. No teflon tape.
Do Not add ”insert” into Black tubing. Simply push tubing into port.
4. Point A System water inlet (to Stage 1 prefilter) connection:
Tubing color: Red tubing. Connect the RED tubing from the Feed Water Valve to the RO’s stage -1
pre-filter.
Fitting type: Quick Connect fitting
See Fig.1 on page 4. Simply push the Red tubing into the Quick
Connect fitting. No Inserts, Sleeves or Nuts are needed to secure the connection. No
teflon tape is needed here.
5. Point H Stage-5 filtered water to faucet connection:
Tubing color: Clear tubing. Connect the CLEAR tubing from the faucet base stud to the Stage-5 filter’s
outflow end at point H. (See “Flow -->” arrow on the filter for flow direction.)
Fitting type: Quick Connect fitting
See Fig.1 on page 4. Simply push the Clear tubing into outlet
on the 5th stage filter. No Inserts, Sleeves or Nuts are needed to secure the
connection. No Teflon tape is needed here.
Please Note: There are two end plugs on the stage-5 filter that has to be removed before
inserting the tubing. Please refer to Fig. 1A on page 4 for removal instruction.
6. Point G Stage-5 filter’s T-fitting connection:
Tubing color: Yellow tubing. Connect the YELLOW tubing to Stage-5 filter’s T-fitting.
Fitting type: Quick Connect fitting
See Fig.1. Simply push the Yellow tubing into the 5th stage filter’s
T Fitting. No Inserts, Sleeves or Nuts are needed to secure the connection. No Teflon tape
needed here.
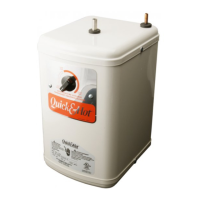
(Note: If the unit comes with a UV Light, connect the Yellow tubing to the T- fitting on the
UV, as the Stage 5 filter will not have a T-fitting).
nt
bing color
lack tubing. Conn
K tubing
r
th
R
t
th
Dr
in
itting type:
uic
Connect
itti
n saddle. No te
lon tape.
Do
ot add ”inser
ack tubing. Simply push tubing into port.
System water inlet (to Stage 1 pre
ilter) connection
Tubi
color
ed tubin
Connect the RED tubin
r
the
Water Valve to the RO’s st
e -1
ilter.
itting type:
k Connect
itting
ee Fig.1
imply push the Red tubing into the Q
nnect
itting. No Inserts, Sleeves o
are needed to secure the connection. No
te
lon tape is needed here
P
nt H Stag
5
iltered water
cet connection
Tubing color
Clear tubing. Conn
EAR tubing
r
the
aucet base stu
tage-5
ilter’s
end at
See
Flow --
arrow on the
ilter
or
l
on.)
itting type: Quick Co
t
i
g
e Fig.1
page
. Simply push the Clear tubing into outlet
on the
er. No Inserts, Sleeves or Nuts are needed to secure the
conne
lon tape is needed here.
There are two end plugs on the stage-5
ter that has to be removed before
on page 4 for removal instruction.
P
nt
Stag
5
ilter’s T-
itting conn
color
g type: Quick Connect
itting
e
g.
Simply push the Yellow tubing into
e
age
ilter’s
T Fitting. No Inserts, Sl
Nuts are needed to secure the con
No Te
lon tape
n
h
r
.
ote: I
the
es with a UV Ligh
, connect the
t
g to the T-
itting on the
s
Stage 5
ilter will not have a T-
itti
 Loading...