Do you have a question about the APlusLift HW-10KBP and is the answer not in the manual?
Unpack and verify all lift components. Review installation and anchoring requirements before proceeding.
Position, align, and anchor the lift columns securely to the floor, ensuring they are square and level.
Route and connect equalizer cables between carriages, ensuring proper initial tension for synchronization.
Mount the power unit and connect hydraulic hoses to cylinders and power unit, routing them safely.
Attach the four swing arms and pins to the carriages, ensuring correct alignment and secure fit.
Connect the power unit to the electrical supply, following all safety codes and using appropriate wiring.
Adjust equalizer cables for synchronized carriage movement and verify safety latch operation.
Mount the floor plate, fill hydraulic fluid, check assembly, and bleed air from the system for optimal performance.
Position the vehicle centrally on the lift pads, ensuring balanced weight distribution for safe lifting.
Raise the lift slowly, checking for stability and engaging safety locks at desired heights.
Clear the area, disengage safety locks, and lower the lift smoothly to the floor.
Follow critical safety guidelines including training, awareness of high pressure, and area control.
Perform essential daily checks on safety locks, connections, cables, and floor integrity before use.
Conduct weekly checks on anchor bolts, hydraulic oil level, and fasteners to ensure continued reliability.
Perform annual lubrication of chains and rub blocks, and change the hydraulic fluid.
Specialized tasks like hose/cylinder replacement or pump/motor rebuilding require expert intervention.
Provides a two-year warranty on lifts and wheel service equipment purchased in the US and Canada.
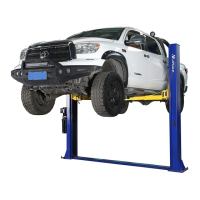
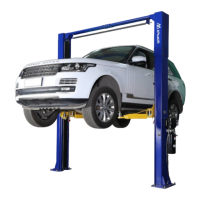
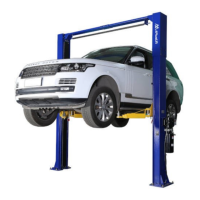
The APlusLift HW-10KBP is a 2-post floor plate car lift designed for vehicle maintenance and repair, offering a robust lifting capacity of 10,000 LB. This lift is engineered for heavy-duty applications, featuring durable construction and a range of safety mechanisms to ensure secure operation.
The HW-10KBP lift is designed to raise entire vehicles, providing access to their undercarriages for various service tasks. It operates using a dual hydraulic cylinder, chain-drive system, powered by a 220V 60Hz 3 HP motor. The lift incorporates both symmetrical and asymmetrical arm assemblies, offering flexibility in vehicle positioning. Lifting is initiated by pressing an "UP" button on the motor, while manual lowering is controlled by a lever. The floor plate design allows for easy installation and maintenance, with cables and hydraulic hoses routed underneath for protection and a clean shop environment.
The HW-10KBP is designed for ease of use and safety. It features a double-point safety lock release and automatic arm lock restraints to prevent accidental lowering or movement of the arms. A relief valve built into the power pump prevents overloading, protecting the system. Door guards made of rubber are included for vehicle protection. An up-limit switch safeguards the cylinders by ensuring they operate within a safe stroke length. Heavy-duty 3/8" diameter cables and 5" pulleys are used to reduce stress during synchronization and extend cable life. Ultra-high molecular self-lubricating nylon sliders ensure smooth carriage movement. The lift includes a 4-piece truck adapter set for versatility. The control system allows for lifting by pressing an "UP" button and manual lowering via a lever. Proper vehicle loading involves positioning the vehicle at its center of gravity between the pads and placing pads at manufacturer-recommended pick-up points. It is crucial to always lower the lift into the nearest lock position before working underneath. The lift is intended for empty vehicles only; lifting persons or vehicles containing persons is strictly prohibited.
Regular maintenance is crucial for the longevity and safe operation of the HW-10KBP lift.
| Brand | APlusLift |
|---|---|
| Model | HW-10KBP |
| Category | Lifting Systems |
| Language | English |