iBoard
®
Customer Support: info@iboardauto.com
Rev. 20210301
3
STEP 3
STEP 4
Move to the driver side 4th & 6th & 8th of the vehicle. Repeat
Steps 1-3 for (2) Driver Center Mounting Brackets (DCM/PCM),
(1) Driver Rear Mounting Bracket (DRM/PRM) and (3) Support
Brackets assembly and installation. Do not fully tighten at this
time.
Note: (6) Support Brackets are universal.
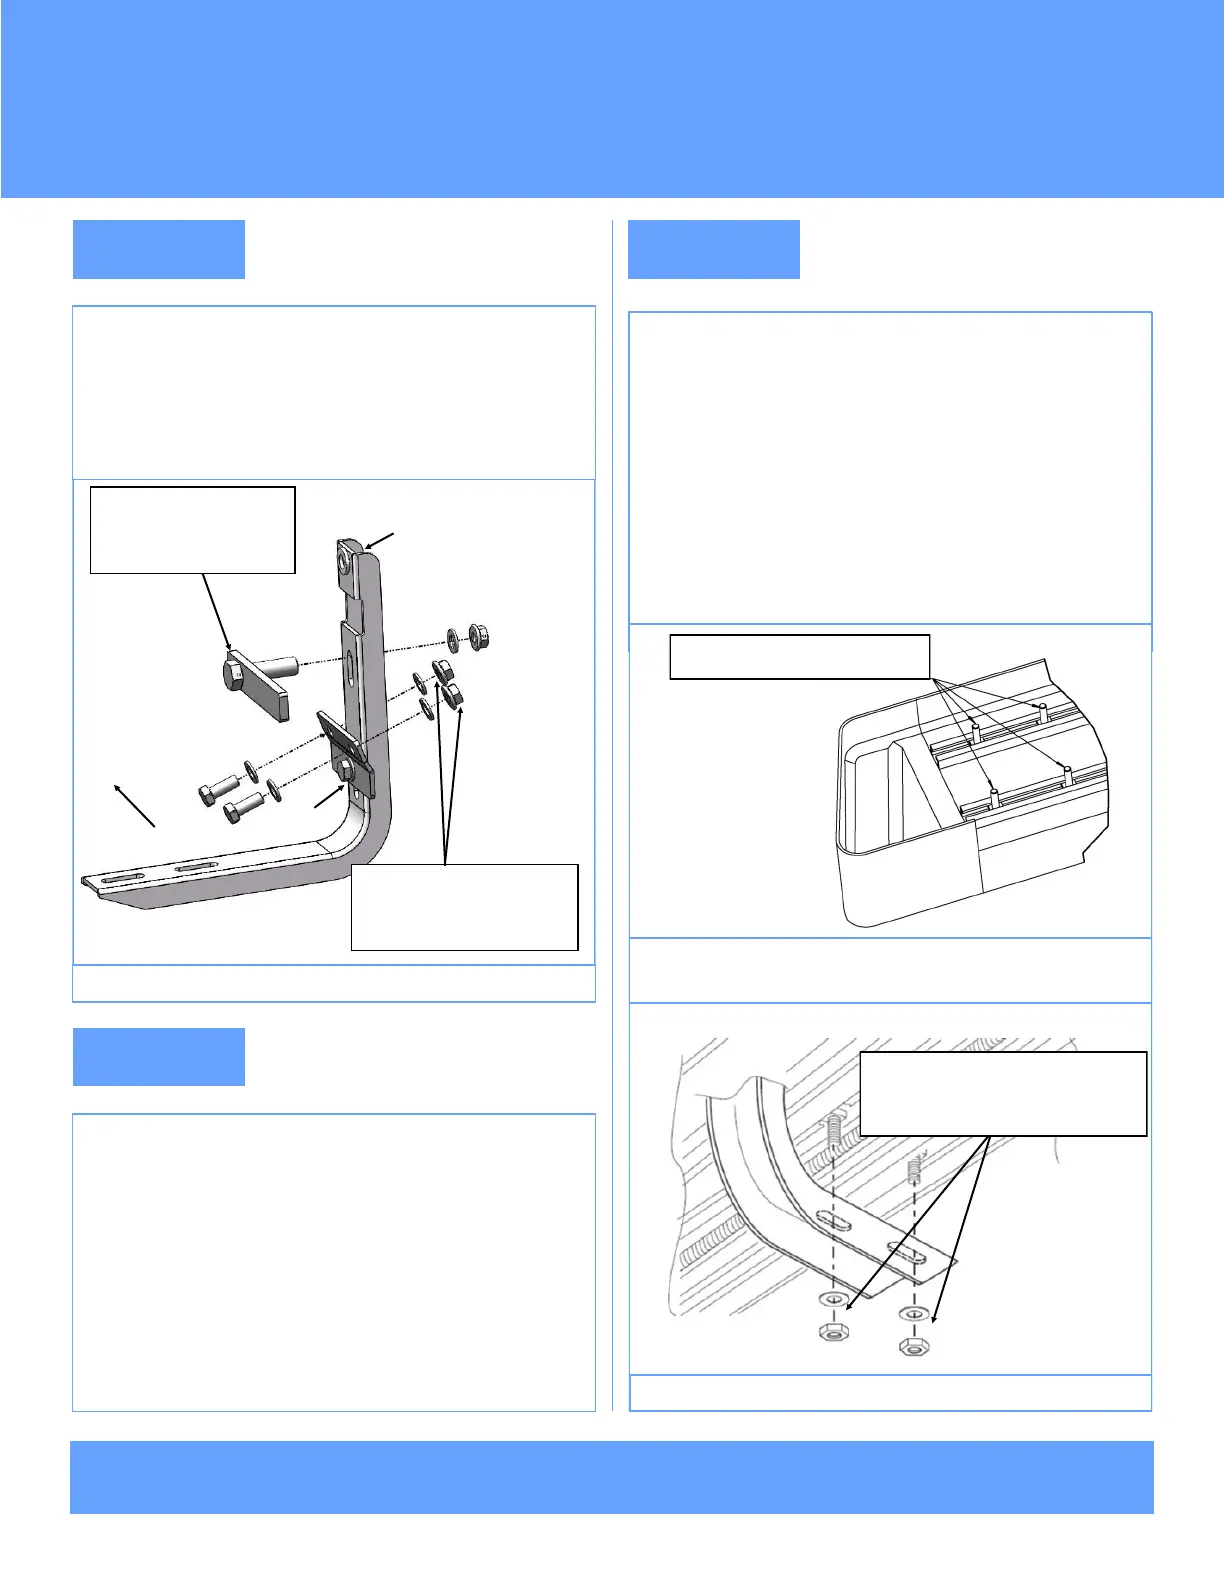
Install the assembled Driver Front Mounting Bracket on the
rocker panel and pinch weld with (1) M8 Bolt Plate, (2)
M8X1.25-20mm Hex Bolts, (5) M8 Flat Washers, (3) M8 Hex
Flange Nuts, (Fig 4). Do not fully tighten at this time.
(Fig 4) Driver Side Front Mounting Bracket Installed
DFM/PFM
DFS/PFS
Front
(1) M8 Bolt Plate
(1) M8 Flat Washer
(1) M8 Hex Flange Nut
STEP 5
Select a Running Board. Slip (4) M6x1-20mm Square Head
Bolts into each bottom channel (Fig 5). Carefully position the
Running Board onto the (4) Mounting Brackets.
IMPORTANT: Do not slide the Running Board on the Brackets
or the bottom surface of the board will be damaged. Attach the
Running Board to each Mounting Bracket with (2) M6x1-20mm
Square Head Bolts, (2) M6 Large Flat Washers and (2) M6 Ny-
lon Lock Nuts (Fig 6). Do not fully tighten at this time.
(Fig 5) Slip M6X1-20mm Square Head Bolts Into The Bottom
Channels
M6X1-20mm Square Head Bolts
(Fig 6) Running Board Installed Onto Mounting Bracket
(2) M6X1-20mm Square Head Bolts
(2) M6 Large Flat Washers
(2) M6 Nylon Lock Nuts
(2) M8X1.25-20 Hex Bolts
(4) M8 Flat Washers
(2) M8 Hex Flange Nuts
 Loading...