Do you have a question about the AQESO U87E and is the answer not in the manual?
Prohibits use in patients with severe heart insufficiency, infants, and children due to suffocation risk.
For adults over 12 years old in home/hospital to measure systolic, diastolic pressure, and pulse rate.
Explains symbols used in the manual, on the device, and accessories for compliance and standards.
Defines WARNING and CAUTION alerts, indicating hazards for serious injury, death, minor injury, or damage.
Covers safe handling, avoiding modification, suffocation risks, cleaning, battery care, and environmental factors.
Precautions for safe measurements: repetition pauses, cuff fit, tube kinking, wounds, specific patient groups, and simultaneous monitoring.
Warnings regarding flammable environments, electrical contact, proper disposal of electrical appliances, and equipment classification.
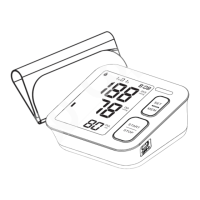
Details the physical components of the monitor, including air socket, LED light, buttons, and Type-C socket.
Describes the information presented on the LCD screen, including user, date/time, readings, and symbols.
Specifies the cuff size (22-42cm) and provides instructions for connecting the cuff tube to the device.
Step-by-step guide for correctly installing the 4 AAA batteries into the device's battery compartment.
Instructions for using the optional AC adapter, including compliance with IEC standards and safety measures.
Instructions for setting user profiles and the device's date and time before the first measurement.
Visual examples illustrating the display interface during year, month, date, hour, and minute setting adjustments.
Guidelines for relaxation, avoiding certain activities, and proper arm preparation before taking a measurement.
Detailed instructions on how to correctly fit the blood pressure cuff onto the upper arm for accurate readings.
Step-by-step guide on operating the device to perform a blood pressure measurement.
Instructions for recalling stored measurement records and permanently clearing memory data for a user.
Explains blood pressure as arterial pressure and defines systolic and diastolic values.
Presents blood pressure categories based on WHO/ISH guidelines and provides examples of readings for each type.
Lists common error symbols, their causes, and practical solutions for troubleshooting device issues.
Guidance on cleaning the unit and cuff, proper storage, and battery removal for long-term non-use.
Details the device's specifications, including measurement range, accuracy, power source, dimensions, and lifetime.
Specifies the operating and storage environmental requirements for temperature, humidity, and air pressure.
Outlines the two-year warranty coverage, conditions, and common exclusions like misuse or unauthorized modifications.
Provides important instructions and warnings regarding electromagnetic compatibility and the use of specified accessories.
Details the manufacturer's declaration on electromagnetic emissions, including test results and compliance levels.
Presents the manufacturer's declaration on electromagnetic immunity, listing test levels and compliance criteria.
Provides specific guidance and declaration for radiated RF immunity tests for enclosure and wireless communications equipment.
The AQESO Upper Arm Electronic Blood Pressure Monitor, Model U87E, is a digital blood pressure monitor designed for measuring systolic pressure, diastolic pressure, and pulse rate via the upper arm. It employs the oscillometric method of blood pressure measurement, detecting blood movement through the brachial artery and converting it into a digital reading. This method eliminates the need for a stethoscope, simplifying its use for both home and hospital environments, and is intended for adults over 12 years old.
The monitor features "Intelligent Inflation" technology, which aims to reduce discomfort caused by incorrect inflation and shorten measurement time, thereby extending the cuff's lifespan. It includes a 2x99 set memory function, automatically storing each measurement result and displaying it on the screen. A blood classification index is also integrated, making it easier for users to check their blood pressure against established guidelines.
The device's display provides comprehensive information, including the year, month, date, and time, along with systolic and diastolic blood pressure readings. It also shows a blood pressure classification, a memory symbol, a low battery symbol, and the number of memory times. An irregular heartbeat symbol will be displayed if detected during measurement. The pulse rate is also shown.
A color-changing LED light acts as a WHO indicator, providing a visual cue for blood pressure classification:
Battery Installation and Power: The monitor operates on 4 AAA 1.5V alkaline batteries. To install, remove the battery cover from the back, insert the batteries ensuring correct polarity, and replace the cover. A low battery symbol will appear on the display when replacement is needed. For prolonged storage (over 3 months), batteries should be removed to prevent leakage and damage.
An optional AC adapter can also be used, which must comply with IEC 60601-1:2005 standards. When using the AC adapter, batteries should be removed from the compartment. The adapter plug is inserted into the Type-C socket on the back of the unit, and the other end into a 100-240V outlet. To disconnect, first remove the adapter plug from the outlet, then from the unit's socket. It is important not to use batteries and the AC adapter simultaneously.
Setting Mode: Before the first measurement, the monitor needs to be set up for the correct user, date, and time.
Cuff Fitting: The device comes with an L-sized cuff suitable for upper-arm circumferences of 22-42cm.
Measurement Procedure:
Discontinuing a Measurement: If a measurement needs to be interrupted (e.g., due to patient discomfort), press the START/STOP button at any time. The device will automatically decrease the cuff pressure.
Memory Recall: The monitor stores 2x99 sets of measurements per user. The oldest record is replaced by the latest once 99 sets are exceeded.
Clearing Memory: To permanently remove a user's memory data:
Care for the Main Unit and Cuff:
Troubleshooting: The manual provides a table for error indicators and trouble removal. For example, "E-1" (weak signal/pressure change) requires wrapping the cuff properly and remeasuring. "E-2" (external strong disturbance) suggests keeping quiet and avoiding chatting during measurement, and being away from cell phones or other high radiant devices. "E-3" (error during inflation) indicates checking the air plug insertion and re-measuring. "E-5" (abnormal blood pressure) advises relaxing for 30 minutes before re-measuring, and contacting a doctor if unusual readings persist. A low battery symbol requires replacing all worn batteries. For issues like no power or no inflation, checks include battery power, polarity, plug insertion, and cuff condition. If the cuff is loose, it should be wrapped tightly. If the cuff is broken or leaking, it needs to be replaced. Users are advised to contact the distributor for problems that cannot be solved and not to disassemble the unit themselves.
Safety Information: The device is not suitable for patients with severe heart insufficiency, infants, or children. It is also contraindicated for neonatal patients, pregnant women, patients with implanted electronic devices, pre-eclampsia, premature ventricular beats, atrial fibrillation, peripheral arterial disease, intravascular therapy, arterio-venous shunt, or post-mastectomy. Consultation with a doctor is advised for individuals with arrhythmia, diabetes, blood circulation, or apoplexy problems. Self-diagnosis and treatment based on measured results can be dangerous. The device should be kept out of reach of children. No modifications to the equipment are allowed without manufacturer authorization. The cuff hose around the neck or swallowing small parts can cause suffocation. The device should not be used with flammable gases or liquids. The user must ensure the equipment functions safely before use. The device requires no calibration and contains no user-serviceable parts.
| Measurement Method | Oscillometric |
|---|---|
| Irregular Heartbeat Detection | Yes |
| WHO Classification Indicator | Yes |
| Measurement Range (Pulse Rate) | 40-180 beats/min |
| Automatic Shut-off | Yes |