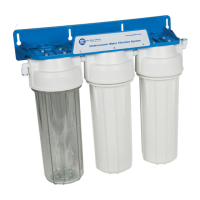
Connect other end of flexible tubing with IN elbow of the
system.
9
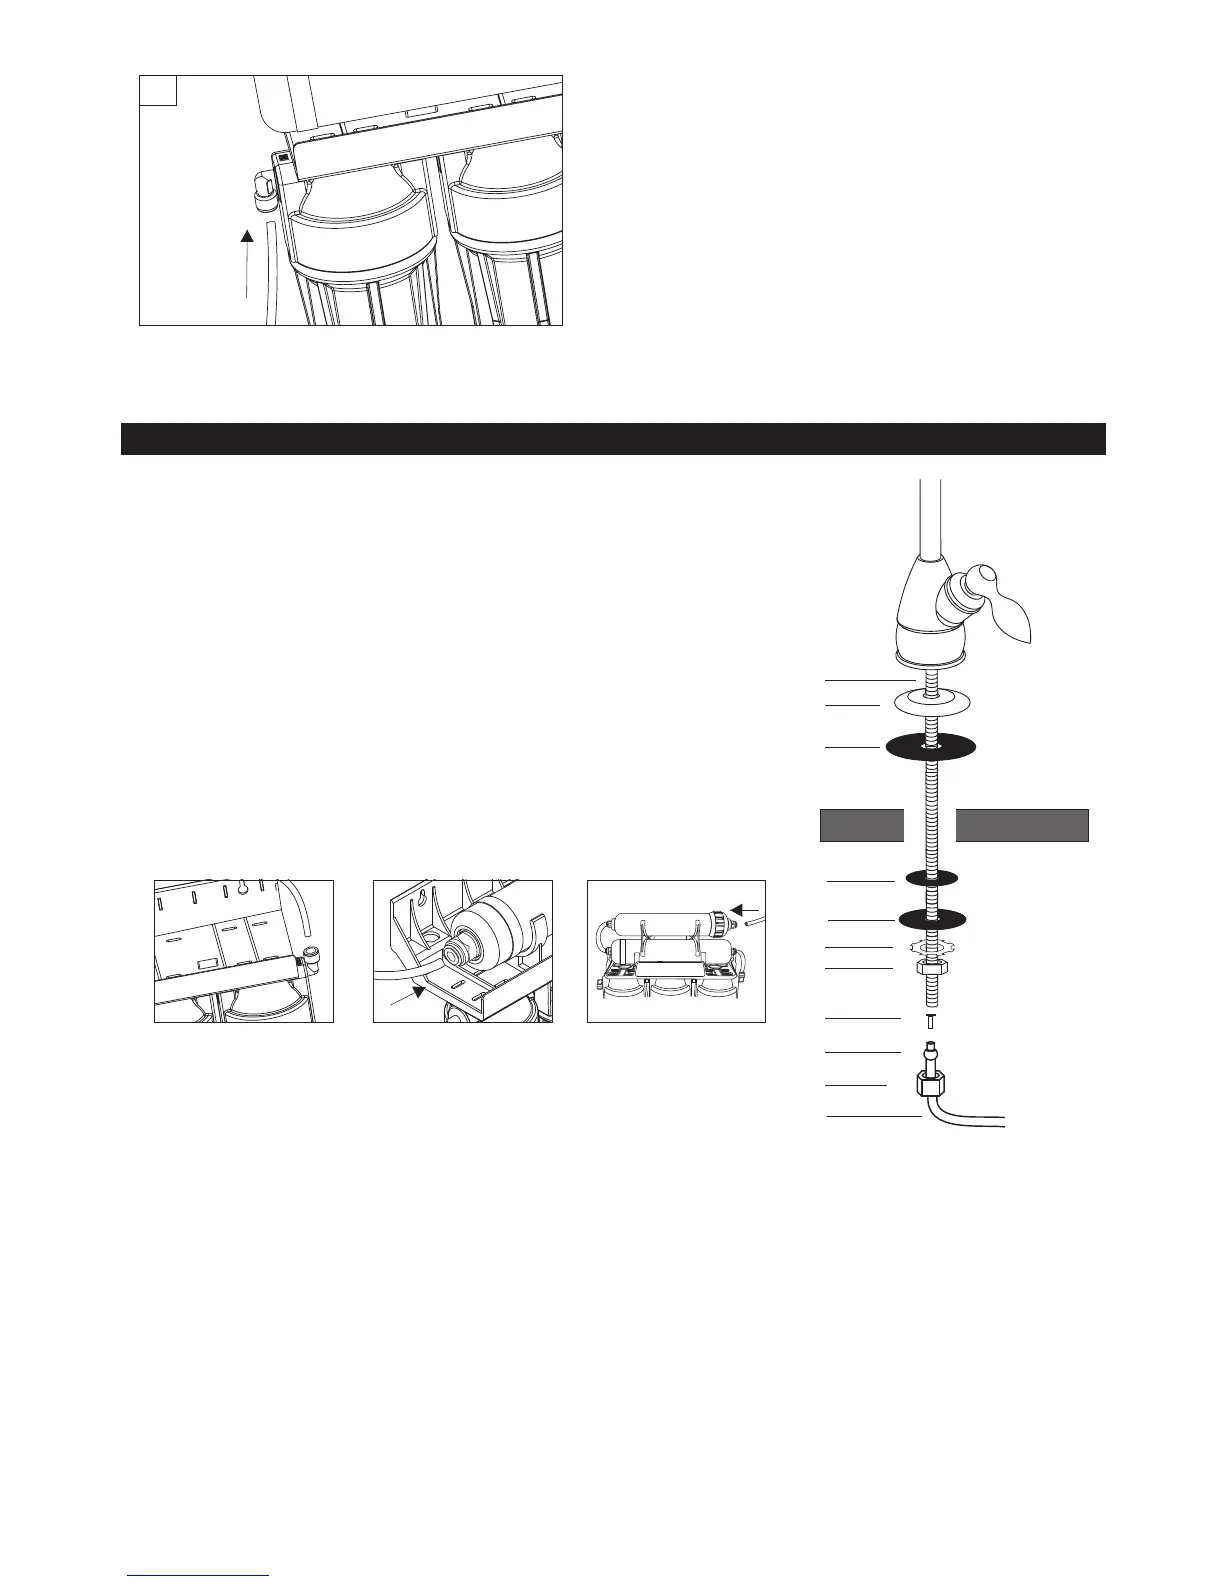
WARNING! To seal threaded connections, always use
Teflon tape during installation (does not concern
threads for plastic and faucet nuts).
1) Drill an opening 12mm in kitchen counter or kitchen sink (in case of enamel sinks
the manufacturer recommends drilling openings in the structure supporting sink).
2) On threaded faucet extension [1], first put on cover plate [2], and then rubber gasket [3].
3) Secure the faucet in the drilled sink/counter opening.
4) Underneath the sink, put the rubber [5] and metal [6] washers on the faucet extension
[4], and tighten with metal nut [7].
5) Install flexible tubing supplying water and connecting faucet with the system:
a) put the tubing [11] through the metal nut [10] and plastic tightening ring [9],
b) put the insert [8] into the tubing,
c) push flexible tubing (all the way) into the faucet extension [4] and tighten it (by hand!)
with the metal nut [10].
System FP2, FP3-2, FP3-K1, FP3-3
6) Push other
System FP3-HJ-K1, FP3-4
7) Push other end of flexible tubing 1.5 cm (0.6 in) deep into the connector
of UF membrane's housing.
System FP3-5
8)
end of flexible tubing with (OUT) elbow of the system.
Push the other end of tubing 1.5 (0.6 in) cm into the connector which attached to filter
cartridge AIFIR1000
7. Systems Installation - Stage II - FXFCH, FXFCH5, FXFCH17-C Faucet Installation
Fig .1
Faucet Installation
Kitchen Counter
COUNTER TOP
1
2
3
4
5
6
7
8
9
10
11
FP2, FP3-2,
FP3-K1, FP3-3
FP3-5FP3-HJ-K1, FP3-4
WARNING! To seal threaded connections, always use Teflon tape during installation
(does not concern threads for plastic and faucet nuts).
11
 Loading...