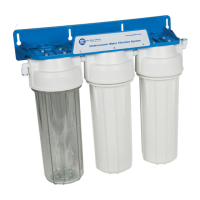
9. Cartridge replacement in the following systems: FP2, FP3-2, FP3-3, FP3-K1, FP3-HJ-K1, FP3-4, FP3-5
Close your water supply valve. Open faucet valve to release
pressure build-up in the system.
1
3
Unscrew filter housing sump from filter cap by hand or using
wrench (FXWR1-BL). (Remember to use wrench
perpendicularly to the filter housing). Remove old filter
cartridge.
2
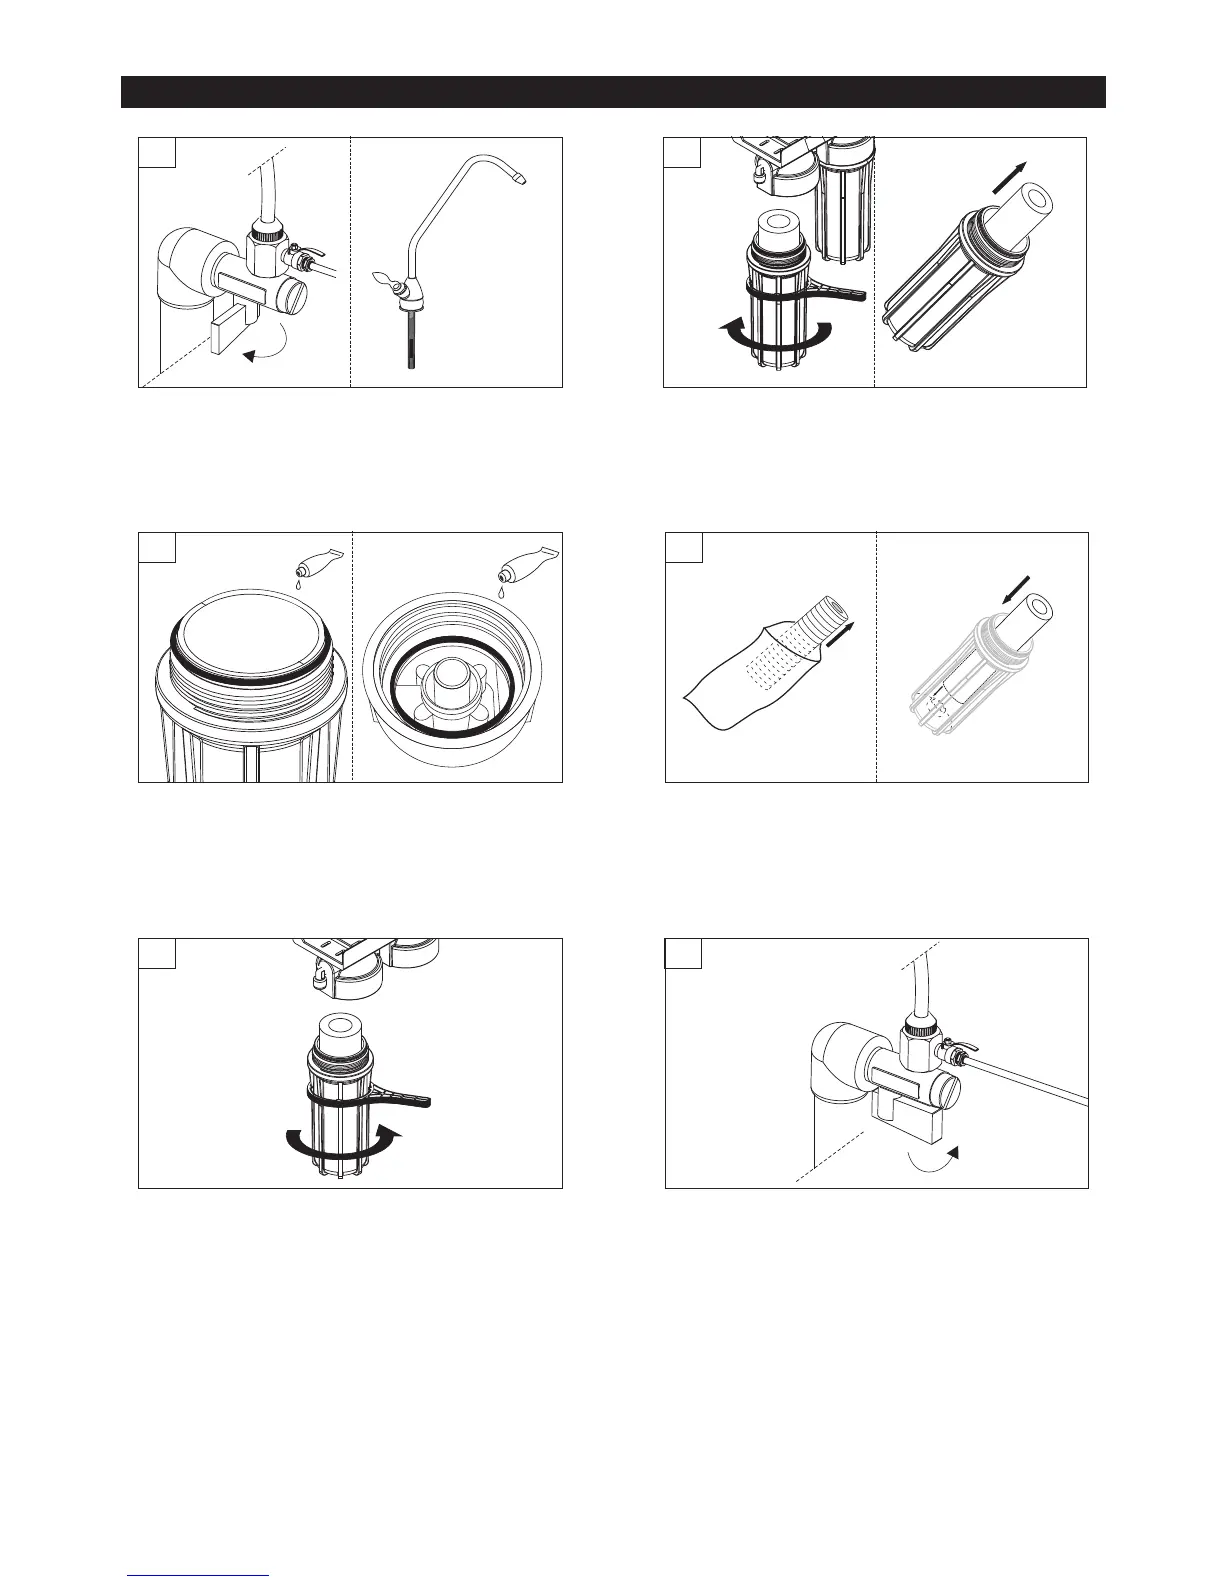
Remove filter cartridge out of plastic foil and place it inside
filter housing sump (pressing against the top of plastic tang
to ensure its central location).
4
Lubricate filter housing o-rings, next turn the system 180
degree and lubricate filter cap o-rings.
ATTENTION! Water may leak out of filter housing 2 and 3.
ATTENTION! Wash your hands thoroughly after
completing the installation.
13
Screw filter housing sump with filter cap using wrench
(remember to use the wrench perpendicularly to the filter
housing). Use the same procedures for the installation of
remaining filter cartridges.
ATTENTION! If you cannot tightly screw in the filter cap
with filter housing sump check if all o-rings and the
cartridge are situated correctly.
5
Slightly open filter faucet and next gradually open your water
supply valve to fill filter housings with fresh water and
release air from the system thru the faucet.
ATTENTION! After each filter cartridge replacement
procedure, all filters must be flashed out with running
water for at least 5 minutes. Next do not use the system
for 5 to 6 hours – during this time system seals and
activates its components. Filtered water can be safely
consumed after this process is completed.
6
WARNING! Before the first use of the system and after cartridge replacement, perform system flushing process. Flush the system for
several minutes before use. Use only microbiologically safe and adequately disinfected water. After completion of the above operations,
filtered water can be consummed..
 Loading...