Parts List
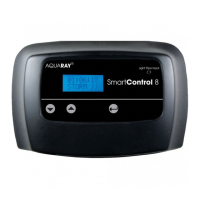
1. AquaRay SmartControl 8 unit
2. AquaRay SmartControl 8 PSU
3. Mains cable
4. Fixing kit
5. Temperature sensor cable
6. Fibre optic light pipe
7. Menu guide sheet
Installation
To ensure water shedding properties (should the unit
accidentally get splashed), the unit should be mounted
vertically on a surface using the screws supplied in the
fixing kit. These engage into the keyhole slots on the back
of the unit.
Self adhesive feet are supplied in the fixing kit and can be
placed in the circular indents on the back of the unit to
prevent it marking the wall.
When mounting the SmartControl 8 unit, please make
sure there is enough space below to connect the PSU and
lamps.
Once the unit is in position, connect the lamps and
temperature sensor (if using) to the SmartControl 8 unit
by plugging them into the correct sockets on the control
unit.
Please note: Channels 1, 2, 3 and 4 are all controlled
independently of each other.
Connect the PSU to the SmartControl 8 unit by plugging it
into the input.
Operation
Once mounted and connected according to the installation
instructions above, the mains power to the PSU may be
switched on.
2
 Loading...