This document is an owner's manual for Aquaterra Spas, providing comprehensive information for safe operation, installation, maintenance, and troubleshooting of their 115V/230V 60 Hz models.
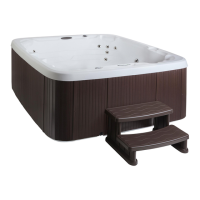
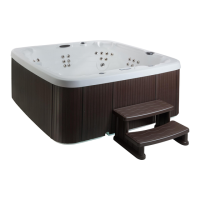
The primary function of an Aquaterra Spa is to provide a recreational and therapeutic hot water experience. Users can enjoy hydrotherapy jets, warm water, and a relaxing environment. The spa is designed for both recreational and therapeutic purposes, with considerations for privacy and environmental factors during installation.
Usage Features:
The spa's control panel allows for easy adjustment of various settings. The temperature can be set between 80°F (26.5°C) and 104°F (40°C) using the Up or Down buttons. The display shows the current spa temperature, and a "Heat" indicator lights up when the spa is actively heating.
Jets operation is straightforward: a firm press of the "Jets (1)" button activates the low speed of the pump, a second press engages high speed, and a third press turns the pump off. If left running, the pump automatically shuts off after one hour. For two-pump models, a "Jets (2)" button controls the second pump similarly.
The spa also features a multi-color LED light. Pressing the "Light" button once turns the light on, and subsequent quick presses cycle through various light modes, including White, Full color wheel, Amber, Blue, Red, Green, Purple, Color wheel 1, Color wheel 2, and abrupt color wheel. The last used light mode is recalled if the light is turned off for more than two seconds. The light automatically turns off after four hours if left on.
Filter cycles are automated to maintain water quality. There are two preset filter cycles (F1 and F2), with F1 starting immediately after power-up and F2 starting 12 hours later. The default durations are one hour for F1 and 30 minutes for F2, but these can be adjusted between 0.5 and 6 hours in 30-minute increments through the programming mode. Filter cycles run at low speed, indicated by a blinking "Filter" light. Manual activation of jets or lights during a filter cycle will suspend the cycle for 10 minutes after the manual use ends.
Operational modes include Standard, Economy, Sleep, and Quiet modes, primarily for single-pump models.
- Standard Mode (default) maintains the desired temperature with periodic water sampling and heating.
- Economy Mode prevents the spa from heating, with water sampling only occurring during filter cycles.
- Sleep Mode allows heating only during filter cycles, with water sampling also limited to these times.
- Quiet Mode prevents the jet pump from running (water sampling) for a set duration (0.5 to 11.5 hours) after the F2 filter cycle.
For two-pump models, an Economy Mode is available to lower the temperature set point by 20°F (11°C).
The spa also has an "OFF MODE" for quick maintenance, stopping all functions for 30 minutes. This mode can be exited early by tapping the "Jet" button.
A Fahrenheit/Celsius setting allows users to switch the temperature display unit.
The spa incorporates various components for enhanced user experience:
- Air Control Valves regulate the amount of air mixed with the water, increasing jet action when turned in one direction and turning off air when rotated the other way. Turning them off when not in use helps maintain heat.
- Diverter Valve (when equipped) directs water flow to different jet combinations, allowing users to customize jet pressure.
- Hydrotherapy Jets are recessed in the spa wall and can be turned on or off by rotating their faces, affecting the power of other active jets.
- Ozone Generator (when equipped) enhances water quality by supplementing the regular chemical maintenance program, though it is not a standalone sanitizer.
- Waterfall (when equipped) has a control valve to adjust water flow from no flow to a steady stream.
- Whirlpool Jet (when equipped) is a high-capacity diverter jet that can be turned on or off by rotating its face. It requires the pump to be off or in low speed for rotation due to high water pressure.
Maintenance Features:
The manual emphasizes several key maintenance aspects to ensure the longevity and performance of the spa.
Water Chemistry Guidelines:
Proper water chemistry is crucial and the owner's responsibility. The manual outlines a four-step process for initial setup and ongoing maintenance:
- Establish Proper pH Level: Recommended range is 7.2-7.8. pH Down/Decreaser (sodium bisulfate) is used to lower pH, and pH Up/Increaser (sodium hydrogen carbonate) to raise it. Add in small amounts, waiting 30 minutes between adjustments.
- Measure Total Alkalinity (TA): Ideal range is 40-120 ppm. Alkalinity Down/Decreaser (sodium bisulfate) reduces TA, while Alkalinity Up/Increaser (sodium bicarbonate or sodium hydrogen carbonate) increases it. Add in small amounts, waiting 30 minutes between adjustments.
- Determine Calcium Hardness: Recommended range is 75-150 ppm. Calcium hardness can be increased by adding calcium hardness products or decreased by mixing hard and soft water, or using stain and scale control.
- Sanitizing: After adjusting pH, TA, and calcium hardness, sanitize the spa with Chlorine (sodium dichlor) to reach 3-5 ppm. This level should be checked and maintained weekly, and before and after spa use. Granulated sodium dichlor or bromine is recommended; compressed sanitizers with a floater should not be used. Sanitizers should be added with jets running for 10 minutes.
- Weekly Shock: A potassium monopersulfate (MPS) shock (approximately 2 oz/60 ml) should be added to the filter bucket with jets running for 10 minutes, with the cover open.
Filter Cartridge Maintenance:
- Monthly Cleaning: The filter cartridge should be cleaned monthly to remove debris. Use household water pressure and a garden hose with a pressurized nozzle, spraying from inside to outside the pleats. Do not scrub with a brush.
- Replacement: Filter cartridges should be replaced every six to eight months or sooner if needed. Running the spa with dirty or missing filters can damage the pump and void the warranty.
- Removal and Cleaning Steps:
- Turn off spa power.
- Push down and turn the filter basket counter-clockwise to unlock, then pull out the basket and weir.
- Unscrew the filter cartridge counter-clockwise.
- Rinse the cartridge thoroughly with a garden hose, separating pleats to remove all dirt and debris.
- Allow the filter to dry and check for calcium deposits or oil film. If found, deep clean with a "spa filter cleaner" solution.
- Reinstall the filter cartridge, basket, and weir, turning clockwise to lock. Do not overtighten.
- Important Note: Damage from dirty, clogged, or calcified filters, or improper chemical use, is not covered under warranty.
Surface Care:
- Clean the spa surface with mild detergent and water. Avoid solvents or abrasive cleaners.
- Rotomolded spas may flex slightly over time, which is cosmetic and does not affect structural integrity.
Cover Care:
- Monthly Cleaning: Clean and condition the polyester cover monthly.
- Cleaning Steps:
- Remove the cover and lean it against a wall or fence, ensuring seams are closed.
- Spray with a garden hose to loosen dirt.
- Mix four tablespoons of mild soap or dishwashing liquid with one gallon of lukewarm water.
- Clean with a soft bristle brush.
- Rinse thoroughly with cold water and air dry. Do not let soap film dry on the cover.
- Scrub the cover's perimeter and side flaps, then rinse.
- Rinse the underside of the cover with water only and wipe clean with a dry rag.
- Usage: Use and lock the cover when the spa is not in use. Lift or carry the cover by its handles, do not drag it by the lock straps.
Cabinet Care:
- Clean the spa cabinet as needed with hot soapy water to remove dirt and debris.
- Avoid abrasive or harsh chemicals, and solvents containing aromatic solvents.
- Prevent prolonged exposure to direct sunlight or excessive temperatures (above 100°F/38°C) to prevent buckling.
Spa LED Light Replacement:
- Turn off spa power.
- Remove the equipment compartment access door.
- Locate the rear of the spa light.
- Turn the outside housing counter-clockwise ¼ turn, pull out, and remove the LED board.
- Replace by reversing the steps.
Draining or Winterizing:
- Draining: Every three to six months, drain and refill the spa.
- Unplug the GFCI cord or turn off the subpanel breaker before draining.
- Pull out the hose bib from the recess under the spa.
- Unscrew and remove the drain cap.
- Attach a garden hose and direct it to a draining area, keeping the hose below the water line.
- After draining, clean the shell and filter cartridge.
- Remove the garden hose, replace the drain cap, and push the hose bib back into the recess.
- Winterizing: If storing the spa for winter, ensure all water is removed from the lines to prevent freezing damage.
- Remove all water from interior plumbing.
- Remove, clean, and store the floating weir, basket, and filter cartridge.
- Use a shop vac to thoroughly dry the filter compartment and remove water from jets, starting from the top. Block off other jets to maximize suction.
- Thoroughly dry the spa shell.
- Pour Propylene glycol anti-freeze into filter suction fittings and jet outlets. CAUTION: Use only non-toxic Propylene glycol.
- Remove the pump drain plug(s) and allow all water to drain. Store the plug(s) near the pump for reinstallation at start-up.
- Unscrew suction/discharge pump and heater unions and allow water to drain. Leave unions loose until refilling.
- Replace the equipment compartment door and secure with screws.
- Important Note: Damage from improper winterizing is not covered under warranty.
Troubleshooting Procedures:
The manual provides a troubleshooting guide for common issues like no component operation, pump not operating but light on, poor jet action, and water being too hot. It advises checking power, circuit breakers, GFCI, water levels, filters, and air control valves. For persistent problems, users are directed to contact Customer Service.
The manual also includes a "Diagnostic LCD Message" section, explaining various error codes (HL, AOH, PRR, OH, UPL, FLO) and the required actions, often involving checking components, cooling the spa, or contacting service.