— 2 —
Customer Service (800) 945-2726 • www.aquaticbath.com
Installation Instructions
F
2
DRAIN
FOR USE WITH AQUATIC 2-PIECE FREESTANDING BATHTUBS
FINISHING STEPS
Step 2:
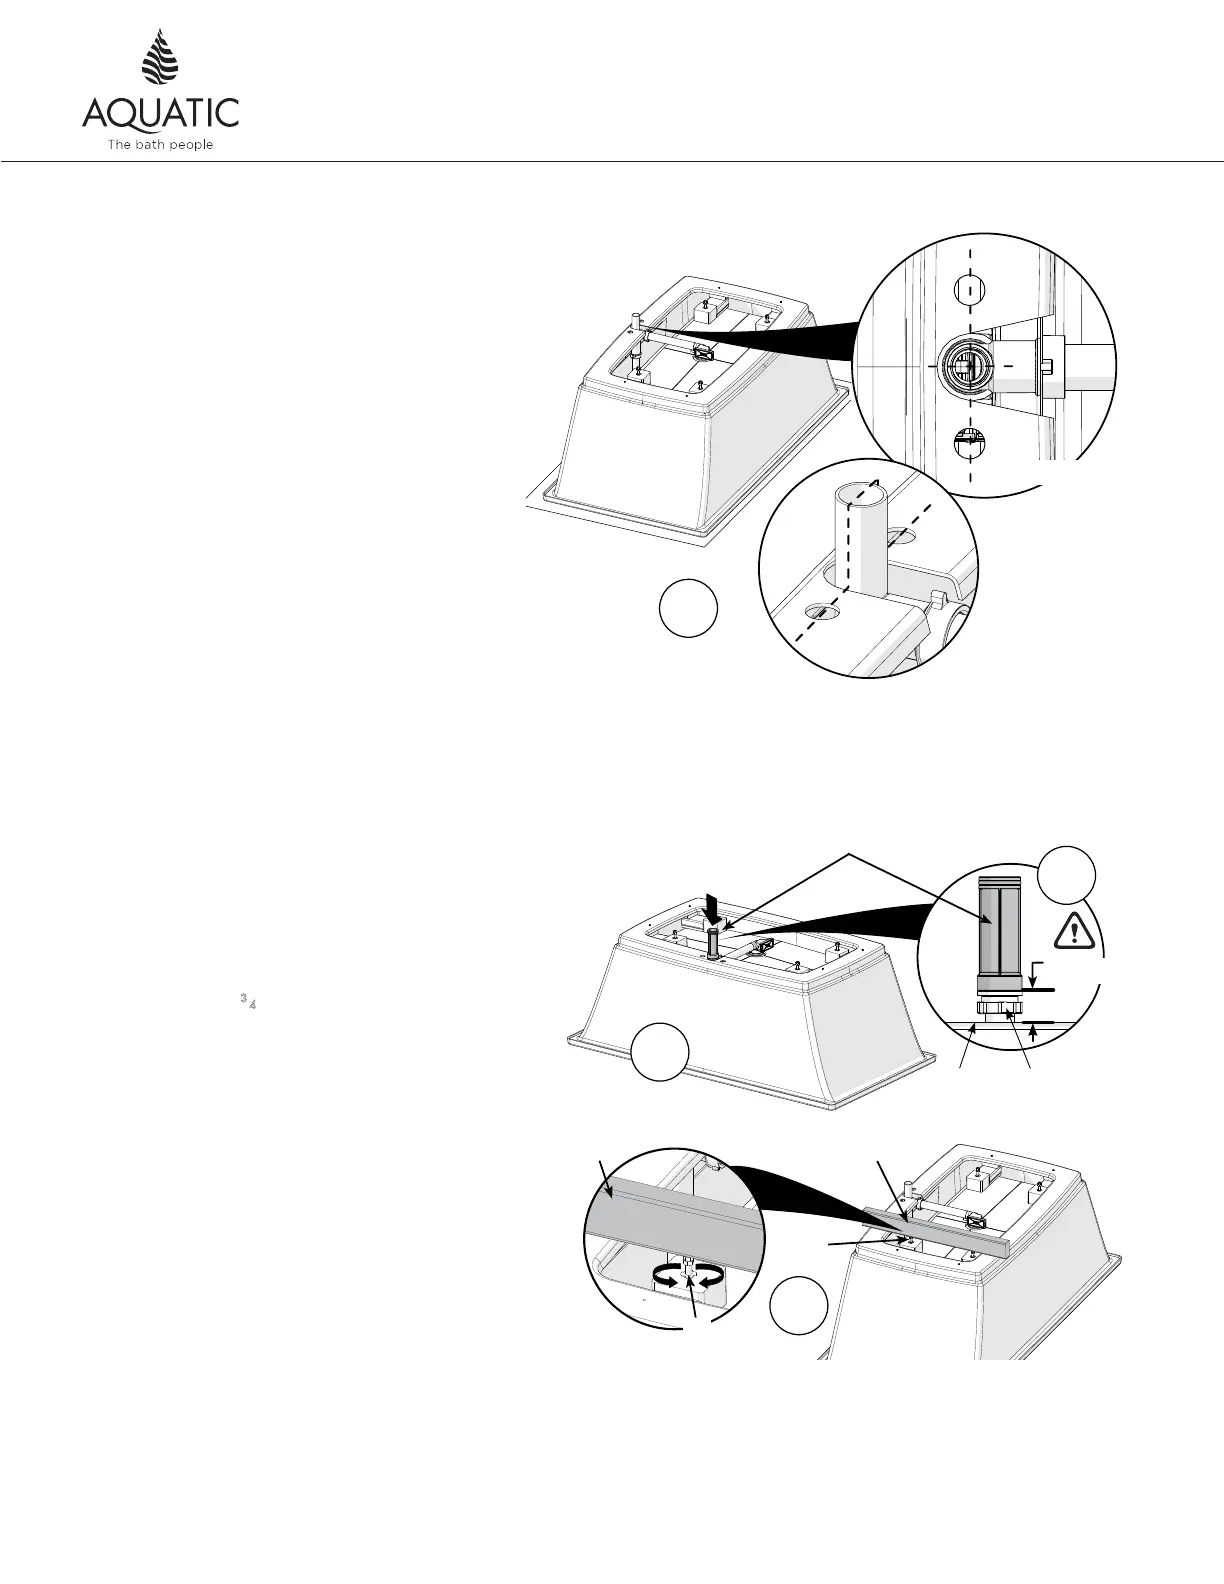
A. Recover the male slip joint and remove the
prevention cap. Install the male part of the slip
joint with the drain line using the drain adapter
if needed.
B. Place the slip joint male end, keeping a distance
of no more than
3
⁄4
'' between this piece and the
apron.
C. Place the apron over the bathtub to level the legs
with it by fastening or loosing them so that these last
touches the ground once the installation is complete
(see image 5B at the end of this guide). Use a
straight object (for example with a 2x4) to ease
the alignment.
D. If the faucet must be installed on the deck of the
bathtub, do the installation at this stage.
Step 1:
A. After finishing the floor (tiles, etc..), place the
bathtub on the side over cardboard and install
the waste & overflow without fastening into the
final position.
B. Place the bathtub bottom up. Adjust the waste
& overflow by aligning it with apron's predrilled
holes shown (image 1B) so that the pierced
holes on the apron are in line with the center line
of drainage. If you have the optional template,
use the provided measure to adjust the waste &
overflow.
1B
Top view
2C
2x4
Leg
2x4
Leg
2A
Apron
¾" Max
Slip joint (Male)
2B
Drain adapter
 Loading...