Do you have a question about the Aquavista 15-B42WP-CH-A and is the answer not in the manual?
Protect your eyes with safety glasses when cutting or soldering water supply lines.
If soldering, remove internal parts to avoid voiding warranty and cover drain to prevent losing parts.
Ensure all parts are present and gather necessary tools before starting assembly.
Turn off water, disconnect supply lines, remove old faucet, and clean mounting surface.
Install gasket, apply sealant, insert faucet body, and secure with mounting nuts.
Connect supply lines to faucet shanks using thread seal tape, do not overtighten.
Remove stopper and flange, screw on mounting nut, and push gasket down on drain assembly.
Apply silicone, insert drain assembly, screw flange, ensure pivot hole faces back, and tighten.
Insert stopper, connect horizontal rod to pivot hole, and close rotating clip.
Adjust horizontal rod length if necessary by sliding plastic portion and reattaching clip.
Slide lift rod, adjust vertical rod to engage with lift rod, and verify smooth stopper operation.
Flush system for one minute, check for leaks, and reinstall aerator.
This document provides installation, usage, and maintenance instructions for an AquaVista Bathroom Faucet with Pop-Up Drain Assembly.
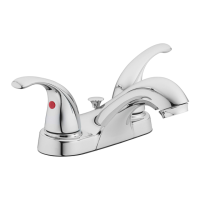
The AquaVista Bathroom Faucet is a two-handle faucet designed for use in residential bathrooms. It includes a pop-up drain assembly for convenient basin drainage. The faucet is available in three finishes: polished chrome (15-B42WP-CH-AV), brushed nickel (15-B42WP-BN-AV), and polished brass (15-B42WP-PB-AV). The two lever handles control the flow of hot and cold water, with the degree of handle opening determining the water flow volume. Rotating the right handle forward provides cold water, while rotating the left handle forward provides hot water. Returning the handles to their original position stops the water flow.
The faucet features a two-handle design for precise control over water temperature and flow. The pop-up drain assembly is integrated into the system, allowing for easy opening and closing of the drain. The lift rod, located on the faucet body, controls the pop-up stopper. The installation process is detailed, including steps for securing the faucet to the sink, connecting water supply lines, and assembling the pop-up drain. The manual emphasizes hand-tightening connector nuts to avoid overtightening, which can reduce system integrity. Prior to initial use, it is recommended to remove the aerator, turn on both hot and cold water for at least one minute to flush out any debris, and then reattach the aerator.
Routine cleaning is recommended using a soft cloth to prevent dulling of the finish. Abrasive cleaners, steel wool, and harsh chemicals should be avoided as they can damage the finish and void the warranty. The troubleshooting section provides solutions for common issues:
Replacement parts are available and can be ordered by contacting customer service. The manual includes a detailed list of replacement parts with their corresponding part numbers for each finish, such as handle hot/cold, screw, index buttons, bonnet, washer, bolt and cartridge, washer and spring, aerator assembly, mounting nut, lift knob and rod assembly, and pop-up drain assembly.
The product comes with a limited lifetime warranty to the original consumer purchaser, covering defects in material and workmanship under normal residential use. The distributor will provide repair parts or replace defective products. Damage from non-genuine parts, installation error, misuse, negligence, faulty maintenance, or non-compliance with local building codes is not covered. The warranty excludes labor charges, indirect/incidental/consequential damages, and is in lieu of all other warranties. Liability is limited to the purchase price of the defective product.
| Brand | Aquavista |
|---|---|
| Model | 15-B42WP-CH-A |
| Category | Bathroom Fixtures |
| Language | English |