Do you have a question about the Arcam RCUBE and is the answer not in the manual?
Read all safety and operating instructions before use. Retain for reference.
Avoid using the equipment near water to prevent electrical danger.
Locate away from heat sources and ensure proper ventilation.
Use specified power sources and protect power cords from damage.
Turn off and unplug for abnormal smells or smoke; contact dealer.
Do not service yourself; contact dealer for damage or performance issues.
Recycle responsibly and note safety standards compliance.
Lists AC adapter and remote control with battery.
Arcam rWave USB and rWand iPod transmitters for wireless audio.
Arcam rTube component video breakout cable for display connection.
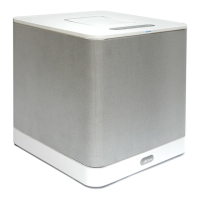
Describes the rear panel connectors and top panel controls.
Details rear panel connectors and top panel controls for operation.
The BASS button adjusts bass output based on placement.
USB port for future firmware updates only.
Controls main power and standby mode for the unit.
Overview of AUX-in, VIDEO, UPGRADE, DC IN, and POWER ports.
Unit powered by mains or integral rechargeable battery.
Connect line-level analogue or headphone jack sources to AUX-in.
Connect iPods to TV via composite or component video for playback.
Standby button toggles between on and standby mode.
Switch between iPod, AUX, or wireless sources using buttons.
LEDs display source, wireless, standby, and volume status.
Adjust volume using +/- buttons; mute by pressing both simultaneously.
Remote standby button controls power and standby mode.
Use remote buttons to adjust volume and mute audio.
User control over iPod charging for battery life and sound quality.
Navigate iPod menus and tracks using remote buttons.
Control playback, fast forward, rewind, and skip tracks with remote.
Cycle through playback modes like repeat and shuffle using the remote.
Use the hidden handle under the dust cover to carry the unit safely.
Guidance on positioning for best sound quality, considering room acoustics.
Corner placement enhances bass due to beneficial wall reflection.
Do not obstruct drivers; avoid shelves or enclosed areas.
Power up, dock iPod/iPhone, and select iPod as source.
Choose tracks and adjust volume using iPod or remote controls.
Connect to AUX-in using RCA to 3.5mm stereo mini-jack cable.
Select AUX-in source and verify external source playback.
Use remote or top panel buttons to adjust the volume.
Use a 3.5mm stereo mini-cable to connect audio equipment headphone jacks.
Select AUX-in source and verify external source playback.
Use remote or top panel buttons to adjust the volume.
Connect to TV via composite or component video for iPod playback.
Select iPod source, start video, and set display input correctly.
Use remote or top panel buttons to adjust the volume.
Integral battery allows portable use around the home.
Unit charges automatically; check charge level via top panel LEDs.
Ensure rear power switch is off when storing the unit.
Plug the USB transmitter into a free USB port on your computer.
Associate rWave transmitter with rCube by pressing buttons on both.
Power on the rCube and set it to search for the transmitter.
Install rWave transmitter, power up rCube, select wireless source.
Play tunes from computer's music player and adjust volume.
Plug the rWand into the docking connector of your Apple player.
Associate rWand transmitter with rCube by pressing buttons on both.
Power on the rCube and set it to search for the transmitter.
Install rWand transmitter, power up rCube, select wireless source.
Play tunes from iPod/iPhone/iPad and adjust volume.
Associate transmitter rCube with receiver rCube for music streaming.
Discusses range limitations and factors affecting signal quality.
Download firmware from website to USB flash drive.
Insert USB, power on rCube, and follow on-screen indicators.
Addresses no lights, flashing red power light, and remote response.
Covers no sound, humming, and thin or boomy bass problems.
Solutions for when video output is not displayed on the screen.
Details continuous power output, inputs, and amplifier output specs.
Includes mains voltage, power consumption, dimensions, and weight.
Lists included items like power supply and remote control.
Two-year repair guarantee for units purchased from authorized dealers.
Instructions for packing, returning, and insuring the unit for repair.
Contact support for queries and register your product online.
| Impedance | 100 Ω |
|---|---|
| Sensitivity | 94 dB |
| Frequency range | 20 - 20000 Hz |
| RMS rated power | 90 W |
| Audio output channels | 2.0 channels |
| Signal-to-Noise Ratio (SNR) | 90 dB |
| Bluetooth | No |
| DC-in jack | Yes |
| Headphone connectivity | - |
| Apple docking compatibility | iPhone, iPod |
| AC input voltage | 110 - 240 V |
| Power source type | AC |
| Dimensions (WxDxH) | 200 x 200 x 200 mm |
| Compatible products | iPhone 4 iPhone 3GS iPhone 3G iPod Touch 3 Gen. iPod Classic 6 Gen. iPod nano 5 Gen. |
| Product color | Black |
| Weight | 5000 g |
|---|---|
| Package weight | 6200 g |