4
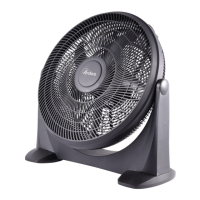
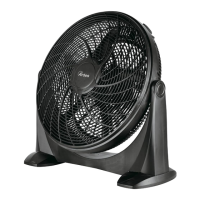
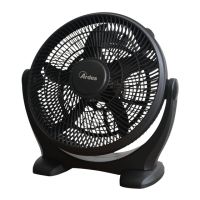
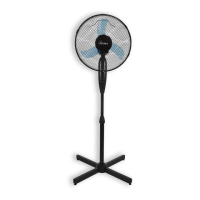
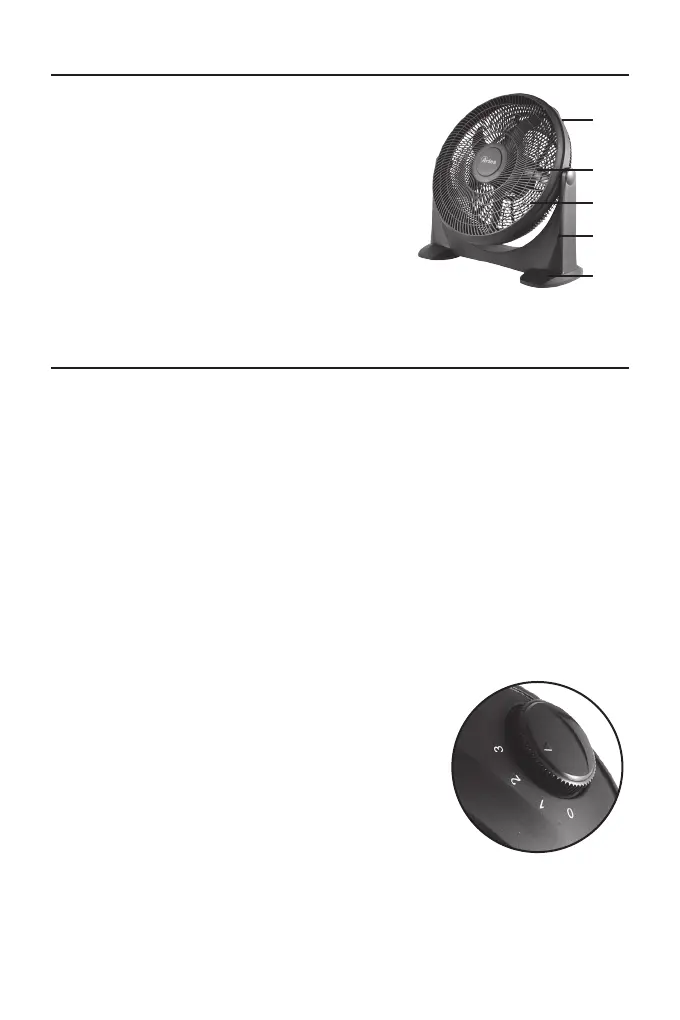
Műszaki tudnivalók
1 – Be / Ki / Sebesség gomb
2 – Lapátok
3 – Rács
4 – Fő ventilátortest
5 – Talpak
10
Instructions for use
Support assembly.
Caution! The fan should always be switched off and does not connected
to the mains supply, if you mounting the fan.
To x the supports to the main body:
- set the fan gently on the head. Use a soft surface to not damage the
top of the product.
- take care on the indication of the supports: “L” is the left support, “R” is
the right support. The “FRONT” indicator with the arrow on both supports
indicates the front side;
-slide the supports on the main body.
Pay attention that all the parts are correct and rmly connected with each
other.
Caution! Connect to the mains supply only after the fan has been fully
assembled. The fan must not be used without supports.
Place the fan on a dry and stable surface, make sure the on/off/speed
knob is in off position (0) and insert the plug on the socket.
Turn the on/off/speed knob to select the
desired speed:
0 - Off
1: Low speed
2: Middle speed
3: High speed
Technical informations
1 - On / Off / Speed knob
2 - Blades
3 - Grid
4 - Main body
5 - Supports
3
2
1
4
5
Használati utasítások
Talpak összeszerelése
Vigyázat! Felszereléskor a ventilátort mindig tartsuk kikapcsolva és áramtalanítva.
A talpak csatlakoztatása a fő ventilátortesthez:
- Helyezzük a ventilátort noman a tetejére. Helyezzük puha felületre, így az esz-
köz teteje nem károsodik.
- Figyeljünk a talpak jelzéseire: az „L” jelenti a bal talpat, az „R” pedig a jobb tal-
pat. A talpakon található „FRONT” (ELÜLSŐ) jelzés és a nyíl jelzik a talpak elül-
ső felét;
- Csúsztassuk a talpakat a fő ventilátortestre.
Vigyázat! Az eszközt csak akkor helyezzük áram alá, amikor már teljesen össze-
szereltük.
Helyezzük az eszközt száraz és stabil felületre, ellenőrizzük, hogy a be/ki/sebes-
ség gomb a ki helyzetben van (0), és helyezzük az eszközt áram alá.
A kívánt sebesség kiválasztásához forgassuk a be/ki/sebesség gombot a kijelölt
helyzetekbe:
0 – Ki
1: Alacsony sebesség
2: Közepes sebesség
3: Magas sebesség
10
Instructions for use
Support assembly.
Caution! The fan should always be switched off and does not connected
to the mains supply, if you mounting the fan.
To x the supports to the main body:
- set the fan gently on the head. Use a soft surface to not damage the
top of the product.
- take care on the indication of the supports: “L” is the left support, “R” is
the right support. The “FRONT” indicator with the arrow on both supports
indicates the front side;
-slide the supports on the main body.
Pay attention that all the parts are correct and rmly connected with each
other.
Caution! Connect to the mains supply only after the fan has been fully
assembled. The fan must not be used without supports.
Place the fan on a dry and stable surface, make sure the on/off/speed
knob is in off position (0) and insert the plug on the socket.
Turn the on/off/speed knob to select the
desired speed:
0 - Off
1: Low speed
2: Middle speed
3: High speed
Technical informations
1 - On / Off / Speed knob
2 - Blades
3 - Grid
4 - Main body
5 - Supports
3
2
1
4
5
 Loading...