461307409 (RS-000)
20
R
F
8
GB
CLEANING AND MAINTENANCE
• Prior to any maintenance work or cleaning,
disconnect the appliance from the electricity
mains.
• Do not use a steam cleaner to clean this
appliance.
• Do not wash the parts if they are still hot
• Never use abrasive powders, pads or corrosive
spray products.
• Do not leave vinegar, coffee, milk, salty water
or the juice of lemon or tomato on the surface
for any length of time.
EXTERIOR PARTS
All the parts of the oven exterior (stainless steel, side
panels, door glass) must be cleaned frequently with a
mild detergent and a little water and then dried with a
soft cloth.
Do not use rough or abrasive materials or sharp metal
scrapers to clean the oven glass doors as they could
scratch and cause the glass to break.
On painted or stainless steel surfaces, do not use
aromatic or aliphatic solvents to remove spots or label
adhesive.
INTERIOR PARTS
We recommend cleaning the oven after every use
to remove all residues of food, grease and sugar,
which may burn with subsequent use, causing per-
manent stains and unpleasant smells. Always clean
the oven when slightly warm with soapy water. Rinse
and dry all surfaces thoroughly. Always wash all acces-
sories used.
Do not spray or wash the electric heating
elements nor the thermostat with acid-based
detergents (check the information label on the
product you are using). The manufacturer cannot
be held responsible for any damages caused by
incorrect cleaning.
OVEN DOOR SEAL
The oven door seal keeps hot air inside and is vital for
the correct operation of the oven. We recommend:
• cleaning carefully, using no abrasive sponges or pro-
ducts.
• checking the condition of the seal regularly.
If the seal has become hardened or damaged,
contact your local authorised service centre
and do not use the oven until the seal has been
replaced.
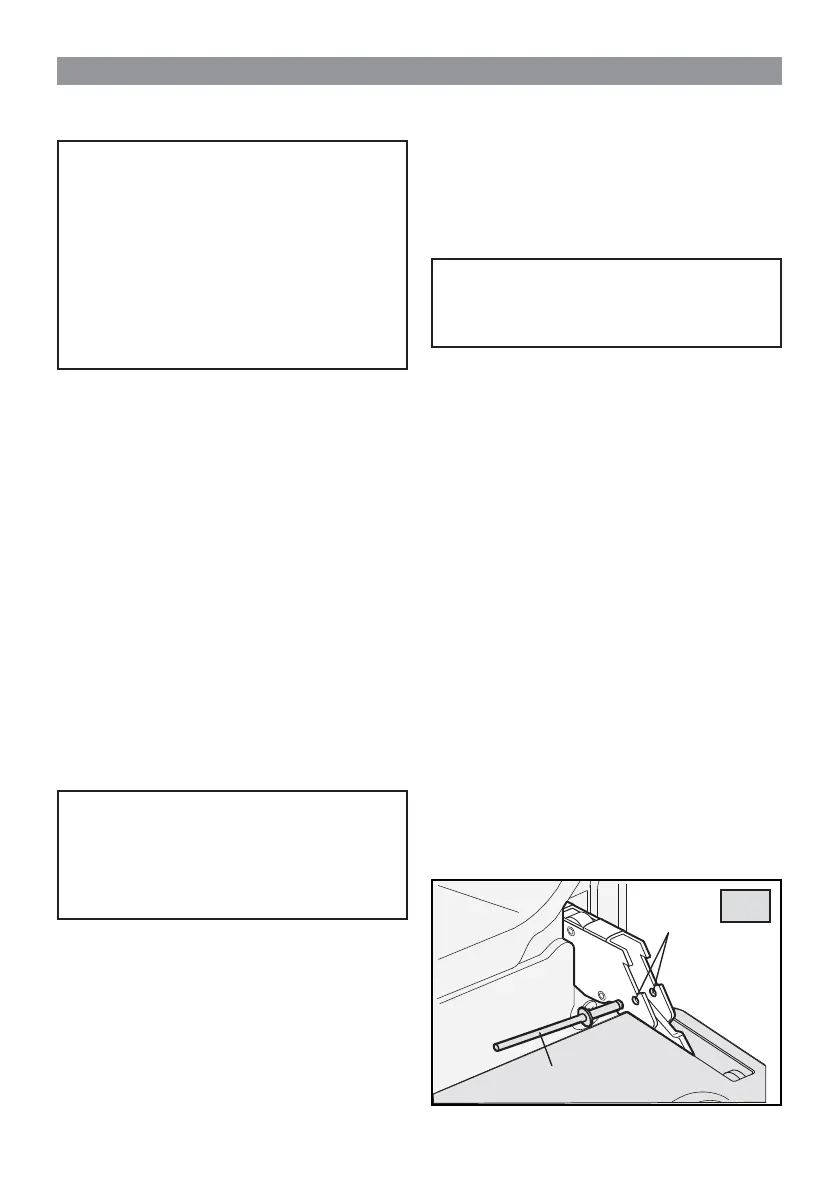
REMOVING AND MOUNTING THE OVEN DOOR
(fi g. 8)
To facilitate cleaning the oven, the oven door can be
rem
oved by completing the following steps:
• Open the oven door and insert either a nail or rivet
(R) in the hinge hole (F).
• Partially close the door while simultaneously forcing
it slightly upwards so as to free the stop lug and the
hinge segment.
• Once the hinge has been released, pull the door
forwards, bending it slightly upwards at the same
time to free the segment.
• Remount the door following the above instructions
in the reverse order, taking care to put the segments
ba
ck in their right places.
USER INSTRUCTIONS
 Loading...