EasyManuals Logo

Arduino Mega2560 User Manual

Arduino Mega2560
39 pages
To Next Page IconTo Next Page
To Previous Page IconTo Previous Page
Page #23 background imageLoading...
Page #23 background image
Lesson 3: Tracking Line
In this lesson3, we will add a 3-Point tracking sensor module to the robotic car built in
Lesson 1.The software in this lesson will read data from the 3-Point Tracking sensor
module and automatically guide the smart car to move along the black track line in the
white ground.
OSOYOO Mecanum wheels robotic car chassis x1 (2xleft-wheels/2xright-wheels and Motor x 4)
OSOYOO Mega2560 board fully compatible with Arduino UNO/Mega2560 x1
OSOYOO V1.0 Wifi shield x1
OSOYOO Model X motor driver x2
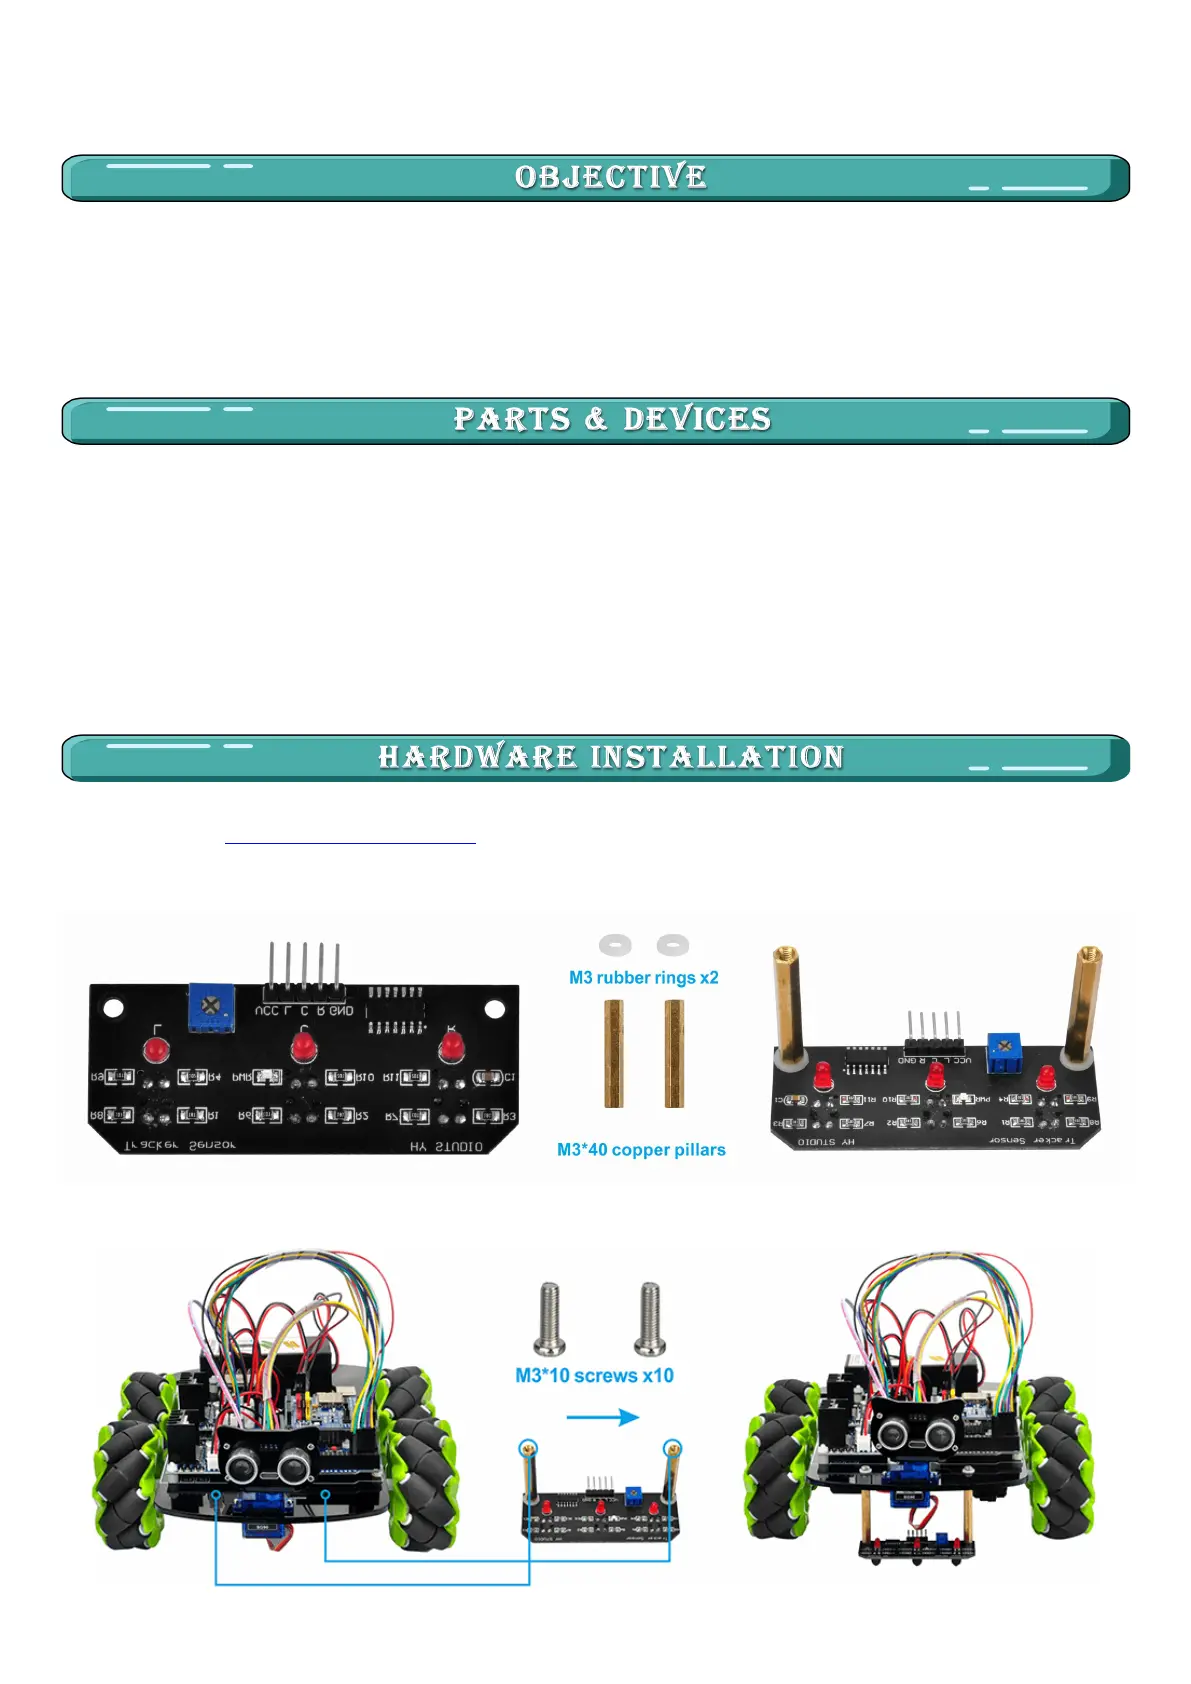
OSOYOO 3-Point Tracking sensor module x1
OSOYOO Battery box x1
18650 Batteries(3.7V) x2
You must complete lesson 1 (assembling the car), before you continue on with this lesson.
We will add a 3-Point tracking sensor module to the robotic car built in Lesson 3.

Questions and Answers:

Question and Answer IconNeed help?

Do you have a question about the Arduino Mega2560 and is the answer not in the manual?

Arduino Mega2560 Specifications

General IconGeneral
MicrocontrollerATmega2560
Operating Voltage5V
Input Voltage (recommended)7-12V
Input Voltage (limit)6-20V
Digital I/O Pins54 (of which 15 provide PWM output)
Analog Input Pins16
DC Current per I/O Pin20 mA
DC Current for 3.3V Pin50 mA
Flash Memory256 KB of which 8 KB used by bootloader
SRAM8 KB
EEPROM4 KB
Clock Speed16 MHz
Length101.52 mm
Width53.3 mm
Weight37 g