Do you have a question about the Arduino Mega2560 and is the answer not in the manual?
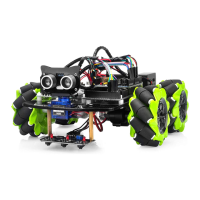
Explains mecanum wheels and the robot car's capabilities and features.
Learn basic movements and identify required components for assembly.
Detailed guide for assembling the robot car's chassis, motors, and wheels.
Wiring guide for connecting motors, drivers, and control boards.
Install Arduino IDE, download, and upload the basic movement sketch.
Instructions for operating the robot car after assembly and code upload.
Add ultrasonic sensor for obstacle detection and avoidance, mounting it.
Connect servo motor and ultrasonic sensor to the WiFi board.
Install obstacle avoidance sketch and align the ultrasonic sensor.
Learn how the robot car navigates and avoids obstacles.
Use tracking sensor to guide the car along a black line, module installation.
Connect the 3-Point tracking sensor to the WiFi shield.
Install line tracking sketch and calibrate the tracking sensor.
Prepare a track and operate the car for line following.
Control robot car via mobile app using Bluetooth, module connection.
Wire the HC02 Bluetooth module to the OSOYOO Wifi Board.
Install Bluetooth sketch and the OSOYOO Wifi Robot APP.
Pair Bluetooth, use app for imitation driving and control.
Connect car to WiFi for IoT control, configure WiFi shield.
Install WiFi library, set up AP/STA modes, install mobile app.
Control car via WiFi hotspot (AP) or LAN (STA).
| Microcontroller | ATmega2560 |
|---|---|
| Operating Voltage | 5V |
| Input Voltage (recommended) | 7-12V |
| Input Voltage (limit) | 6-20V |
| Digital I/O Pins | 54 (of which 15 provide PWM output) |
| Analog Input Pins | 16 |
| DC Current per I/O Pin | 20 mA |
| DC Current for 3.3V Pin | 50 mA |
| Flash Memory | 256 KB of which 8 KB used by bootloader |
| SRAM | 8 KB |
| EEPROM | 4 KB |
| Clock Speed | 16 MHz |
| Length | 101.52 mm |
| Width | 53.3 mm |
| Weight | 37 g |