EasyManua.ls Logo

Argos 9x4 Gazebo With 4 Slide Panels - User Manual

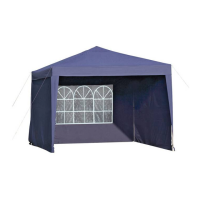
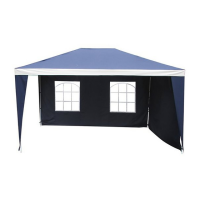
Argos 9x4 Gazebo With 4 Slide Panels
6 pages
Print Icon
To Next Page IconTo Next Page
Loading...
@ 10 x Top Pole
I.
(6) 12 x Support Pole
I.
y
<Cl10 x Leg Pole
I •.•.
I I
eEl
10 x Base Plate
9x4 Gazella Wi 11
(J) 2 x End Panel
if!)
2 x Side Panel
•
•
(El 6 x Corner Joint
@ 9 x Centre Joint
~1xRoof
Fittings' .
43
14 x Long Peg @ 4 x Large Peg
'\ "","*1======;;;;))=
046xPeg
\
4j)
1 x Metal Bar
@ 60 x Canopy Ties
~
@ 54 x Wing Screw
V
Gl
4 x Ratchet Bell
~
C) 4 x Guy Rope
~
o
1 x Spanner
0_-9
IMPORTANT
1. Read these instructions careful/yand _
familiarise yourself with the procedure
before assembling the unit.
2. Check that you have all the component
parts following the list on the back
cover and familiarise yourself with
each part before proceeding.
3. Take all the fittings out
of
the plastic bag
and separate them into their groups.
4. Ensure you have enough space to fay out
all the parts before assembly.
Question and Answer IconNeed help?

Do you have a question about the Argos 9x4 Gazebo With 4 Slide Panels and is the answer not in the manual?

Summary

General Safety and Preparation

Important Safety Instructions

Read all instructions before use. This unit can burn and is not a permanent fixture.

Fire Precautions & Safety

Follow good fire safety. Do not use naked flames or store cooking apparatus inside the unit.

Choosing a Good Camp Site

Orientate the door away from prevailing winds and pitch on level ground free from debris.

Tips and Guidelines

Practice pitching, check parts before each trip, and ensure good ventilation to prevent condensation.

Care and Storage

Allow fabric to dry completely before repacking. Clean with a soft brush and mild detergent.

Stage 1 - Assembling the connecting frames

Assemble Connecting Frames

Insert support poles into center and corner joints, securing with wing screws to build frames.

Stage 2 - Fitting the connecting frames

Fit Top Poles and Connecting Frames

Attach top poles to one frame, then connect the remaining two frames using wing screws.

Stage 3 - Fitting the Roof

Attach the Roof

Carefully place the roof onto the unit and secure it using canopy ties.

Stage 4 - Fitting the Leg Poles

Install Leg Poles

Fix leg poles to the unit using wing screws on both sides and attach base plates.

Stage 5 - Fitting the Side Panels

Attach Side and End Panels

Secure side/end panels using canopy ties at the top and Velcro tapes on leg poles.

Stage 6 - Pegging Down the Gazebo

Secure Gazebo to Ground

Peg down side/end panels and secure base plates and guy ropes using pegs.

Stage 7 - Fitting the Ratchet Bells

Tension Canvas with Ratchet Bells

Attach ratchet bells to the unit and large pegs, then use ratchets to tension the canvas.

Stage 8 - Finishing the Unit

Final Steps and Door Management

Zip up doors when leaving. Roll doors inwards to prevent water collection.

Argos 9x4 Gazebo With 4 Slide Panels Specifications

General IconGeneral
BrandArgos
Model9x4 Gazebo With 4 Slide Panels
CategoryOutdoor Furnishing
LanguageEnglish

Related product manuals