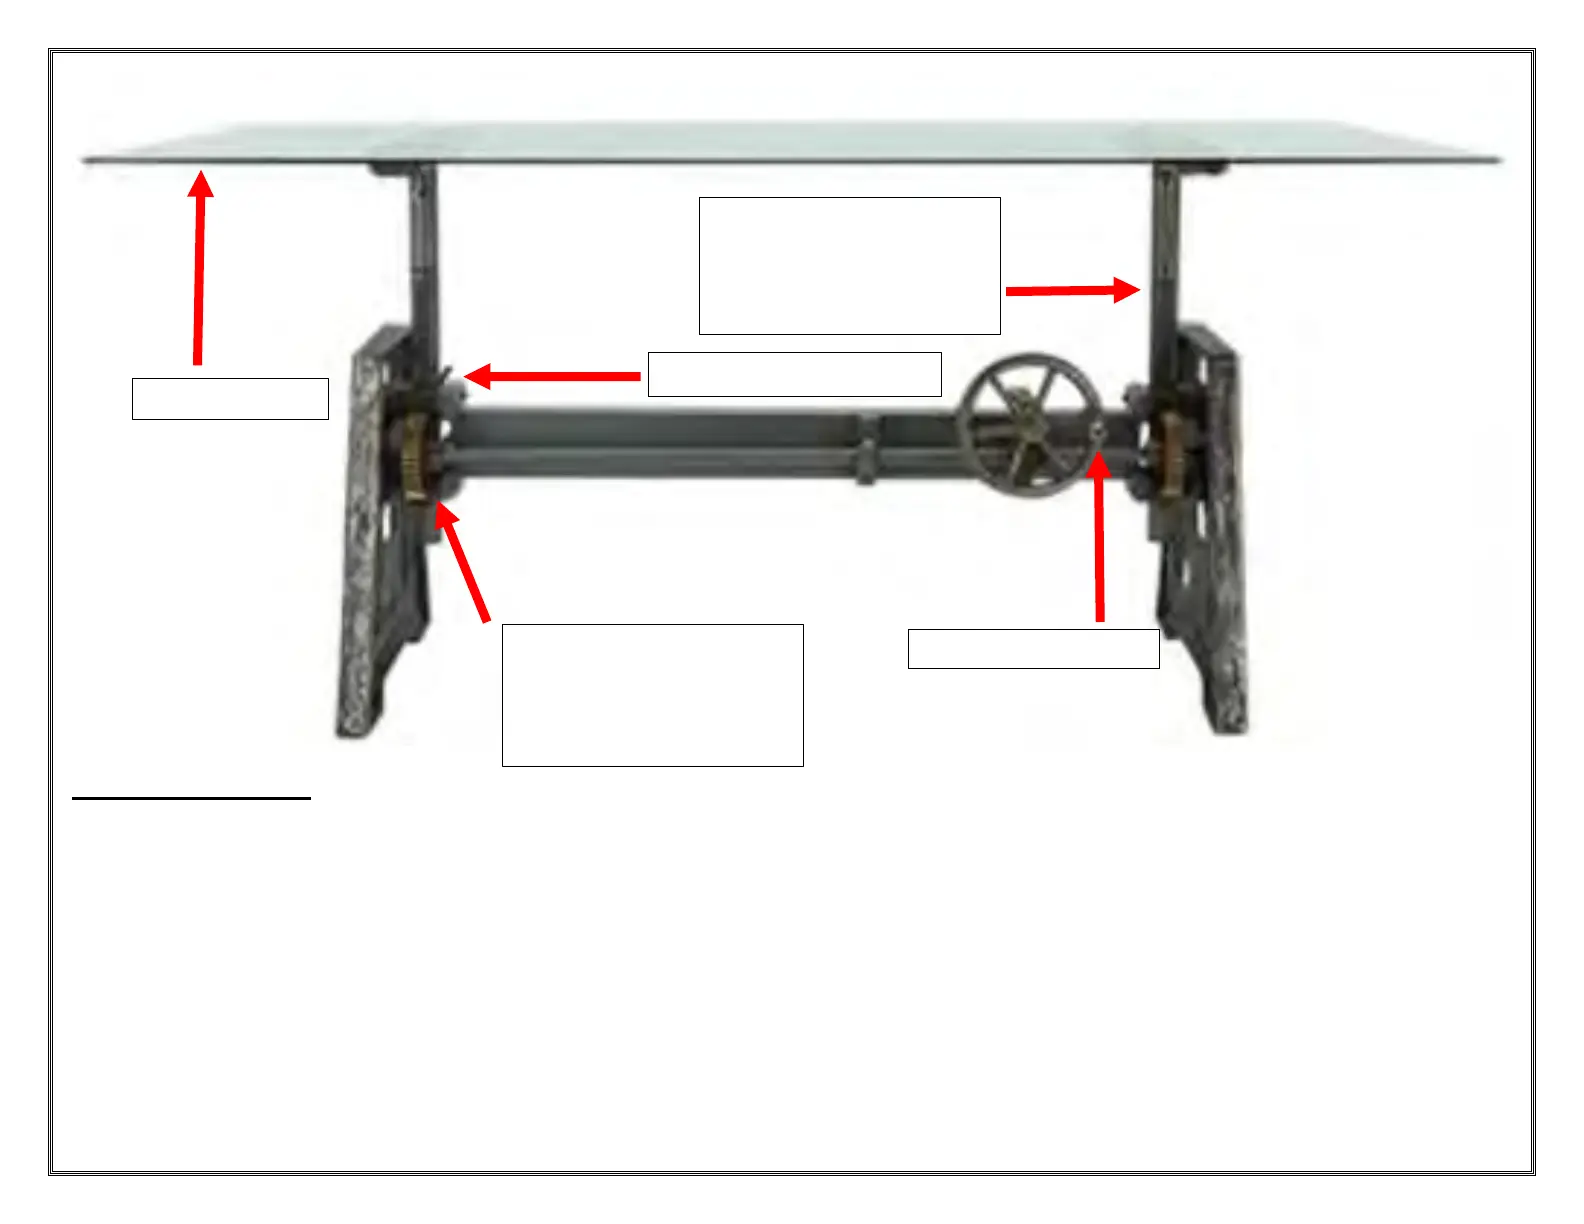
Product Assembly
Make sure crank handle is removed and placed on the outside of the wheel. (1A. Un-screw nut and bolt and remove handle and place front side of
crank wheel.)
There are 2 star screw on each of table top supports to stabilize. Please make sure the star screws are tightened on both sides to ensure stability of
table top. (2A)
Gears will have a generous amount lubricant please wipe away any excess (Please refer to photo 3A.)
Be sure to check that all hardware is intact and no brakes in casting and welded screws are completely welded
3A. Gear and table supports
may contain generous about
of lubricant please remove
any excess.
3A. Gear and table supports
may contain generous about
of lubricant please remove
any excess.