Do you have a question about the Ariens 936048 and is the answer not in the manual?
Read, understand, and follow all instructions on the machine and in the manual before starting.
Slopes are a major factor related to loss of control and tip-over accidents, which can result in severe injury or death.
Tragic accidents can occur if the operator is not alert to the presence of children. Children are often attracted to the machine.
Tow only with a machine that has a hitch designed for towing. Do not attach towed equipment except at the hitch point.
To avoid personal injury or property damage, use extreme care in handling gasoline. Gasoline is extremely flammable and the vapors are explosive.
Never operate machine in a closed area. Keep all nuts and bolts tight to ensure the equipment is in safe working condition.
Read and observe the safety rules. Follow a regular schedule in maintaining, caring for and using your tractor.
A socket wrench set will make assembly easier. Standard wrench sizes are listed.
Remove all accessible loose parts and parts cartons from carton. Cut along dotted lines on all four panels of carton.
Lift seat to raised position. Charge battery for minimum of one hour at 6-10 amps.
Assemble extension shaft onto lower steering shaft. Install steering wheel onto steering shaft extension.
Adjust seat before tightening adjustment knob. Place seat on seat pan so head of shoulder bolts are positioned over large slotted holes.
Raise attachment lift lever to its highest position. Place freewheel control in 'transmission disengaged' position.
The tires on your tractor were overinflated at the factory for shipping purposes. Correct tire pressure is important.
For best cutting results, mower housing should be properly leveled. See 'TO LEVEL MOWER HOUSING'.
After you learn how to operate your tractor, check to see that the brake is operating properly.
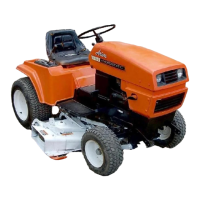
Before you operate your new tractor, we wish to assure that you receive the best performance and satisfaction.
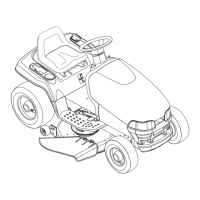
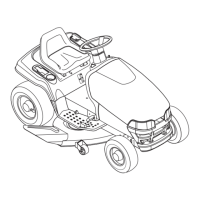
Identifies and describes tractor controls like Attachment Lift Lever, Brake Pedal, Ignition Switch, etc.
Instructions on setting parking brake, stopping, using throttle, and moving forward/backward.
Adjusting mower cutting height and gauge wheels, operating mower, stopping blades, and operating on hills.
Reverse Operation System, transporting, towing, checking oil, and adding gasoline.
Procedures for starting engine in different weather, warming transmission, and general mowing advice.
Table detailing maintenance tasks and their frequency for tractor, engine, and other components.
The warranty on this tractor does not cover items subjected to operator abuse or negligence. Maintain tractor as instructed.
Check engine oil level. Check brake operation. Check tire pressure. Check operator presence and ROS systems. Check for loose fasteners.
Diagram showing lubrication points and types of grease to be used. Avoid greasing nylon bearings.
If tractor requires more than five (5) feet to stop, then brake must be checked and adjusted.
Maintain proper air pressure in all tires. Keep tires free of gasoline, oil, or insect control chemicals.
Ensure operator presence and reverse operation systems are working properly. If tractor does not function as described, repair immediately.
For best results mower blades must be kept sharp. Replace bent or damaged blades.
Raise mower to highest position to allow access to blades. Remove blade bolt by turning counterclockwise.
Your tractor has a battery charging system which is sufficient for normal use. Periodic charging will extend its life.
Corrosion and dirt on the battery and terminals can cause the battery to 'leak' power. Disconnect cables and clean.
Check V-belts for deterioration and wear after 100 hours of operation and replace if necessary.
The transaxle was sealed at the factory and fluid maintenance is not required for the life of the transaxle.
Only use high quality detergent oil rated with API service classification SG-SL. Select oil's SAE viscosity grade according to expected operating temperature.
Change the oil after every 50 hours of operation or at least once a year. Check crankcase oil level before starting and after each eight (8) hours.
Replace the engine oil filter every season or every other oil change if the tractor is used more than 100 hours in one year.
Your engine will not run properly using a dirty air filter. Service air cleaner more often under dusty conditions.
Air screen must be kept free of dirt and chaff to prevent engine damage from overheating.
Debris may clog the engine's air cooling system. Remove blower housing and clean the area to prevent overheating.
Inspect and replace corroded muffler and spark arrester (if equipped) as it could create a fire hazard.
Replace spark plugs at the beginning of each mowing season or after every 100 hours of use.
The fuel filter should be replaced once each season. If fuel filter becomes clogged, replacement is required.
Clean engine, battery, seat, finish, etc. of all foreign matter. Avoid all pinch points and movable parts.
Disconnect spark plug wire. Place attachment clutch in 'DISENGAGED' position. Lower attachment lift lever. Remove mower.
Ensure tractor is on level surface and engage parking brake. Lower attachment lift lever to its lowest position. Slide mower under tractor.
Position hole in arm over pin on chassis and secure with retainer spring. Repeat on opposite side.
Lift rear corner of mower and position slot in link assembly over pin on rear mower bracket and secure.
Work from left side of tractor. Insert rod end of link assembly through front hole in tractor front suspension bracket.
Check belt for proper routing in all mower pulley grooves. Raise attachment lift lever to highest position.
Ensure tires are properly inflated. Determine which side of mower is cutting lower for adjustment.
Turn lift link adjustment nut to the left to lower LH side, or to the right to raise LH side.
Measure distance from bottom edge of blade to ground on both sides. Distance should be the same.
Adjust mower blades so front tip is 1/8" to 1/2" lower than rear tip when mower is in highest position.
Remove mower from tractor. Work belt off pulleys. Pull belt away from mower.
Park tractor on level surface. Remove belt from stationary and clutching idlers, centerspan idler.
Move motion control lever until unit rolls freely. Loosen adjustment bolt, move lever to neutral, tighten bolt.
If tractor requires more than five (5) feet to stop, then brake must be serviced.
If steering wheel crossbars are not horizontal, remove steering wheel and reassemble.
The front wheel toe-in and camber are not adjustable on your tractor.
Block up axle securely. Remove axle cover, retaining ring and washers to allow wheel removal.
If your battery is too weak to start the engine, it should be recharged. Follow jumper cable procedure if necessary.
Lift seat pan. Disconnect BLACK battery cable first then RED battery cable. Install new battery with terminals in same position.
Pull bulb holder out of the hole in the backside of the grill. Replace bulb in holder and push back.
Loose or damaged wiring may cause your tractor to run poorly, stop running, or prevent it from starting. Check wiring.
Replace with 20 amp automotive-type plug-in fuse. The fuse holder is located behind the dash.
Raise hood. Unsnap headlight wire connector. Grasp hood at sides, tilt toward engine and lift off.
The throttle control has been preset at the factory and adjustment should not be necessary.
The choke control has been preset at the factory and adjustment should not be necessary.
Your carburetor is not adjustable. If engine does not operate properly, take tractor to authorized service center.
Prepare tractor for storage. Remove mower, clean thoroughly, inspect and replace belts, lubricate, check fasteners.
Fully charge battery for storage. Disconnect battery cables to prevent corrosion and power leakage.
Prevent gum deposits in fuel system parts. Empty fuel tank and lines, or use fuel stabilizer.
Drain oil (with engine warm) and replace with clean engine oil.
Remove spark plug(s). Pour one ounce of oil through spark plug hole(s) into cylinder(s).
Do not store gasoline from one season to another. Store tractor indoors and cover it.
Register product immediately. Perform maintenance, notify Ariens of need for service, transport product, have warranty service performed.
Batteries warranted for 12 months. First 90 days free replacement. Pro-rated cost for defective battery thereafter.
Engines, accessories, non-genuine parts, maintenance items, misuse, alteration, improper assembly/adjustment, neglect, accident are excluded.
Ariens' liability is limited to repair or replacement. Not liable for incidental, special, or consequential damages.
| Brand | Ariens |
|---|---|
| Model | 936048 |
| Category | Lawn Mower |
| Language | English |