EasyManua.ls Logo

Ariston AS600VX - User Manual

Ariston AS600VX
16 pages
Print Icon
To Next Page IconTo Next Page
Loading...
Contents
TUMBLE DRYER
AS600VX
Instruction booklet
Important information, 2
Installation, 3-4
Where to put your dryer
Ventilation
Electrical connection
Levelling
Before you start using your dryer
Dryer description, 5
The front
The back
Control panel
Start and programmes, 6-7
Choosing a programme
Table of programmes
Laundry, 8-9
Sorting your laundry
Wash care labels
Special clothing items
Drying times
Warnings and Suggestions, 10
General safety
Disposal
Saving energy and respecting the environment
Maintenance and Care, 11
Switching off the electricity
Cleaning the filter after each cycle
Check the drum after each cycle
Cleaning the dryer
Troubleshooting, 12
Service, 13
Spare parts
GB
English, 1
GB
1
! Keep this instruction booklet on hand in order to refer to it when necessary. Take it with you when you move, and
should you sell this appliance or pass it on to another party, make sure that this booklet is supplied along with the
dryer so that the new owner may be informed about warnings and suggestions on how the appliance works.
! Read these instructions carefully; the following pages contain important information on installation and suggestions
on how the appliance works.
Question and Answer IconNeed help?

Do you have a question about the Ariston AS600VX and is the answer not in the manual?

Overview

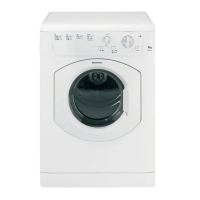
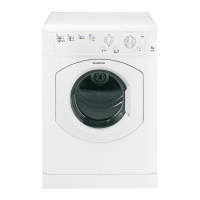
This document is an instruction booklet for the Ariston AS600VX Tumble Dryer, providing comprehensive guidance on its installation, operation, maintenance, and troubleshooting.

The dryer's primary function is to dry laundry efficiently. It operates by drawing in cool, clean air, heating it, and then distributing it through the clothes as they tumble. The moist air is then expelled through a vent tube at the back of the dryer.

Usage Features:

The dryer offers various programmes tailored to different fabric types and load sizes. These include:

  • Automatic Drying (average loads): Dries clothes completely, suitable for 1-3kg of cotton, polycotton, or synthetics. It uses a high heat setting.
  • Automatic Drying (large loads): Also dries clothes completely, designed for 3-6kg of cotton. It uses a high heat setting.
  • Easy Iron: A brief 10-minute programme (8 minutes heat, 2 minutes cool tumble) that softens clothing fibres, making them easier to iron. This is not a drying programme and should not be used for wet items. Maximum loads for this programme are 2.5kg for cotton/cotton mixtures, 2kg for synthetics, and 2kg for denim.
  • Timed Drying (up to 120 minutes): For drying wet clothes that will be ironed, acrylic fibres, or small loads (less than 1kg). Users can select high or low heat.
  • Cool Tumble: A 10-minute programme to refresh clothing fibres. This is not a drying programme.

To operate the dryer:

  1. Plug it into the electrical socket.
  2. Sort laundry by fabric type, ensuring pockets are empty, buttons checked, zippers and hooks closed, and belts/strings tied. Wring out excess water from items.
  3. Open the door and ensure the filter is clean and in place.
  4. Load the machine, making sure items do not obstruct the door seal, then close the door.
  5. Select the desired drying programme using the PROGRAMMES knob, rotating it clockwise.
  6. Set the temperature (High or Low Heat) using the HEAT button.
  7. Optionally, set a delay time using the TIMER knob.
  8. To silence the buzzer, press the ALARM button.
  9. Press the START button to begin. The ACTIVE indicator light will illuminate and remain on until the door is opened or power is turned off.
  10. During drying, items can be checked and removed if dry. Close the door and press START to resume.
  11. The final 10 minutes of any programme is the COOL TUMBLE phase, where fabrics are cooled. This phase should always be allowed to complete to prevent damage to items.
  12. A buzzer will sound when drying is complete.
  13. Open the door, remove laundry, clean the filter, and unplug the dryer.

The dryer features a "Drying Guide" to help users consult a table of fabric types and load capacities. The TIMER knob also allows for setting a delay on the dryer's start time by rotating it clockwise to the desired number of hours. The PROGRAMMES knob sets the programme by rotating it clockwise. The ALARM button turns the buzzer on/off, signaling the end of a cycle. The ACTIVE indicator light glows when the dryer is in use, including during a delayed start programme, and remains on until the door is opened or power is turned off.

Maintenance Features:

Regular maintenance is crucial for efficient operation:
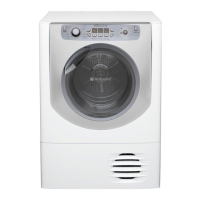
  • Fluff Filter Cleaning: The fluff filter MUST be cleaned after EVERY drying cycle. To do this, open the door, pull out the filter using the finger grips, clean any fluff deposits from the mesh, refit the filter with arrows facing you, and push it fully home. Never run the dryer without the filter in position. Failure to clean the filter will reduce drying performance and increase electricity usage.
  • Filter Housing and Vent Tube Cleaning: Fluff build-up around the filter housing and in the vent tube should be cleaned periodically, every two or three months. Check the vent tube and any permanent venting fixture for fluff accumulation and remove it. Remove lint from around the filter and outlet vents.
  • Drum Check: After each cycle, manually turn the drum to remove any small items (e.g., handkerchiefs) that may have been left behind.
  • Dryer Cleaning: External metal, plastic, and rubber parts can be cleaned with a damp cloth. Do not use abrasives, steel wool, or stainless steel cleaning agents on the drum. A coloured film may appear on the stainless steel drum due to water and cleaning agents, but this will not affect performance.
  • Ventilation System Check: Periodically check the vent tube and any permanent venting fixture for fluff or lint accumulation and remove it. Remove lint that collects around the filter and outlet vents.
  • Electrical Safety: Unplug the dryer when not in use, during cleaning, and all maintenance operations.

Installation Guidelines:

  • Placement: Place the dryer away from heat sources like gas ranges or stoves. Maintain a 10mm gap between the top and other objects, and a 15mm gap between the sides and walls for proper air circulation. Ensure the back vents are not obstructed. The dryer should be in a non-damp environment with good air circulation. Avoid installing it in enclosed spaces or cupboards due to heat build-up.
  • Door Restriction: The appliance must not be installed behind a lockable door, sliding door, or a door with a hinge on the opposite side that restricts full opening of the dryer door.
  • Ventilation: The dryer vents moist air through a vent tube. Ensure adequate ventilation to prevent backflow of gases from other fuel-burning appliances. The vent tube should not exceed 2.4 metres, be kept free of fluff/lint/water, and not be squashed. The end of the tube should not be directed towards the air intake vent at the rear of the dryer.
  • Permanent Venting: A Wall/Window Vent Kit is recommended. For wall mounting, leave an opening in the wall to the left of the dryer, keep the tube short and straight, and ensure the duct slopes downwards. For window mounting, the hole should ideally be below the vent, and the tube kept short. Periodically check areas A and B for lint/debris.
  • Mobile Venting: A vent tube must always be fitted securely to the back of the dryer. If permanent installation is not possible, the tube can pass through a partly-opened window, with the end directed downwards to prevent condensation.
  • Electrical Connections: Ensure the socket is grounded, can sustain maximum power (as per rating label), voltage is within specified values, and is compatible with the dryer's plug. Do not use extension cords. The power cord must not be bent or squashed. The dryer should not be installed outdoors. The electrical wire and plug must be easily accessible after installation.
  • Levelling: The dryer must be installed level. Use a wooden block to adjust the front legs until the dryer is level side-to-side and front-to-back.
  • Pre-use Cleaning: Before first use, clean the inside of the drum to remove any dust accumulated during transport.

Ariston AS600VX Specifications

General IconGeneral
Dryer typeVented
Capacity6 kg
Energy ratingC
Power consumption2700 W
Noise level69 dB
ColorWhite

Related product manuals