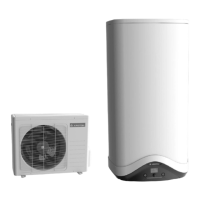
Heat pump water heater – INSTALLATION
35
4. INSTALLATION
WARNING! Observe the general warnings and safety instructions listed in the previous
paragraphs and strictly adhere to the indications therein contained.
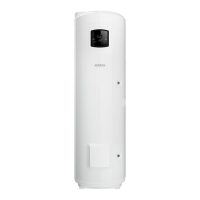
4.1 Location of the internal unit
WARNING! Prior to start
any installation activities, ensure that the location where the water heater is to be
installed satisfies the following requirements:
a) establish the most suitable position on the wall, allowing enough roo
b)
Make sure the space is suitable to house the product (see Fig. 1), also considering the hydraulic safety
devices, the electrical wiring, hydraulic and refrigerant connections
c) Avoid installing the appliance in rooms which may favour frost build-up.
The product is designed for
indoor installations, t
he product’s safety and performance levels are not guaranteed in the event of
outdoor installation
d) Ensure that the installation site and the electrical and hydraulic systems to
which the appliance must be
connected fully comply with the regulations in force
e) The chosen site must have, or must be suitable to house, a single-phase 220-
supply socket
f) The support surface must ensure a perfectly horizontal operating position,
and can withstand the weight
of the water heater filled with water
g)
The chosen site must conform to the appliance’s IP protection rating (protection against the penetration of
liquids) as specified by the regulations in force
h) The appliance must n
ot be exposed to direct sunlight, even when windows are present
i)
The appliance must not be exposed to particularly aggressive substances such as acidic vapours, dust or
gas-filled environments
j) The appliance must not be directly installed on lines that are u
nprotected against overvoltage
k)
The appliance must be installed as close as possible to the points of use to limit heat dispersion along the
piping
Indoor unit installation sequence:
a) Remove the packaging from the product, make the electrical connections (v.
b) Screw the dielectric couplings on inlet and outlet water pipes
c) Place an hydraulic safety device on the cold water inlet pipe (v. section 4.7)
d)
Fix the product to the wall: the water heater is equipped with a wall bracket with complete fasteni
system, properly sized and suitable for the weight of the product full of water. To fix the bracket, use the
two rawplugs and screws included. To facilitate the correct positioning of the product, refer to the
installation template printed on the carton box packaging (fig. 4)
e) Ensure that the product is perfectly vertical by adjusting the spacer C (fig. 4)
f) Make the hydraulic and refrigerant connections (v. sections 4.5 and 4.7)
4.2 Location of the external unit
WARNING! Prior to starting any installation
activities, ensure that the location where the water heater is to be
installed satisfies the following requirements:
a)
establish the most suitable position on the wall, allowing enough room to easily perfo
(see fig. 2)
b) Install the outdoor unit on a solid wall in a very secure way
, in a place where noise and exhaust air do not
cause trouble.
c)
Choose a place that does not obstruct the free passage and which is easy to e
produced
d) The plan of operation must be exactly horizontal, check with a level (Fig. 2)
e) secure the brackets to the wall using suitable fixings for the wall
(be careful to cables and pipes in the
wall)
, use dowels larger than the weight would require: while operating the machine vibrates and must be
installed for years without any screw come loose
f)
Follow the steps and only then start making the connections of the pipes and electric cables
WARNING! Observe the general warnings and safety instructions listed in the previous
any installation activities, ensure that the location where the water heater is to be
rm any maintenance
Make sure the space is suitable to house the product (see Fig. 1), also considering the hydraulic safety
The product is designed for
he product’s safety and performance levels are not guaranteed in the event of
which the appliance must be
230 V ~ 50 Hz power
and can withstand the weight
The chosen site must conform to the appliance’s IP protection rating (protection against the penetration of
ot be exposed to direct sunlight, even when windows are present
The appliance must not be exposed to particularly aggressive substances such as acidic vapours, dust or
nprotected against overvoltage
The appliance must be installed as close as possible to the points of use to limit heat dispersion along the
Fix the product to the wall: the water heater is equipped with a wall bracket with complete fasteni
ng
system, properly sized and suitable for the weight of the product full of water. To fix the bracket, use the
two rawplugs and screws included. To facilitate the correct positioning of the product, refer to the
activities, ensure that the location where the water heater is to be
establish the most suitable position on the wall, allowing enough room to easily perfo
rm any maintenance
, in a place where noise and exhaust air do not
Choose a place that does not obstruct the free passage and which is easy to e
vacuate the condensate
(be careful to cables and pipes in the
, use dowels larger than the weight would require: while operating the machine vibrates and must be
Follow the steps and only then start making the connections of the pipes and electric cables
 Loading...