16
Cleaning and Disinfecting the Toilet
Commode Chair and Frame
For exterior areas of the seat and frame the “hard
surface disinfectant wipes” mentioned above will be
very effective, but for internal and crevice areas of the
equipment Arjo recommend that the seat and frame is
immersed in a disinfectant / cleaning solution and
cleaned in the following manner:-
Note:- “ARJO CLEAN” - Disinfectant / Cleaner
is available from Arjo Limited, or their
approved distributor.
ALWAYS WEAR PROTECTIVE GLOVES
AND EYE PROTECTION WHEN USING
DISINFECTANT.
Always read the instructions on the disinfectant
/ cleaner container before using.
Mix a suitable quantity of solution in the bath tub
(always check dilution rate on disinfectant / cleaner
container).
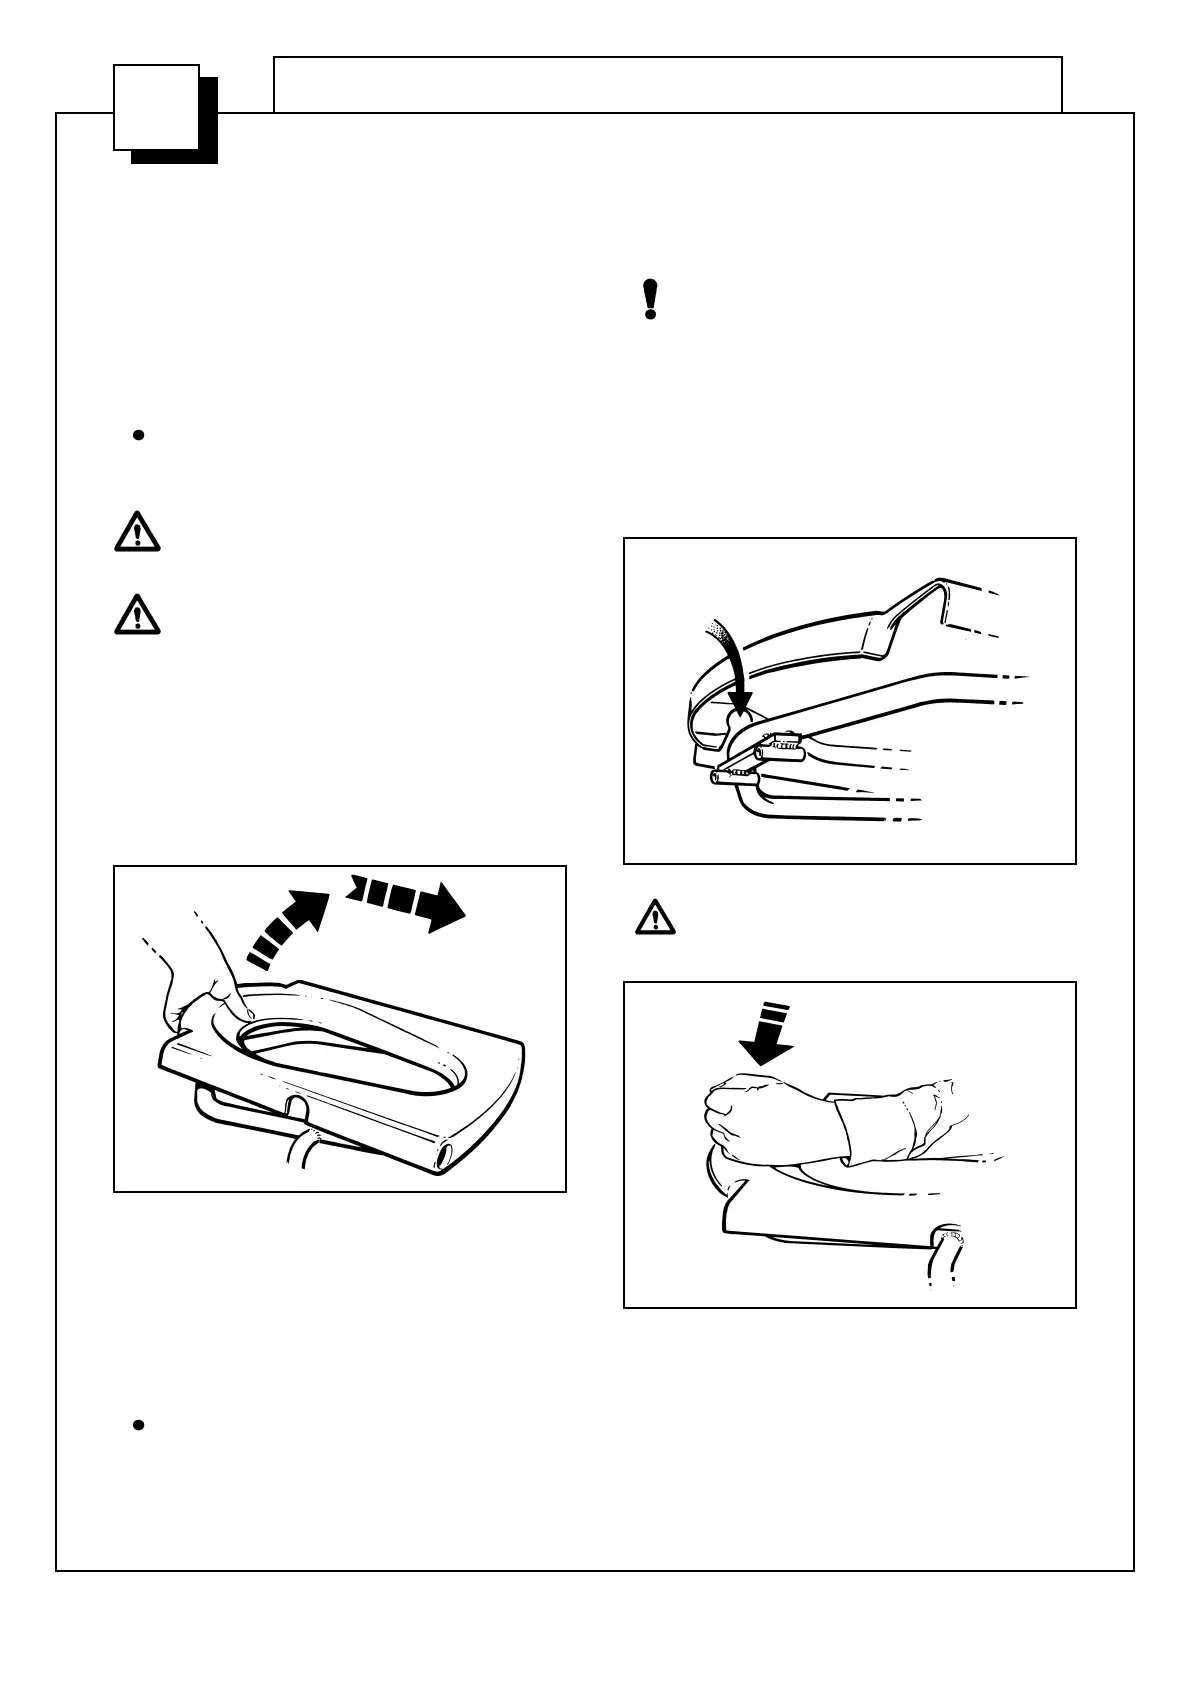
Remove the plastic commode seat from the seat frame
by pulling the rear edge up sharply to disengage the
locating lugs (see Fig. 24). Slide the seat forwards a
short distance until clear of the frame tubes and lift
away.
Put the seat into the disinfectant solution to “soak” and
then place the seat frame into the bath.
Using an appropriate long handled, stiff bristled,
‘bottle type’ brush, clean the inside of the commode
pan support tubes thoroughly.
Clean the remainder of the seat frame, paying
particular attention to recesses in the framework.
Note:- A scrubbing action is necessary as well
as the disinfectant / cleaner action to sanitise
any surface.
Clean the commode seat, then drain the bath.
Rinse all parts with clean water and dry with a
disposable cloth.
Thoroughly clean the brush in a fresh solution of
the disinfectant/cleaner. Rinse well with clean
water. Dry the brush and store ready for the next
cleaning operation.
To refit the commode seat, locate the seat holes over
the seat frame tubes, and align the location lugs over
the rear cross bar of the seat frame as shown in Fig. 16.
Apply sharp downward blows onto the rear of the seat,
(as shown in Fig.26), in two places directly above the
location lugs, until the seat ‘snaps’ back into place.
Always ensure the seat is secure before
allowing a patient to use it.
P1248c
Fig. 24
P1248a
Fig. 25
P1248b
Fig. 26
F
Care of your Sara 2000 - (continued)
(continued...)
 Loading...