Specifications
Wattage:
Heat Lamps Hard Glass Infra red ES type 4 x 275W 240Vac
Reflector backed Lamp R80 ES 100W 240Vac
Airflow:
Output over 200m
3
/hour unducted
Dimensions:
From cavity floor (excluding fascia grille):
Height-195mm
Main body-290mm x 290mm
Outer flange-371mm x 371mm
Standard Accessories:
1 x Four gang wall switch
4 x Infra red Heat Lamps 275W
1 x Incandescent Reflector Lamp R80 100W
1x 1.5m Expandable duct piping
2 x 400mm Plastic ties (to hold duct in place)
1 x Duct outlet
8 x 30mm Cross recess, binding head, ZP self tapping screws
Introduction
Read these instructions carefully before installing & using the
product. Keep the instructions handy for future reference.
IMPORTANT: Always operate the E550 from a power source of the
same voltage, frequency and rating as indicated on the product
identification plate.
The four infra-red lamps heat by direct radiation rather than heating the air in
the room so the heat lamp & fan should be located directly over where drying
off occurs.
Locate and install the product in accordance with the requirements of
AS/NZS 3000 and local building codes. This appliance must be installed
by a licensed electrician.
IMPORTANT: Do not install in a location where there is a possibility
of water splashing onto the lamps. Do not install directly above
bath or shower recesses or enclosures.
Electrical Requirements
This product is designed for wired-in installation and wiring and installation
must be carried out by a licensed electrician in accordance with AS/NZS 3000.
(Fig.01)
Wiring Diagram
Fig. 01
IMPORTANT:
Do not use this heat lamp & fan with any solid state control.
Fixed wiring insulation must be of a minimum
V-90 temperature rating.
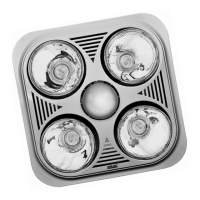
3 in 1 Heat Lamp
& Exhaust Fan
E550
Instruction Manual
IMPORTANT: Please read these instructions carefully before use.
Due to continuous research and development the specifications herein are subject to change without notice.
Safety Instructions
WARNING: To reduce the risk of personal injury or damage to
property, follow basic safety precautions when using this product,
including the following:
• Thisapplianceisnotintendedforusebypersons(includingchildren)with
reduced physical, sensory or mental capabilities, or lack of experience and
knowledge, unless they have been given supervision or instruction concerning
use of the appliance by a person responsible for their safety
• Childrenshouldbesupervisedtoensurethattheydon’tplaywiththeappliance
• Donotlookdirectlyatheatlampswhentheyareoperating.
• Donotoperatetheunitwithouttheoutersurroundbeinginplace.
• Donotinstallinalocationwherethereisapossibilityofwatersplashingonto
the lamps.
• Donotinstalldirectlyabovebathorshowerrecessesorenclosures.
• Donotinstallthecontrolswitchinalocationthatisaccessiblebyapersonin
the bath or shower.
• Donotoperateanyproductwhichappearsdamagedinanymannerorafter
product malfunctions, has been dropped or damaged. Consult a qualified
technician to check the product before further use.
• Donotoperatethisproductinthepresenceofexplosive/ammableliquid
or fumes such as where aerosol (spray) products are being used or where
oxygen is being administered.
• Donotinsertorallowforeignobjectstoenteranyventilationorexhaust
opening as this may cause an electric shock or fire, or damage the appliance.
• Switchofffrompowersupplywhencleaning.Allowallpartstocool
thoroughly before disassembling / assembling parts or replacing lamps.
• Donotusetheproductforotherthanitsintendeduseasdescribedinthese
instructions. This product is intended for domestic household use only. The
use of accessories, attachments or lamps other than those recommended by
the manufacturer may cause safety hazards.
NOTE: Electrical fittings must be installed by a licensed electrician
or other persons authorised by legislation to work on fixed wiring
of an electrical installation.
Ventilation Requirements
For maximum efficiency and fan performance please note these key points
when installing the heat lamp:
Sufficient air inlet into room
Steam will only be removed if there is sufficient flow of air through the room .
Ensure generous inlets exist through windows vents or under the door. Air flow
path from inlet to fan should ideally pass over the steam sources. (Fig.02).
Fig. 02
Adequate ventilation in roof cavity
It is essential that there is adequate space within the roof cavity so the exhaust
air from the heat lamp & fan can dissipate. The roof cavity itself should be well
ventilated to the outside so the moist air can be removed.
Where ventilation space is restricted, such as between floors of multi-story
building, or where space within the roof cavity is severely restricted, install the
supplied flue duct and vent to an outside area.
Clearances around the product
A minimum clearance of 75mm is required above the top of the product (dim. A)
when installed in a well ventilated roof cavity. When ventilation is restricted,
this clearance should be increased to a minimum of 100mm. A minimum space of
245mm is required in the ceiling space (dim. B) where there is good ventilation to
the sides of the unit. (Fig.03).
Side Elevation
Heat Lamp & Exhaust Fan Fig. 03
Additionally, a minimum of 15mm clearance is required between the two vertical
sidesoftheheatlamp&fanandanyadjoiningpartsoftheroofstructure,such
aswalls,joistsorinsulationbatts.
Do not allow insulation material to rest against the sides or the top of the heat
lamp & fan when it is installed.
(B)
(A)
15mm
A minimum
of 15mm
required on
two vertical
sides
Bathroom Plan
Heat Lamp &
Exhaust Fan
Air Flow
Earth
Neutral
Active
S/W Light
S/W Fan
S/W Heat
S/W Heat