7
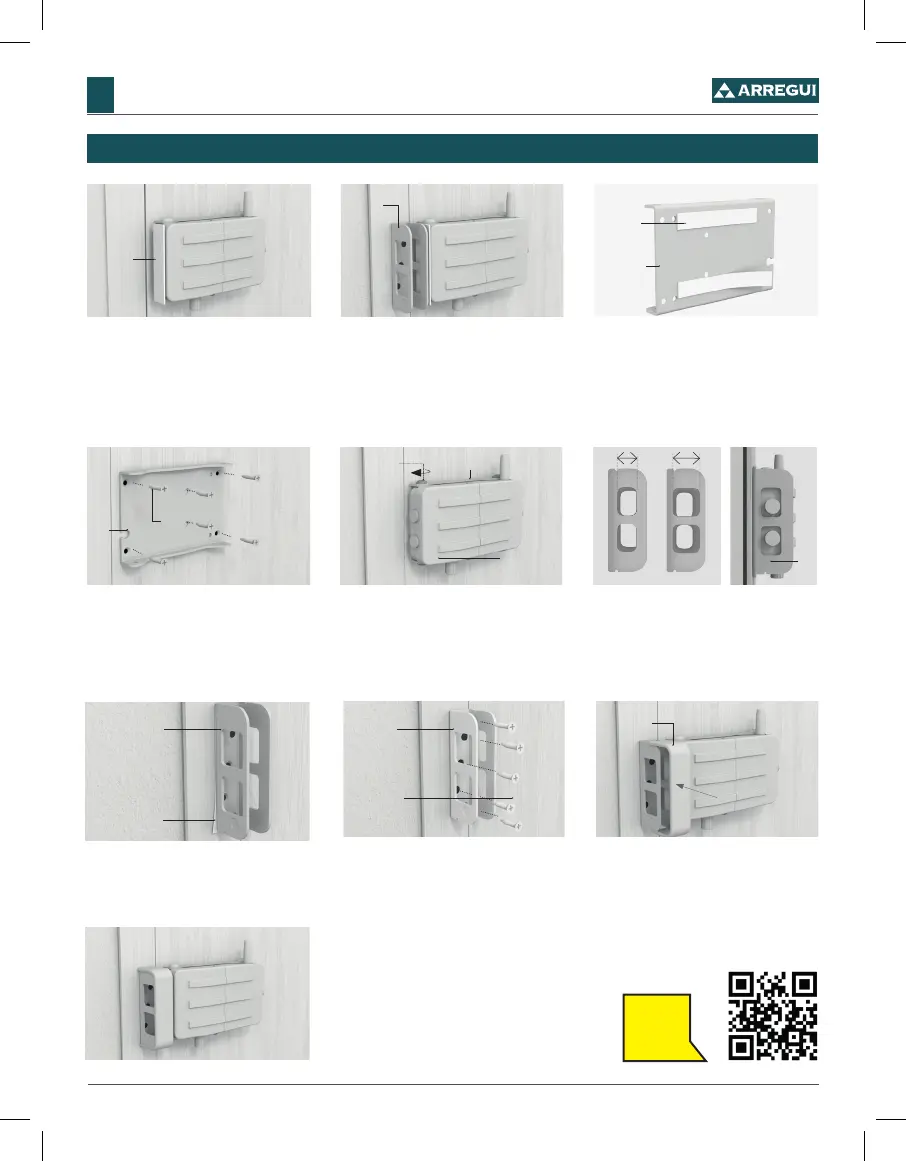
SURFACE MOUNTING INSTRUCTIONS
CI10
EN
See
video
7. Repeat the drilling process to fasten the lock’s
bolt housing (E) to the door, using the supplied
screws (M).
M
E
8. Click the bolt cover (E1) into place.
Attention: Check that the
lock functions, but always
from inside your house.
E1
1. Calculate in which position you want to install
the bolt, but always on the inside of the door.
Place the adhesive spacer (H) as shown in the
image, right up against the lock box.
H
2. Place the housing pin (E) on the door frame
next to the adhesive spacer (H). The spacer
marks the minimum distance between the lock
and the housing pin. If they are not at the same
height, you must use parts (C) and (D) to t the
lock in step 4.
E
3. Fix the adhesive strips (I) onto the back
of the base plate (B) or on the shims (C and
D), to position it properly on the door before
drilling.
I
B
A
4. Once the base plate (B) is pre-installed
and, if necessary, the shims (C) and (D), drill
the holes and fasten it to the door using the
included screws (M).
5. Screw the lock box (A) to the base plate (B),
using the 4 supplied screws (L).
L
B
6_A. To adjust the bolts better, the (E) compo-
nent can be installed in two different positions.
With the bolts in the closed position, verify in
which position to install the piece. The bolts
must stay as close as possible to the edge of (E)
to avoid play when opening the door.
6_B. Place the lock’s bolt housing (E) on the door
frame, holding it in place with an adhesive strip (I),
at the correct height so the bolts can slide in and
lock the door.
E
I
A
M
B
E