Pflegehinweise
z Reflektor (16) und Stufenlinse (7) regelmäßig mit handels-
üblichen Glasreinigern säubern und anschließend mit einem
weichen Tuch nachpolieren.
z Achten Sie darauf, dass der Reflektor nicht beschädigt ist und
keine Beulen aufweist.
z Halten Sie die Kontaktelemente der elektrischen
Steckverbindungen sauber.
z Neben der regelmäßigen Sichtprüfung ist eine Wiederhol-
prüfung der elektrischen Sicherheit mindestens alle 12 Monate
von einer Fachperson durchzuführen und zu protokollieren.
Internet: WWW.ARRI.COM
Technische Änderungen vorbehalten! Design and specifications subject to change without notice!
ARRI Service Werkstätten / ARRI Service Locations
Care Instructions
z Please clean the reflector (16) and lens (7) regularly with a
customary glass cleaning agent. After cleaning, polish the
surfaces with a soft cloth.
z Please check that the reflector shows no kind of deformation or
damage.
z Keep the contact surfaces of the electrical connections and
lamp holder clean.
z In addition to the regular visual inspection,you should have
a qualified electrician carry out a repeated inspection of
electric safety at least ever 12 months.
6
Weitere Hinweise
z Für alle Personen- und Sachschäden, die aus nicht bestim-
mungsgemäßer Verwendung entstehen, haftet nicht der
Hersteller, sondern der Betreiber des Scheinwerfers.
z Besuchen Sie uns unter www.ARRI.com zum Einsehen
der CE-Erklärung, sowie der Ersatzteil-Informationen.
z Lesen Sie auch das
"Sicherheitsmerkblatt: ARRI-Scheinwerfer"; L5.40731.D
Further Notes
z The manufacturer disclaims liability for any damage to persons
or property caused by inappropriate operation, damage of this
kind lies in the responsibility of the operator.
z Please visit www.ARRI.com to view the CE-declaration, as well
as the spare parts information.
z Please also read our leaflet "Operating Your ARRI Lampheads
Safely"; L5.40731.E.
Germany
ARNOLD & RICHTER
CINE TECHNIK
GmbH & Co. Betriebs KG
Pulvermühle
D-83071 Stephanskirchen
Tel. +49(0) 8036-3009-0
Fax +49(0)8036-2471
Germany
ARRI Lighting
Solution GmbH
Ernst-Augustin Str. 12,
D-12489 Berlin
Tel. +49(0) 30-678233-0
Fax +49(0)30-678233-99
USA
ARRI Inc
New York Office
617 Route 303,
Blauvelt,
NY 109131123
Tel. +1(845) 353-1400
Fax +1(845)425-1250
USA
ARRI Inc
Burbank Office
600 N. Victory Blvd.
Burbank,
CA 915021639
Tel. +1(818) 841-7070
Fax +1(818)848-4028
Canada
ARRI Canada LTD.
415 Horner Avenue,
Unit 11, Etobicoke,
Ontario M8W 4W3
Tel. +1(416) 255-3335
Fax +1(416)255-3399
Great Britain
ARRI (GB) LTD.
2 Highbridge,
Oxford Road
Uxbridge Middlesex
UB8 1LX
Tel. +44(0) 1895-457000
Fax +44(0)1895-457001
Italy
ARRI Italia SRL
Viale Edison 318
I-20099 Sesto S.G.
Milano
Tel. +39(02) 26227 175
Fax +39(02)242 1692
Australia
ARRI Australia PTY Ltd.
Unit 6c, 5 Talavera Road
Macquarie Park, NSW 2113
Sydney
Tel. +61(2) 98554300
Fax +61(2)9855 4301
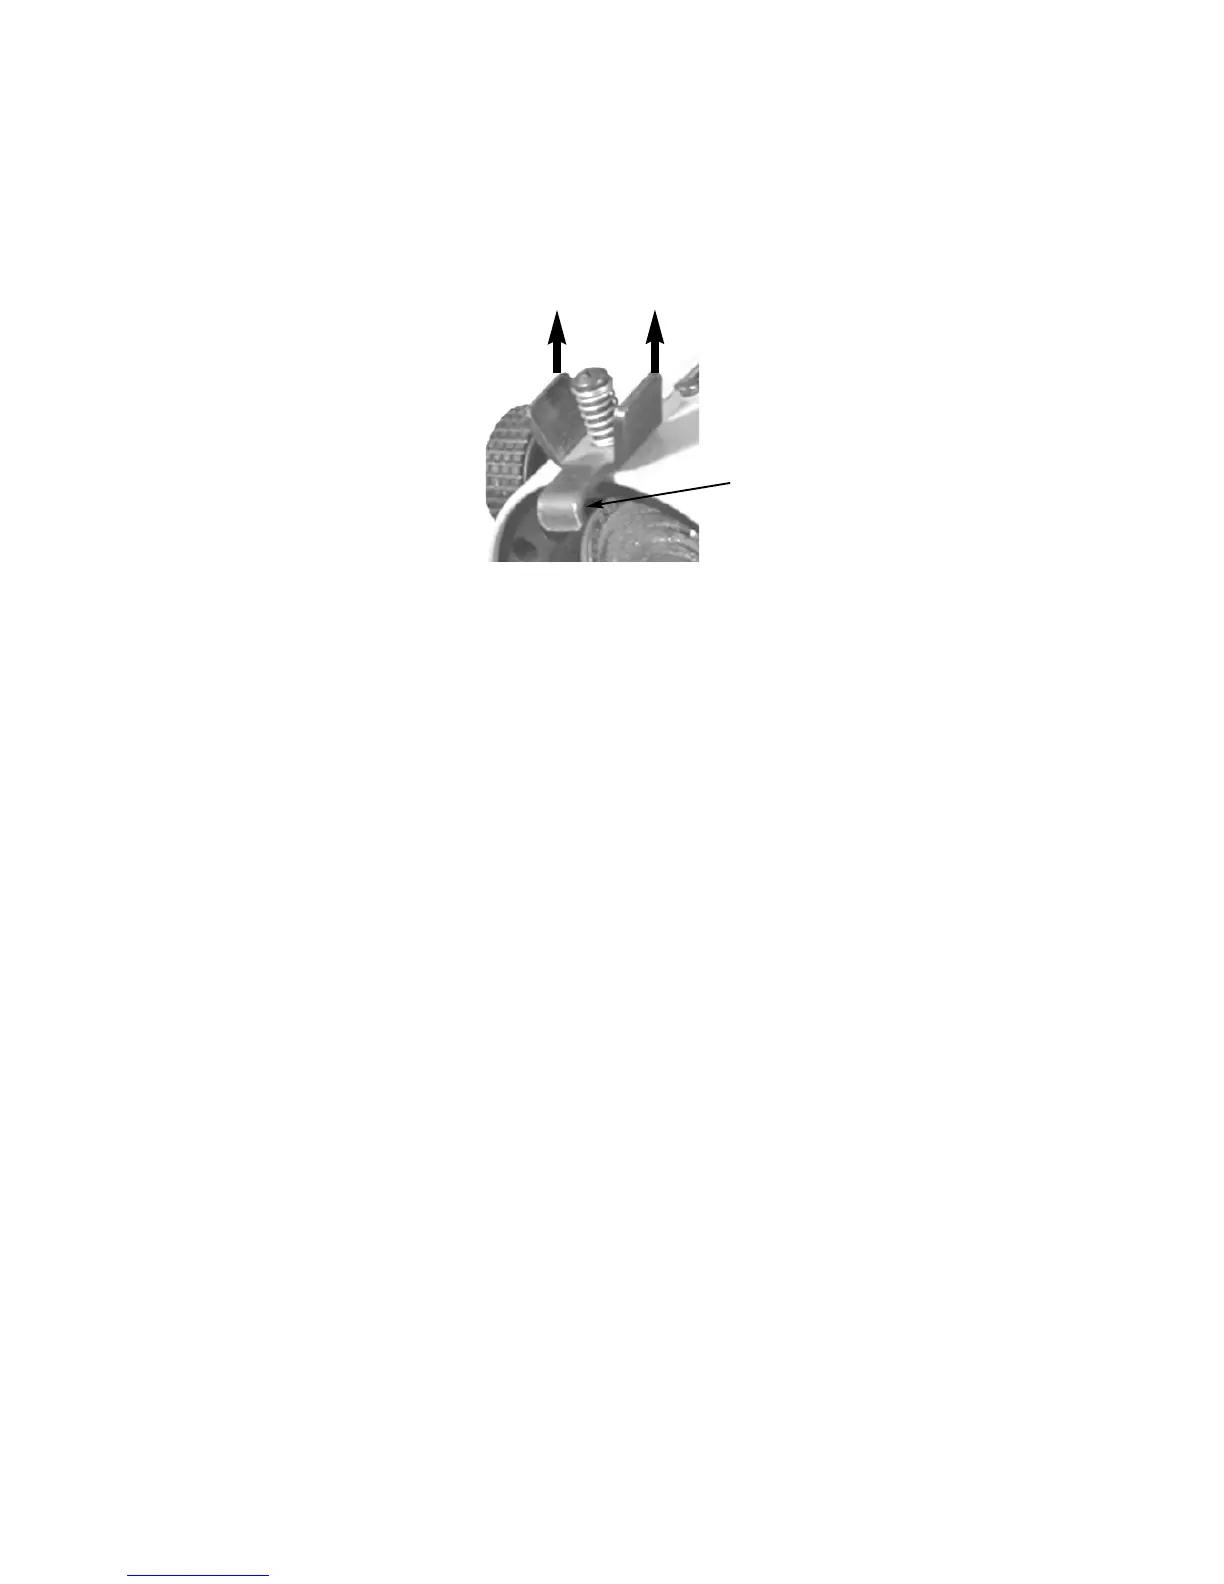
Einsetzen des Zubehörs:
z Das Einsetzen und Wechseln von Zubehör ist von einem
sicheren Stand aus durchzuführen.
z Torsicherung (9) gegen den Federdruck anheben und um 90°
nach links schwenken.
z Zubehör wie z.B. Flügeltor, Tubus, Filter in den Einschub der
Halteklauen einsetzen (siehe unten).
z Torsicherung (9) gegen den Federdruck anheben und um 90°
zurückschwenken, um das Zubehör zu sichern.
z VORSICHT! Den Scheinwerfer nicht bei geschlossenem Tor
einsetzen! Gefahr der Überhitzung.
Inserting Accessories:
z Inserting and exchanging accessories must be carried out from
a stable position.
z Lift the top latch (9) and turn it by 90° to the left.
z Insert accessories, e.g. barndoor, snoot or filter into the
bracket (see below).
z Lift the top latch (9) and turn it back into original position. Make
sure the accessories are securely locked.
z CAUTION! Do not operate the lampead with closed barndoor!
Danger of overheating.
Torsicherung / top latch (9)
Einschub Halteklaue/
accessory bracket
 Loading...