www.arubanetworks.com
1344 Crossman Avenue
Sunnyvale, California 94089
Phone: 408.227.4500
Fax 408.227.4550
Aruba Instant | Quick Start Guide
Part Number 0511764-01 | April 2015
Aruba Instant
Quick Start Guide
Contacting Support
Main Site http://www.arubanetworks.com
Support Site https://support.arubanetworks.com
Airheads Social Forums and Knowledge Base community.arubanetworks.com
North American Telephone 1-800-943-4526 (Toll Free)
1-408-754-1200
International Telephones arubanetworks.com/support-services/aruba-support-
program/contact-support/
Software Licensing Site licensing.arubanetworks.com/login.php
Wireless Security Incident
Response Team (WSIRT)
arubanetworks.com/support/wsirt.php
Support Email Addresses
Americas and APAC support@arubanetworks.com
EMEA emea.support@arubanetworks.com
Americas and APAC Support Email support@arubanetworks.com
WSIRT Email
Please email details of any security
problem found in an Aruba product.
wsirt@arubanetworks.com
Copyright
© 2015 Aruba Networks, Inc. All rights reserved. Aruba Networks®, Aruba NetworksTM (stylized), People
Move Networks Must Follow®, Mobile Edge Architecture®, RFProtect®, Green Island®, ClientMatch®, Aruba
Central®, Aruba Mobility Management System™, ETips™, Virtual Intranet Access™, Aruba Instant™,
ArubaOS™, xSec™, ServiceEdge™, Aruba ClearPass Access Management System™, AirMesh™, AirWave™,
Aruba@Work™, Cloud WiFi™, Aruba Cloud™, Adaptive Radio Management™, Mobility-Defined Networks™,
Meridian™ and ArubaCareSM are trademarks of Aruba Networks, Inc. registered in the United States and
foreign countries. Aruba Networks, Inc. reserves the right to change, modify, transfer or otherwise revise
this publication and the product specifications without notice.
Open Source Code
Certain Aruba products include Open Source software code developed by third parties, including software
code subject to the GNU General Public License (GPL), GNU Lesser General Public License (LGPL), or other
Open Source Licenses. Includes software from Litech Systems Design. The IF-MAP client library copyright
2011 Infoblox, Inc. All rights reserved. This product includes software developed by Lars Fenneberg et al. The
Open Source code used can be found at this site:
http://www.arubanetworks.com/open_source
Legal Notice
The use of Aruba Networks, Inc. switching platforms and software, by all individuals or corporations, to
terminate other vendors’ VPN client devices constitutes complete acceptance of liability by that individual or
corporation for this action and indemnifies, in full, Aruba Networks, Inc. from any and all legal actions that
might be taken against it with respect to infringement of copyright on behalf of those vendors.
Warranty
This hardware product is protected by the standard Aruba warranty of one year parts/labor. For more
information, refer to the ARUBACARE SERVICE AND SUPPORT TERMS AND CONDITIONS.
For information on the AP LED status indicators, see the AP Installation
Guide provided with the IAP package.
Verifying Status Using Instant UI
To verify that the wireless network is available and the SSID is broadcasted,
perform the following steps:
1. Verify that the newly created network is displayed in the Networks
window.
2. Disconnect the client from instant, the default provisioning network
to which your client system is connected.
3. Connect your client to the newly created network.
4. Log in to the Instant UI with the administrator credentials. The
instant provisioning network is automatically deleted and will no
longer be available.
Converting an IAP
You can convert an IAP to operate as a Campus AP or Remote AP managed
by an Aruba Mobility Controller. To convert an IAP through the Instant UI,
perform the following steps:
1. Log in to the Instant UI with the administrator credentials.
2. Click the Maintenance link at the top right corner of the Instant main
window.
3. Click the Convert tab.
4. Based on your requirement, select an appropriate option from the
Convert one or more Access Points to drop-down menu.
5. Enter the IP address of the Mobility Controller.
6. Click Convert Now. The IAP reboots and begins operating in the mode
that you configured.
To convert an IAP from a controller-managed mode to Instant mode,
manually reset the IAP.
For more information on the IAP conversion process, see the Aruba Instant
User Guide.
IAP-214/215 ENET: Indicates uplink connection.
IAP-224/225 ENET0: Indicates uplink connection.
ENET1: Indicates wired downlink connection.
NOTE: When operating on 802.3af, only the port connected
to power is usable. For example, if the source of power is
connected to ENET 0, ENET 1 will not work.
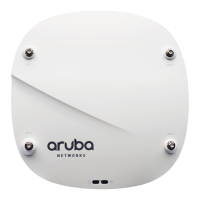
IAP-274/275
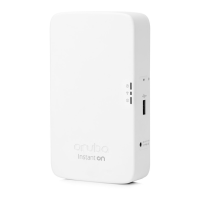
IAP-277
IAP-228
The IAP-274/275, IAP-277, and IAP-228 are equipped with
two Gigabit Ethernet ports, which are referred to as WAN
and LAN ports for Ethernet connectivity.
The WAN port supports 802.3at Power over Ethernet (PoE),
accepting 48 VDC (nominal) as a standard defined Powered
Device (PD) from a Power Sourcing Equipment (PSE) such as
a PoE midspan injector.
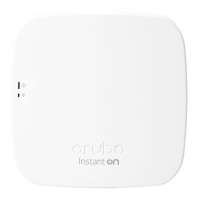
IAP-114/115
IAP-103
ENET: Indicates uplink connection.
IAP-205H does not display Ethernet link status, but includes two
LED indicators that display AP status and the POE PSE power
status.
Table 1 Ethernet Ports
IAP Model Ethernet Ports
To reset an IAP, press and hold the reset button using a small and
narrow object such as a paper clip. Power on the IAP without
releasing the reset button. The power LED flashes within five
seconds indicating that the reset is completed.