EasyManua.ls Logo

Ashford RIGID HEDDLE LOOM User Manual

Ashford RIGID HEDDLE LOOM
6 pages
To Next Page IconTo Next Page
Page #1 background imageLoading...
Page #1 background image
Ashford Guarantee
Thank you for purchasing this Ashford product. In the unlikely event there is
any fault in manufacture we will replace the item. To validate our guarantee
please visit our website or write to us.
Ashford Handicrafts Limited
Factory and Showroom: 415 West Street
PO Box 474, Ashburton 7700 New Zealand
Telephone 64 3 308 9087 Facsimile 64 3 308 8664
Email: sales@ashford.co.nz Internet: www.ashford.co.nz
INSTRUCTIONS
ASHFORD RIGID HEDDLE LOOM
40cm (16"), 60cm (24"), 80cm (32"), 120cm (48")
RH030913V8
Question and Answer IconNeed help?

Do you have a question about the Ashford RIGID HEDDLE LOOM and is the answer not in the manual?

Ashford RIGID HEDDLE LOOM Specifications

General IconGeneral
AssemblyRequired
TypeRigid Heddle Loom
MaterialBeechwood
Included Accessories2 x shuttles, threading hook
Heddle7.5dpi (30/10cm)

Summary

Ashford Rigid Heddle Loom Assembly Instructions

Tools and Preparation

Lists required tools for assembly and provides preparatory advice, including sanding and wood waxing.

Step 1: Attach Reed Support Blocks

Attaches the reed support blocks to the loom sides using 38mm screws.

Step 2: Install Clicker Pins

Taps the clicker pins for the pawls into the bottom of the holes in the right loom side.

Step 3: Attach Pawls

Secures the pawls to the loom side with 30mm bolts, ensuring the clicker pin aligns correctly.

Step 4: Attach Rails and Rollers

Attaches front and back rails to the left side and inserts rollers into both sides.

Step 5: Install Cogs

Places cogs onto the ends of the rollers, checking tooth engagement with pawls, and secures them.

Step 6: Attach Handles

Connects the handles to the cogs by aligning pins and securing them with a sharp hit.

Step 7: Connect Warp Sticks

Connects warp sticks to the roller using warp stick ties, pushing the arrow head through.

Step 8: Position Reed

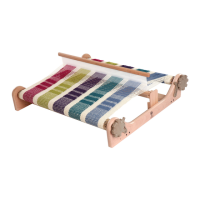
Locates the reed into the rest position of the reed support blocks.

Step 9: Assemble Warping Pegs and Clamps

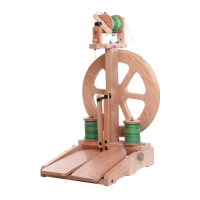
Assembles the warping peg and clamps for the warping process.

Related product manuals