Rev 1 Page 129
Pick-a-Point
Normally, the value of the characteristic for the piece is determined by the algorithm in the data collector
based on the torque type selected in the gage configuration. Use Pick-a-Point to select any point from the
torque curve to enter as the data value. The pick-a-point feature can be used for any port where the
Gage configuration uses Peak, Breakaway, or Restart, and where Pick-a-Point has been turned on for the
gage setup.
Steps
1. Make sure that Pick-a-Point is set to ON in the gage configuration.
2. Use the gage to take a reading as part of the normal data collection process.
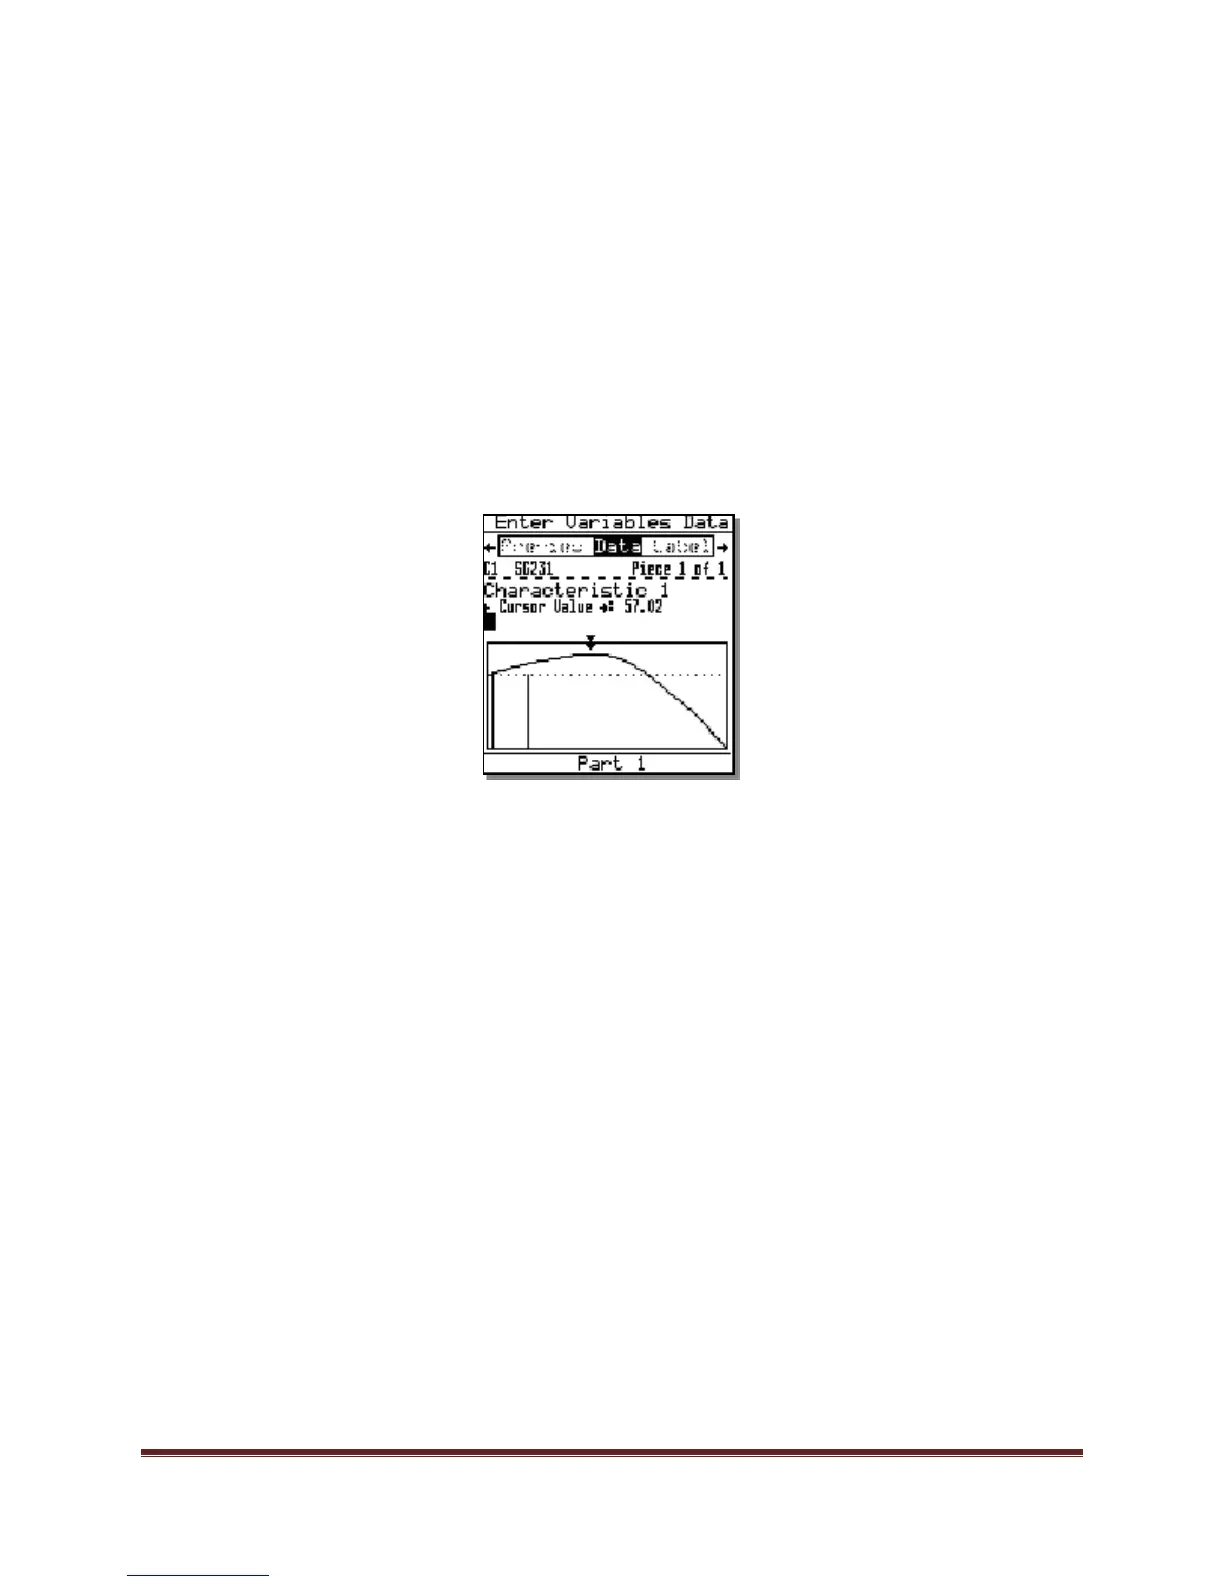
The data collector displays the torque curve in the data collection window instead of storing
the reading. The data value is indicated by a set of cursors:
You can accept the value indicated, continue to take readings, or use the arrow keys to
move the cursor to the point on the curve that you want to record.
The value shown in the Cursor Value reflects the lower cursor position.
The upper cursor marks the original reading selected by the 501 system.
3. Press <Enter> to accept the value shown by the Cursor Value.
Multiple Points
When measuring more than one characteristic in an Auto Scan sequence with pick-a-point
enabled, you can pick a different point for each characteristic. As force is applied to the
transducer, the angle of rotation is recorded when the applied torque achieves “snug.” As
rotation continues, the operator will be alerted (by a “let go tone”) when the amount of rotation
exceeds the lower spec limit for C2.
Note: If the second characteristic source has the format ‘Gxn{y}’ where y is an angle value in
degrees, y will be substituted as the ‘nice’ alarm threshold instead of the characteristic’s low
limit.
 Loading...