EasyManua.ls Logo

ASI DOORS 209 - User Manual

Default Icon
79 pages
Print Icon
To Next Page IconTo Next Page
Loading...
MANUAL PART #: A
OWNER’S MANUAL
MODEL 
Full Aluminum
MODEL 
Full Vision

Questions and Answers

  • M
    Manuel HowardAug 2, 2025
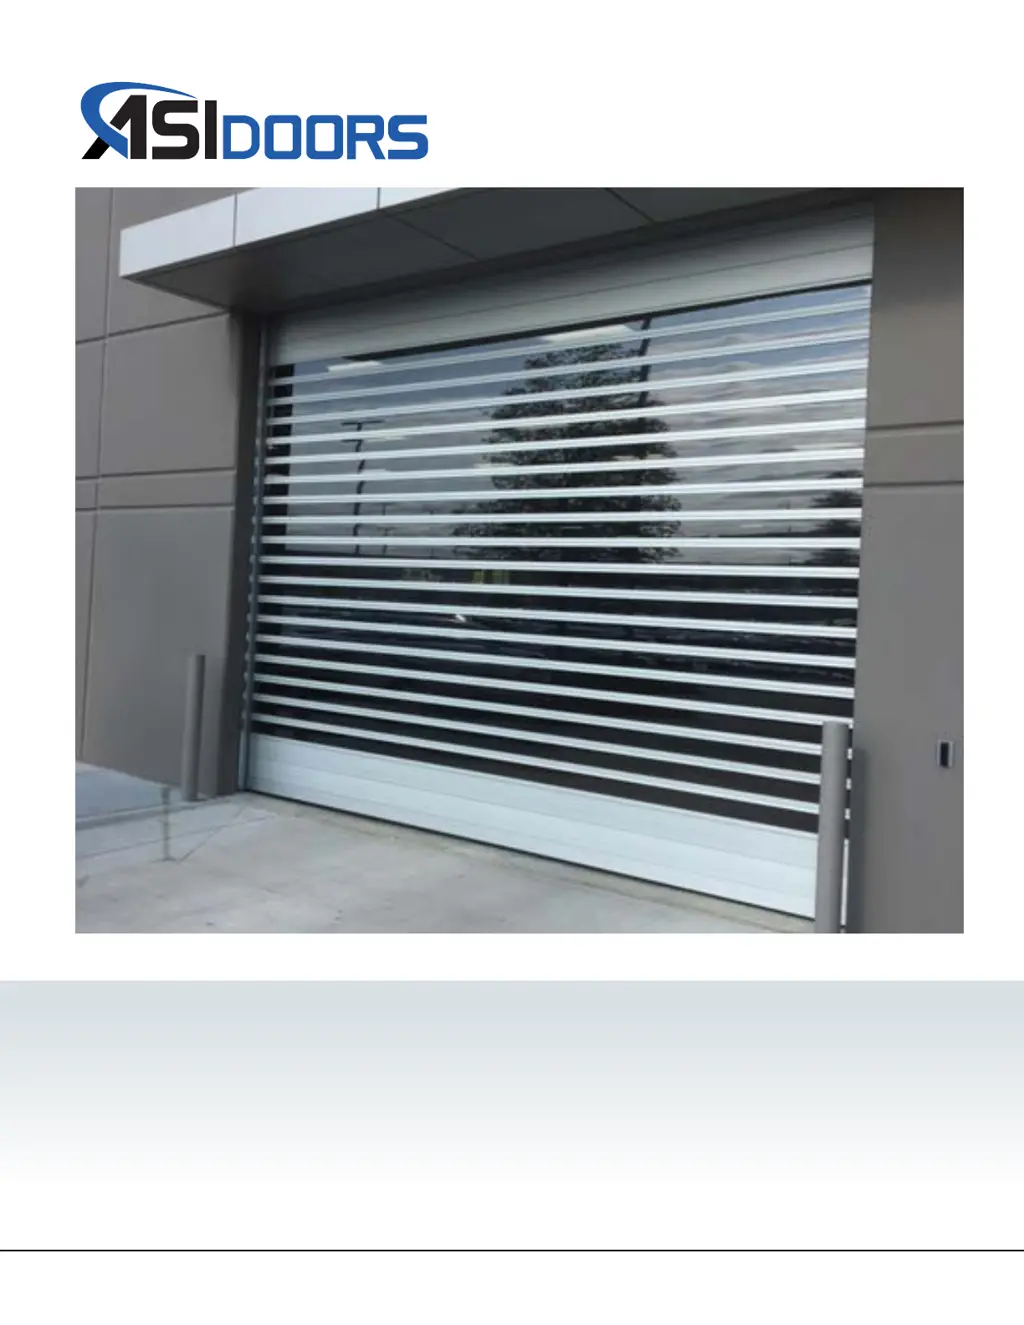
    Why ASI DOORS Garage Door Opener motor will not start?
    • D
      daniel28Aug 2, 2025
      The motor might not start due to several reasons. It could be due to no power, so check power switches, fuses, and connections, and verify the 3-phase voltage at the operator. Another cause could be the control circuit breaker tripping while stopping, so reset it and determine the cause. Other potential issues include being wired for the wrong voltage (check the transformer, motor, and overload relay for proper wiring), a loose or disconnected wire (check wiring and connections), a defective actuator (check the actuator and wiring with an ohmmeter), or being in manual mode (set chains to auto mode).
  • D
    David AndersonAug 6, 2025
    What to do if ASI DOORS Garage Door Opener motor runs but lacks power?
    • S
      Sarah GarrettAug 6, 2025
      If the motor runs but lacks power, it could be due to single phasing. Check the power supply and verify the 3-phase voltage, and also check the contactor/motor wiring. Alternatively, a fuse might be blown, in which case you should replace the fuse.
  • S
    Steven BarkerAug 10, 2025
    Why ASI DOORS Garage Door Opener door does not stop consistently?
    • A
      Ashley HartAug 10, 2025
      Inconsistent stopping can occur if the brake lining is completely worn, requiring replacement of the brake assembly. It can also happen if the air gap has increased to the point where adjusting nuts are up tight, requiring a brake reset.
  • C
    Christopher YoungAug 14, 2025
    What to do if ASI DOORS Garage Door Opener brake does not disengage or limits vary?
    • J
      Jessica VazquezAug 14, 2025
      If the brake isn't disengaging or the limits vary, it could be due to the wrong voltage on the rectifier module; apply the correct voltage as indicated on the nameplate. Another reason could be a defective rectifier, which would need replacement. Also, check if the maximum permissible air gap has been exceeded due to brake lining wear; readjust the brake or replace the brake disc if the lining is completely worn out. A voltage drop in the line could also be the reason, so ensure the correct line voltage.
  • M
    Michael BrownAug 19, 2025
    Why ASI DOORS Garage Door Opener door closes and opens?
    • T
      Tiffany HayesAug 19, 2025
      If the door closes and then reopens, the reversing edge switch may be signaling to reopen. Check the lower limit and shorten the travel so the door does not hit at the bottom.
  • M
    Michael MarquezAug 23, 2025
    What causes inconsistent starting, stopping and reverse of ASI DOORS Garage Door Opener?
    • J
      Jeffery CampbellAug 23, 2025
      Inconsistent starting, stopping, and reversing could be due to a loose or poor connection. Check the connections in the control circuit.
  • N
    nicholasnewmanAug 28, 2025
    What to do if Reversing edge of ASI DOORS Garage Door Opener works on opening cycle instead of closing?
    • P
      Paul AllenAug 28, 2025
      If the reversing edge works on the opening cycle instead of closing, the phase sequence may be reversed. To correct this, shut off the power and change any two of the three line leads.

Summary

General Information

Safety Practices

Explains safety alert symbols (Danger, Warning, Caution, Note).

Warranty Policy

Outlines terms, conditions, and procedures for warranty claims.

Crates and Contents

Details items included in the shipment and unpacking instructions.

209 Manual Installation

Un-bolt Lifting Cradle

Instructions for removing the lifting cradle from the shipping crate.

Opening Measurements

Guidelines for measuring the door opening for proper fit.

Mounting Face Frames

Steps for attaching the face frames to the wall opening.

Mounting Face Frames Continued

Further steps for ensuring face frames are plumb and level.

Mounting Face Frames Continued

Details on leveling face frames and ensuring proper orientation.

Mounting Header Assembly

Steps for lifting and mounting the header assembly onto face frames.

Mounting Header Assembly Continued

Securing the header assembly to the face frames and removing lifting supports.

Unroll Curtain

Procedures for unrolling the curtain and aligning it in the face frames.

Unroll Curtain Continued

Adjusting the curtain for proper alignment and leveling.

Light Curtains & Photo-Eyes

Installation of light curtains and photo-eyes, including wiring.

Mounting Face Frame Covers

Steps for installing the face frame covers after curtain adjustment.

Mounting Chain Bracket

Instructions for mounting the chain lock bracket.

Mounting Spreader Support Gusset

Procedures for mounting spreader support gussets.

Routing Sensor Wires

Guides for routing sensor wires to the control box.

Routing Sensor Wires Continued

Further details on routing sensor wires from various locations.

Wiring Layout

General wiring diagram for power and signal connections to the control box.

Wiring Layout Continued

Side and motor connection details for electrical routing.

Mounting Lintel Seal

Instructions for installing the lintel seal for top opening seal.

Mounting Lintel Seal Continued

Details on positioning and securing the lintel seal.

Shroud Installation

Steps for mounting shroud components.

Shroud Installation Continued

Mounting shroud supports and extrusions.

Shroud Installation Continued

Installing shroud panels and corner extrusions.

Shroud Installation Continued

Completing shroud installation with end covers.

Shroud Installation Continued

Mounting end covers and removing protective coating.

Electrical Start-Up

Describes control box components and their functions.

Electrical Start-Up Continued

Details controller features and terminal connections.

Electrical Start-Up Continued

Explains controller features like buttons, connectors, and connections.

Controller Functions

Overview of controller power-up sequence and menu navigation.

Controller Functions Continued

Details the controller menu structure and navigation.

Controller Functions Continued

Explains the Express Menu options for parameter adjustment.

Controller Functions Continued

Describes various timer functions and safety features.

Setting Door Limits

Step-by-step guide for setting door open and close limits.

Warning Labels

Instructions for inspecting and mounting warning labels.

Pair Transmitter & Controller

Procedure for pairing the wireless transmitter with the controller.

Maintenance

Cleaning Procedures

Guidelines for cleaning acrylic windows and general door maintenance.

Preventative Maintenance

Table outlining daily, monthly, and quarterly inspection tasks.

Preventative Schedules

Detailed descriptions of daily, monthly, and quarterly maintenance tasks.

Troubleshooting

Table of common problems, probable causes, and corrective measures.

Error Codes

Explains how error codes are displayed and categorized.

Error Codes Continued

Lists inverter error codes, their causes, and corrective actions.

Error Codes Continued

Lists door control error codes, their causes, and corrective actions.

Error Codes Continued

Lists door control error codes, their causes, and corrective actions.

Error Codes Continued

Lists option error codes and error code priority levels.

Replacement Parts

Instructions for Ordering

Guidance on how to identify and order replacement parts.

Door Identification

Explains how to identify the door using labels and tags.

Left Hand Face Frame

Exploded view and parts list for the left-hand face frame assembly.

Right Hand Face Frame

Exploded view and parts list for the right-hand face frame assembly.

Header Assemblies

Exploded view and parts list for header assemblies.

Gear Motor Assembly

Exploded view and parts list for the gear motor assembly.

Curtain Assembly

Exploded view of the curtain assembly.

Curtain Assembly Continued

Detailed parts list for the curtain assembly.

Addendum Bulletins

Hybrid and Adjustable Link Assembly Replacement

Bulletin on replacing hybrid and adjustable link assemblies.

Installation

Procedures for installing adjustable and hybrid link assemblies.

Unattached Link Assemblies from Slat Wheel

Instructions for unattaching existing link assemblies.

Rotate Barrel Assebly

Steps for manually rotating the barrel assembly.

Drill Access Holes

Instructions for drilling access holes in header plates.

Remove Old Link Assemblies

Procedures for removing existing adjustable and hybrid link assemblies.

Attach New Link Assemblies

Steps for attaching new hybrid and adjustable link assemblies.

Attach New Link Assemblies Continued

Attaching new link assemblies to the slat wheel.

Reversing Edge and Wireless Transmitter Replacement

Bulletin on replacing reversing edge and wireless transmitter.

Installation

Initial steps for replacing reversing edge or wireless transmitter.

Remove Bottom Bar Assembly

Instructions for removing the bottom bar assembly.

Wireless Transmitter

Procedure for removing and preparing the wireless transmitter.

Replace Reversing Edge

Steps for removing the existing reversing edge.

Replace Reversing Edge Continued

Connecting and routing wires for the new reversing edge.

Pair Transmitter & Controller

Procedure for pairing the transmitter and controller.

Re-Install Bottom Bar

Instructions for re-installing the bottom bar assembly.

Re-Install Bottom Bar Continued

Ensures proper seating of the gasket in the bottom bar.

Slat & Hinge Gasket Replacement

Bulletin on replacing slat and hinge gaskets.

Remove Slats & Gaskets

Instructions for removing damaged slats and hinge gaskets.

Remove Slats & Gaskets Continued

Steps for removing hinge gaskets and screws from end cap links.

Remove Slats & Gaskets Continued

Method for removing a slat, with options for tight fits.

Install Slats

Steps for orienting and installing new slats.

Install Hinge Gaskets

Instructions for installing new hinge gaskets into slat channels.

ASI DOORS 209 Specifications

General IconGeneral
BrandASI DOORS
Model209
CategoryGarage Door Opener
LanguageEnglish