sales@aspenpumps.com www.aspenpumps.com
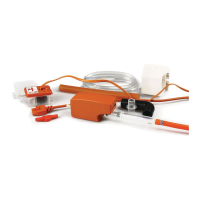
mini orange pump
INSTRUCTION GUIDE
•
Designed to be installed above a
false ceiling where possible, behind
wall-mounted evaporators or
in the plastic conduit
•
Quick and easy to install
•
The Mini Orange will quietly and
reliably pump condensation water
to a maximum height of 8 metres
•
Two reservoir options supplied
for installation flexibility
Thank you for buying your new Mini Orange Pump.
This manual gives instructions on the correct installation, so it is important that you follow these
instructions carefully. Please record the following information for your future reference:
Serial No.:
Date installed:
Location of pump:
Servicing:
• This Pump, like all mechanical equipment, requires maintenance.
• Every six months the reservoir should be removed, taking care to clean the filters
and reservoir thoroughly. We recommend this is done in the Spring and the
Autumn, using an anti-bacterial wash.
•Take great care to replace the reservoir horizontally.
Aspen Pumps Limited, Apex Way, Hailsham, East Sussex, BN27 3WA, United Kingdom
Email: sales@aspenpumps.com Web: www.aspenpumps.com
Tel: +44 (0) 1323 848 842 Fax: +44 (0) 1323 848 847
Troubleshooting:
Fault: The Pump runs all the time.
1. Is the float positioned with the magnet uppermost?
2. Is the reservoir lid (sensor) located firmly onto the reservoir, with the float located
inside the reservoir, around the sensor column?
3. Is the plug at the end of the sensor cable correctly inserted into the pump case,
and are the plug/socket terminals dry?
4. Is there any sludge inside the reservoir, preventing the float from resting on the
bottom? (This may be the case if the pump has been in operation for some time.
Clean using an anti-bacterial wash).
5. Is the pump overwhelmed with the volume of condensation? (If so, a larger
pump is required).
Please note:
• After installation and during operation, if you notice air in the pipe between the
reservoir and the pump, you have a siphoning problem (see page 4).
•The pump will only switch off when the float is resting flat on the bottom of
the reservoir.
Fault: The Pump stops and starts, and makes a loud noise.
1. The water is siphoning back through the pump. Follow advice on page 4 to
prevent back siphoning.
Fault: The Pump runs but does not pump any water.
1. Are there any air-leaks in the pipe between the reservoir and the pump?
(Use cable ties to ensure an airtight seal).
2. Are the reservoir and the inlet tube free from sludge and debris?
Fault: The Pump isn't operating at all.
1. Is power reaching the pump? Is it correctly wired? Is the voltage correct?
2. Is the pump very hot? A thermal cut-out may have been activated, which
will reset automatically once the pump has cooled down.