45
ASRock P67 Pro3 Motherboard
Deutsch
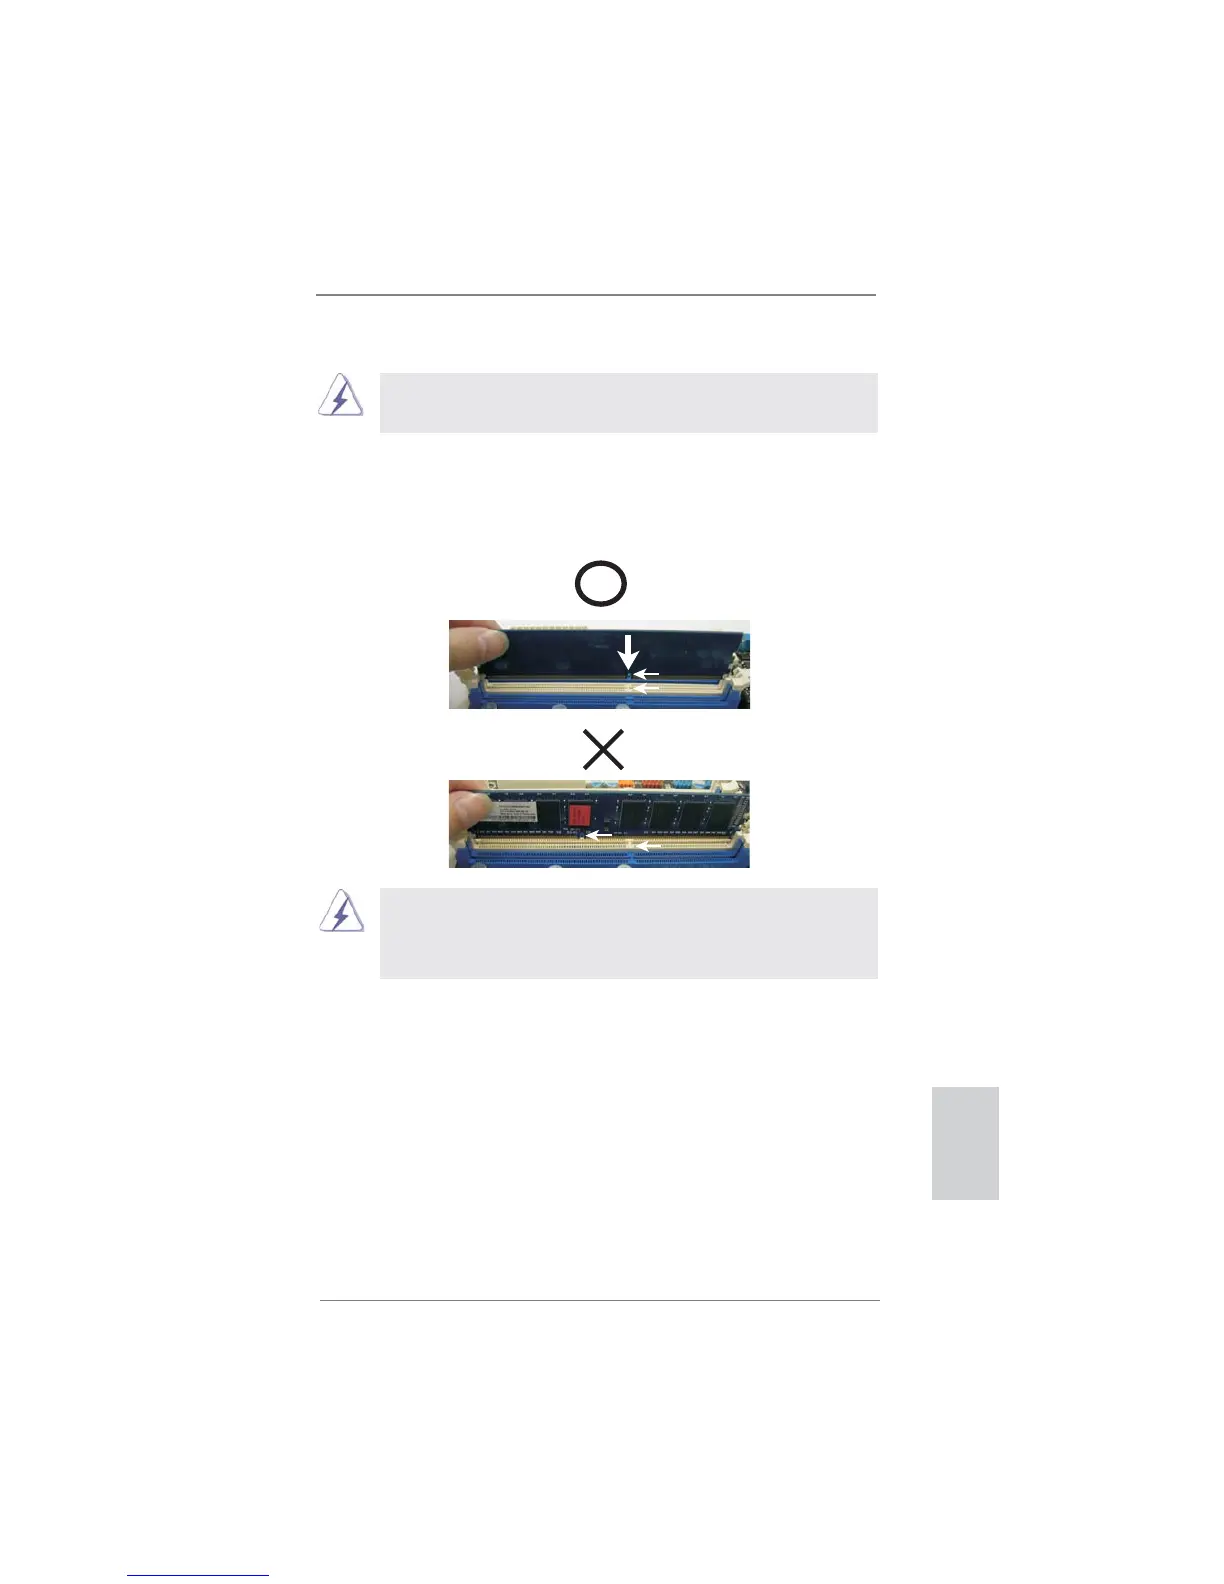
Die DIMM-Module passen nur richtig herum eingelegt in die Steckplät-
ze. Falls Sie versuchen, die DIMM-Module mit Gewalt falsch herum
in die Steckplätze zu zwingen, führt dies zu dauerhaften Schäden am
Mainboard und am DIMM-Modul.
Schritt 3: Drücken Sie die DIMM-Module fest in die Steckplätze, so dass die
Halteklammern an beiden Enden des Moduls einschnappen und das
DIMM-Modul fest an Ort und Stelle sitzt.
Einsetzen eines DIMM-Moduls
Achten Sie darauf, das Netzteil abzustecken, bevor Sie DIMMs oder
Systemkomponenten hinzufügen oder entfernen.
Schritt 1: Öffnen Sie einen DIMM-Slot, indem Sie die seitlichen Clips nach außen
drücken.
Schritt 2: Richten Sie das DIMM-Modul so über dem Slot aus, dass das Modul
mit der Kerbe in den Slot passt.
notch
break
notch
break
 Loading...