66
ASRock P67 Pro3 Motherboard
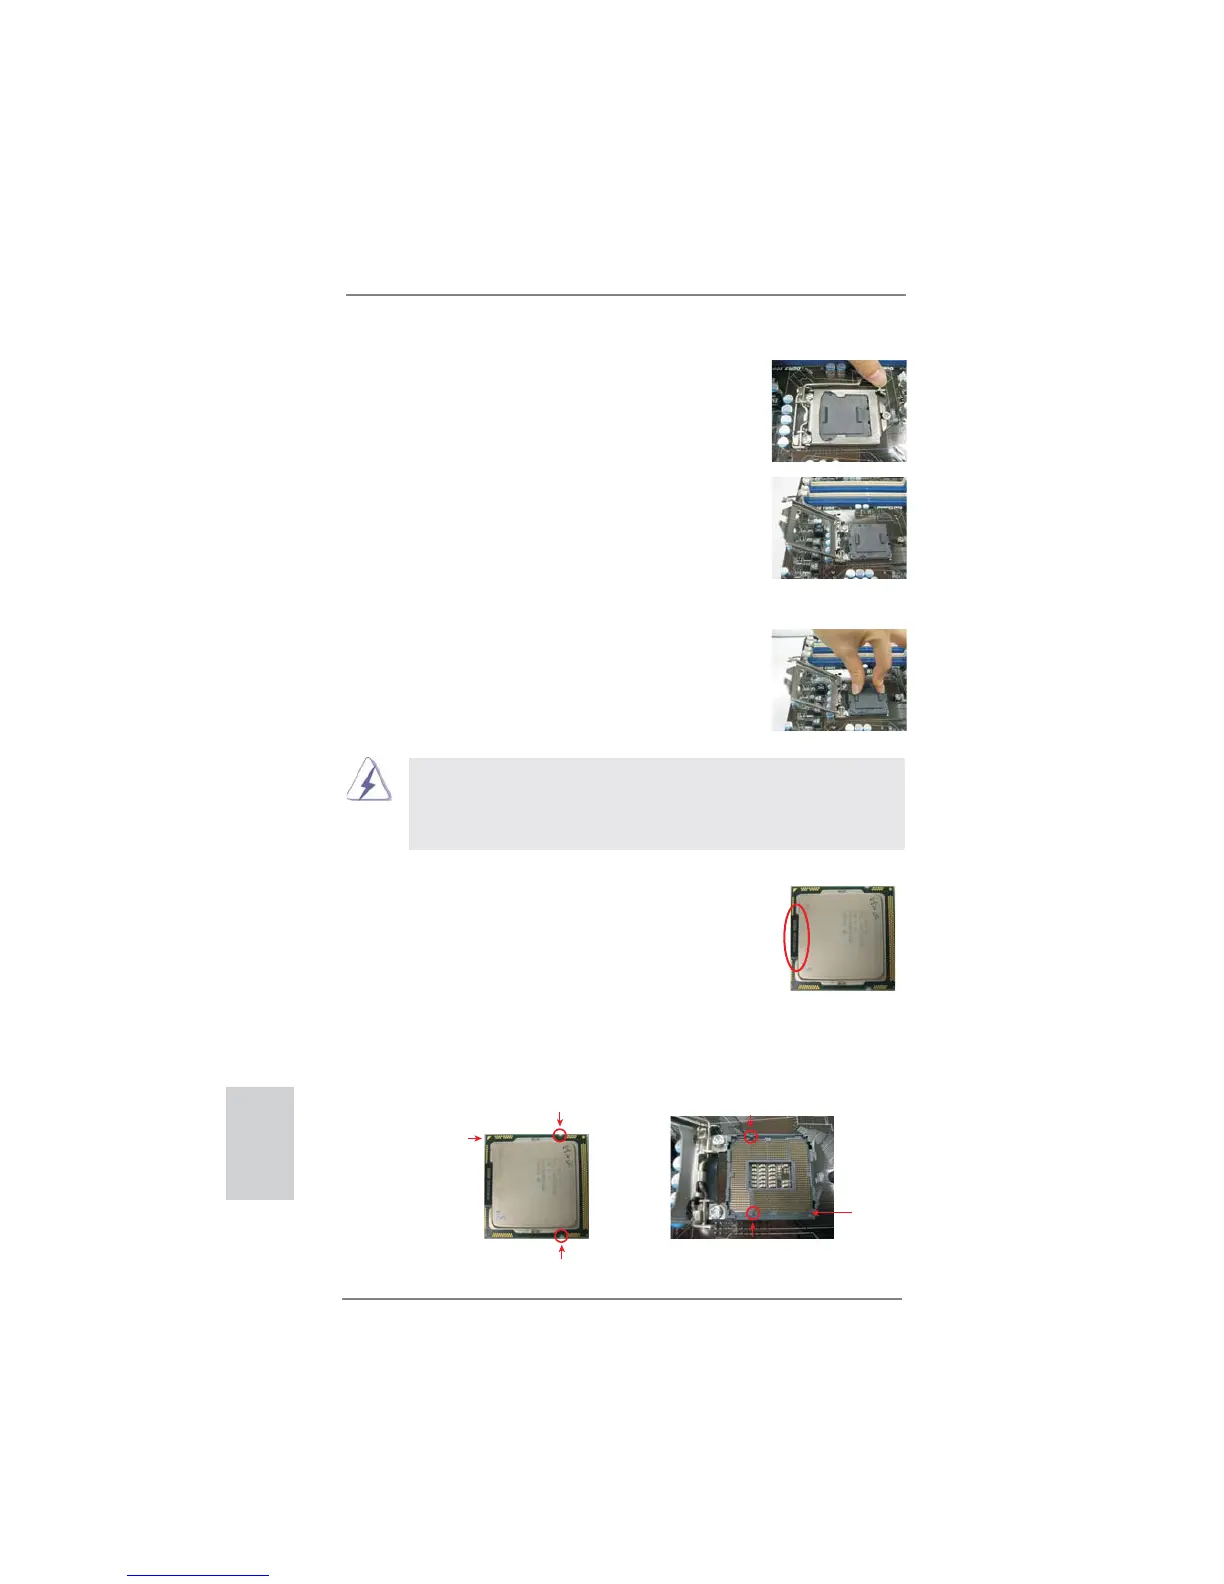
Etape 1. Ouvrez le socle :
Etape 1-1. Dégagez le levier en appuyant sur
le crochet et en le faisant ressortir
pour dégager la languette de rete-
nue.
Etape 1-2. Faites tourner le levier de charge-
ment en position ouverte maximum
à 135 degrés.
Etape 1-3. Faites pivoter la plaque de charge-
ment pour l’ouvrir au maximum à
environ 100 degrés.
Etape 2. Enlevez le capuchon PnP (Pick et Place).
1. Il est recommandé d’utiliser la languette du capuchon ; évitez
de faire sortir le capuchon PnP.
2. Ce capuchon doit être mis en place si vous renvoyez la carte
mère pour service après vente.
Etape 3. Insérez le processeur 1155 broches :
Etape 3-1. Tenez le processeur par ses bords
là où se trouvent des lignes noires.
Etape 3-2. Orientez le paquet avec le dissipa-
teur thermique intégré (IHS) vers
le haut. Repérez la broche 1 et les
deux encoches d’orientation.
Encoche d’orientation
broche 1
Processeur 1155 broches
Encoche d’orientation
Socket 1155 broches
Détrompeur
Détrompeur
Ligne noire
broche 1
Français
 Loading...