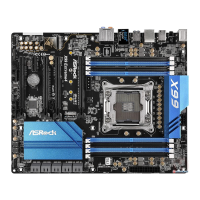
Do you have a question about the ASROCK X79 Extreme9 and is the answer not in the manual?
| ECC | No |
|---|---|
| Non-ECC | Yes |
| Memory channels | Quad-channel |
| Number of memory slots | 8 |
| Supported memory types | DDR3-SDRAM |
| Maximum internal memory | 64 GB |
| Supported memory clock speeds | 1066, 1333, 1600, 1866, 2133, 2400 MHz |
| Processor socket | LGA 2011 (Socket R) |
| Processor manufacturer | Intel |
| Compatible processor series | Intel Core i7, Intel Core i7 Extreme Edition |
| USB 2.0 connectors | 3 |
| Number of COM connectors | 1 |
| Number of SATA II connectors | 4 |
| Number of Parallel ATA connectors | 0 |
| USB 3.2 Gen 1 (3.1 Gen 1) connectors | 2 |
| BIOS type | UEFI |
| ACPI version | 1.1 |
| BIOS memory size | 64 Mbit |
| USB 2.0 ports quantity | 6 |
| Certification | FCC, CE, WHQL, ErP/EuP Ready |
| Component for | PC |
| Audio output channels | 7.1 channels |
| Motherboard form factor | ATX |
| Compatible operating systems | Windows 7, Vista, XP |
| RAID levels | 0, 1, 5 |
| Supported storage drive interfaces | SATA II, SATA III |
| Cables included | SATA |
| Parallel processing technology support | 2-Way SLI, 3-Way SLI, Hybrid CrossFireX, Quad-GPU CrossFireX, Quad-GPU SLI |
| PCI Express x16 slots | 5 |
| PCI Express slots version | 3.0 |
| LAN controller | - |
| Networking features | 10/100/1000 Mbit/sec |
| Ethernet interface type | Gigabit Ethernet |
| Depth | 244 mm |
|---|---|
| Width | 305 mm |
Lists all items included in the motherboard package.
Details the technical specifications of the motherboard's platform, CPU, chipset, memory, expansion slots, audio, and LAN.
Instructions on how to use screw holes to secure the motherboard to the chassis.
Important safety and handling precautions before installing components to prevent damage.
Steps to install the ASRock Game Blaster card and its drivers onto the system.
Details the configuration options for the ASRock Game Blaster's audio features.
Guide for setting up graphics cards for SLI configurations.
Steps to install two NVIDIA SLI-ready graphics cards for multi-GPU performance.
Guide for setting up graphics cards for CrossFireX configurations.
Steps to install two AMD CrossFireX-ready graphics cards for multi-GPU performance.
Steps to install Windows XP/XP 64-bit operating systems without RAID configuration.
Introduction to the UEFI Setup Utility for system configuration and hardware settings.
Describes the menu bar options within the UEFI setup utility for navigation.
Settings related to CPU features and performance, such as Hyper-Threading and core control.
Settings for North Bridge related configurations in UEFI, like PCIe link speed and width.
Settings for South Bridge related configurations in UEFI, like ACPI, onboard devices, and power states.
UEFI settings for SATA modes, RAID configurations, and SMART features for storage devices.
UEFI settings for onboard serial and infrared ports.
UEFI settings related to ACPI power management features like Suspend to RAM.
UEFI settings for USB controllers, legacy support, and device configuration.
Information about the Intel ME Subsystem configuration settings.
Information on supported operating systems and general setup procedures.
Instructions on how to access and use the motherboard support CD to install drivers and utilities.
Describes the available device drivers on the support CD for system hardware.
Describes the applications and utilities available on the support CD.
