6
Automatic colour sequence : Selection from among eight programmes of colour sequences. Each programme is defined by
the duration of each colour and of the transition from one colour to another, according to the following table:
SEQUENCE
1
Red Green Blue
2 Cyan Purple Yellow
3 Green
Emerald
green
Cyan Sky-blue Blue Sky-blue Cyan
Emerald
green
4
Red Orange
Green
Orange
5 Red Magenta Blue Magenta
6
Red Orange
Green
Cyan Blue Magenta
7
Pale
Violet
Purple Cyan Yellow White Yellow Cyan Purple
8 Red Green Blue Yellow Cyan Purple
Pale
Violet
Sky-blue Orange Magenta
Emerald
green
White
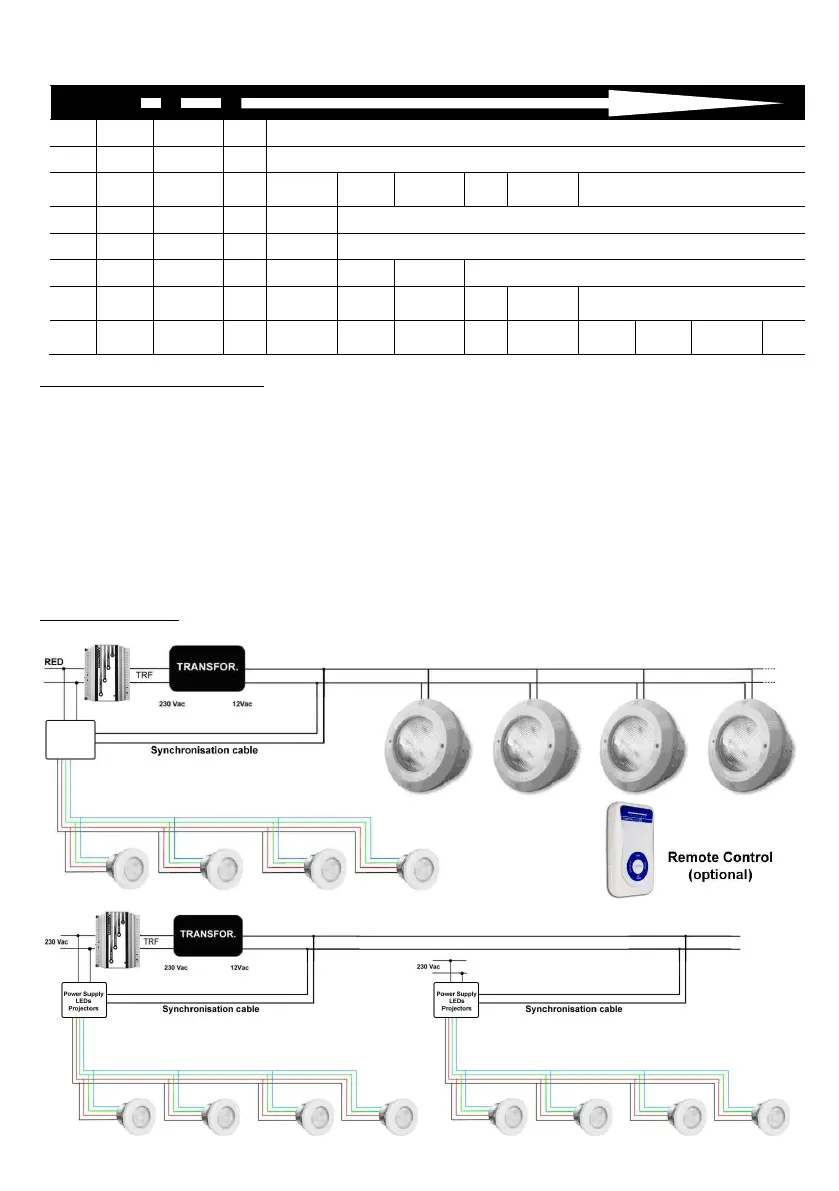
6.2.3. Electrical connection diagram
In both TOP and ECO configurations, two cables should be connected in the two 12VCA terminals of the power supply in
parallel with any spotlight (12 V Mains), as if it were another Colorplus spotlight.
The power supply will therefore interpret the signal received and will perform the same functions as the Colorplus
spotlights.
To control the projectors with a modulator and/or remote control, connect the synchronism cable from the output of a 12V
transformer to the power supply. The 12V of the transformer itself can feed large projectors (if there are any), or the 12V of
a 50W transformer or more, in cases of installations with Micro projectors only.
** Attention: The pushbutton of the power supply has operation priority and should be disconnected if used jointly with the
Colorplus series of spotlights. If it is not disconnected, the spotlights will not work correctly.
Colorplus TOP diagram
Power supply
Mini LED
projectors