3
4
4
.
.
M
M
E
E
N
N
U
U
S
S
&
&
I
I
C
C
O
O
N
N
S
S
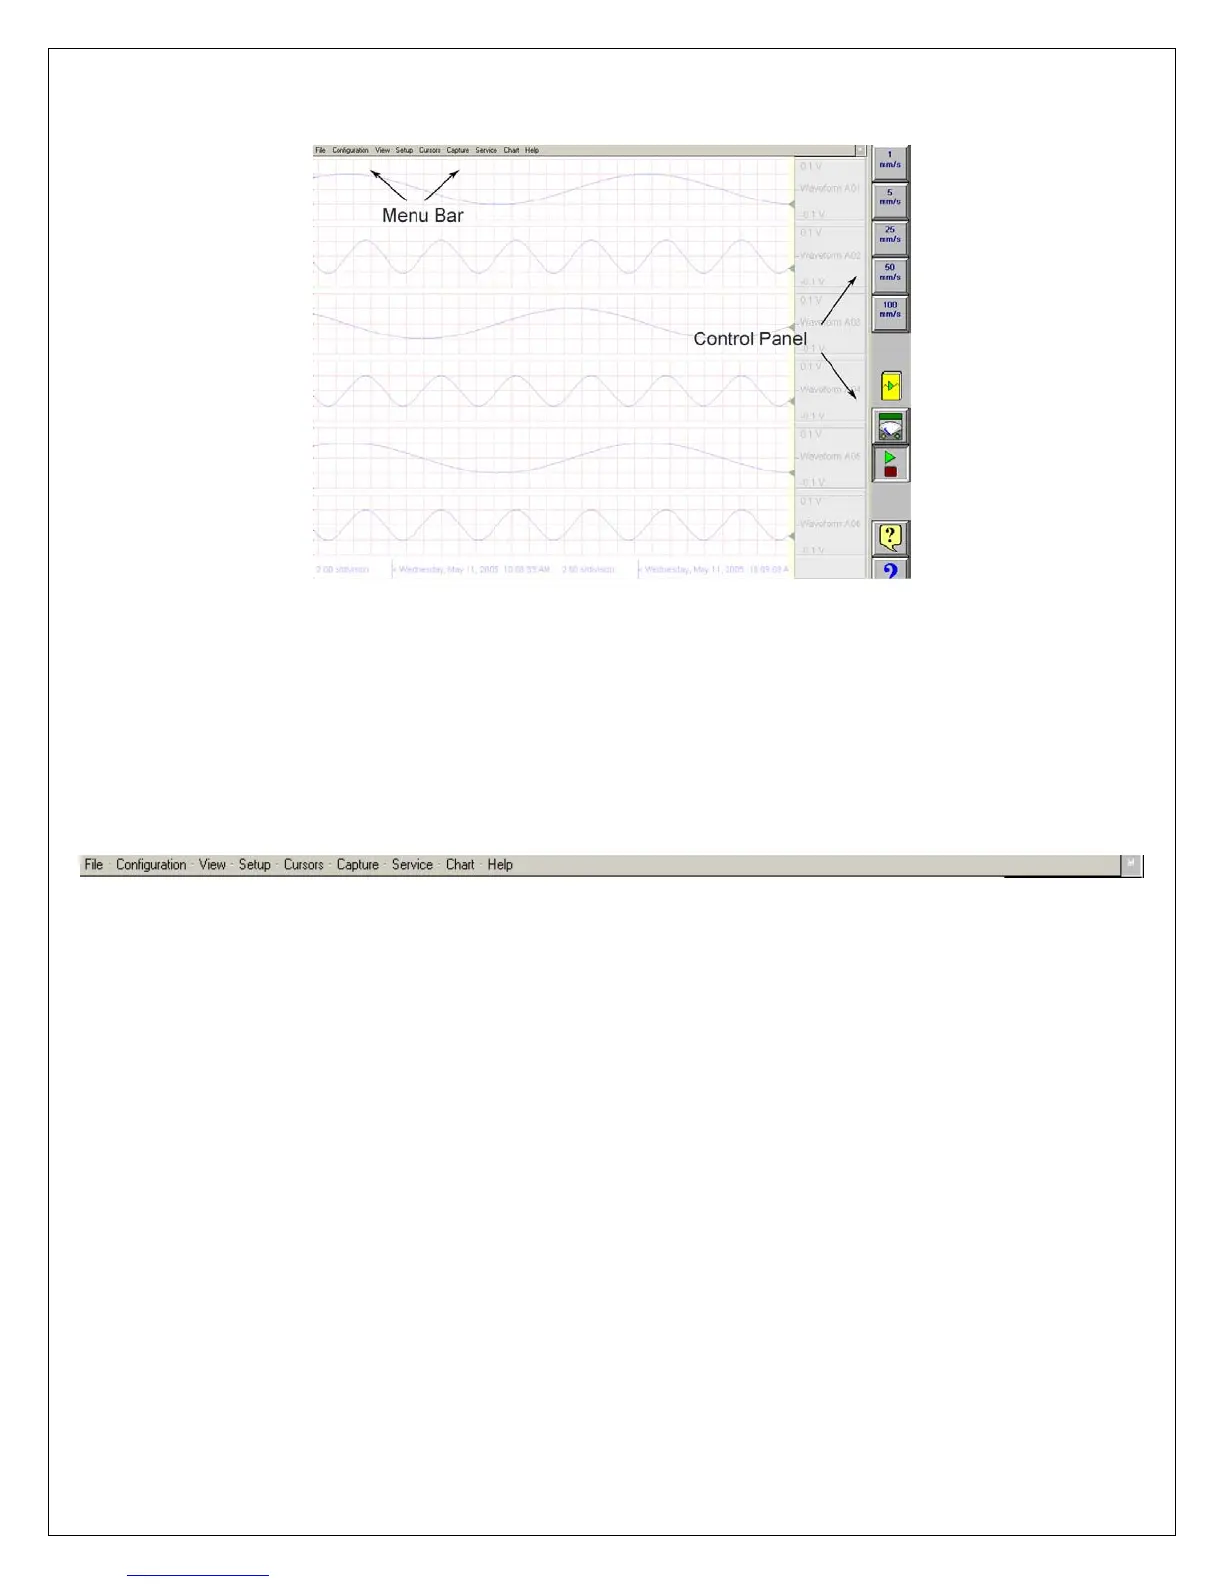
Dash 8Xe / Dash 8X screen highlighting the Menu Bar and Control Panel
MENU BAR
The menu bar is a group of drop-down menus located across the top of the display.
All Dash 8Xe / Dash 8X modes and features can be accessed from this menu. Options
available from the menu bar will vary based on the mode of operation (Realtime, Scope, or
Review) used.
If the date and time are visible instead of the menu bar, choose the M icon in the upper right
hand corner, which toggles the display of date/time and menu bar.
File The File menu is used to save and load your setup files.
Configuration The Configuration menu is used to select the operation of the Dash 8Xe / Dash 8X.
View The View menu is used to supplement the graph display of your signals.
Setup The Setup menu is used to configure the Dash 8Xe / Dash 8X.
Cursors The Cursors menu is used for time and amplitude measurements.
Capture The Capture menu is used to setup, arm, manual trigger, and abort data captures.
Service The Service menu is for less frequently used parameters such as calibration and security settings.
Chart The Chart menu provides for operation of the optional SCR-8 thermal recorder.
Help The Help menu provides for on-line assistance.
CONTROL PANEL
The control panel is an array of icon-based icons located on the right hand side of the display.
The icon icons allow for a single touch to execute a function. The Dash 8Xe / Dash 8X ships
with the control panel displaying icon icons for speed control, analog set up, meter mode, and
run/halt.
The control panel can be customized to add or remove icon icons to suit your recording
needs. Further, the control panel settings can be saved to a file for later recall making test
preparation very easy.
 Loading...