III. Trigger Setup and Data Capture:
In the Data Capture Settings section above, a ten second capture was set up with two seconds of pre-trigger (data before
the trigger). In this section, a trigger level of 8 Volts will be set with a rising slope so that as the signal rises and reaches 8
Volts, the data capture will be triggered.
9
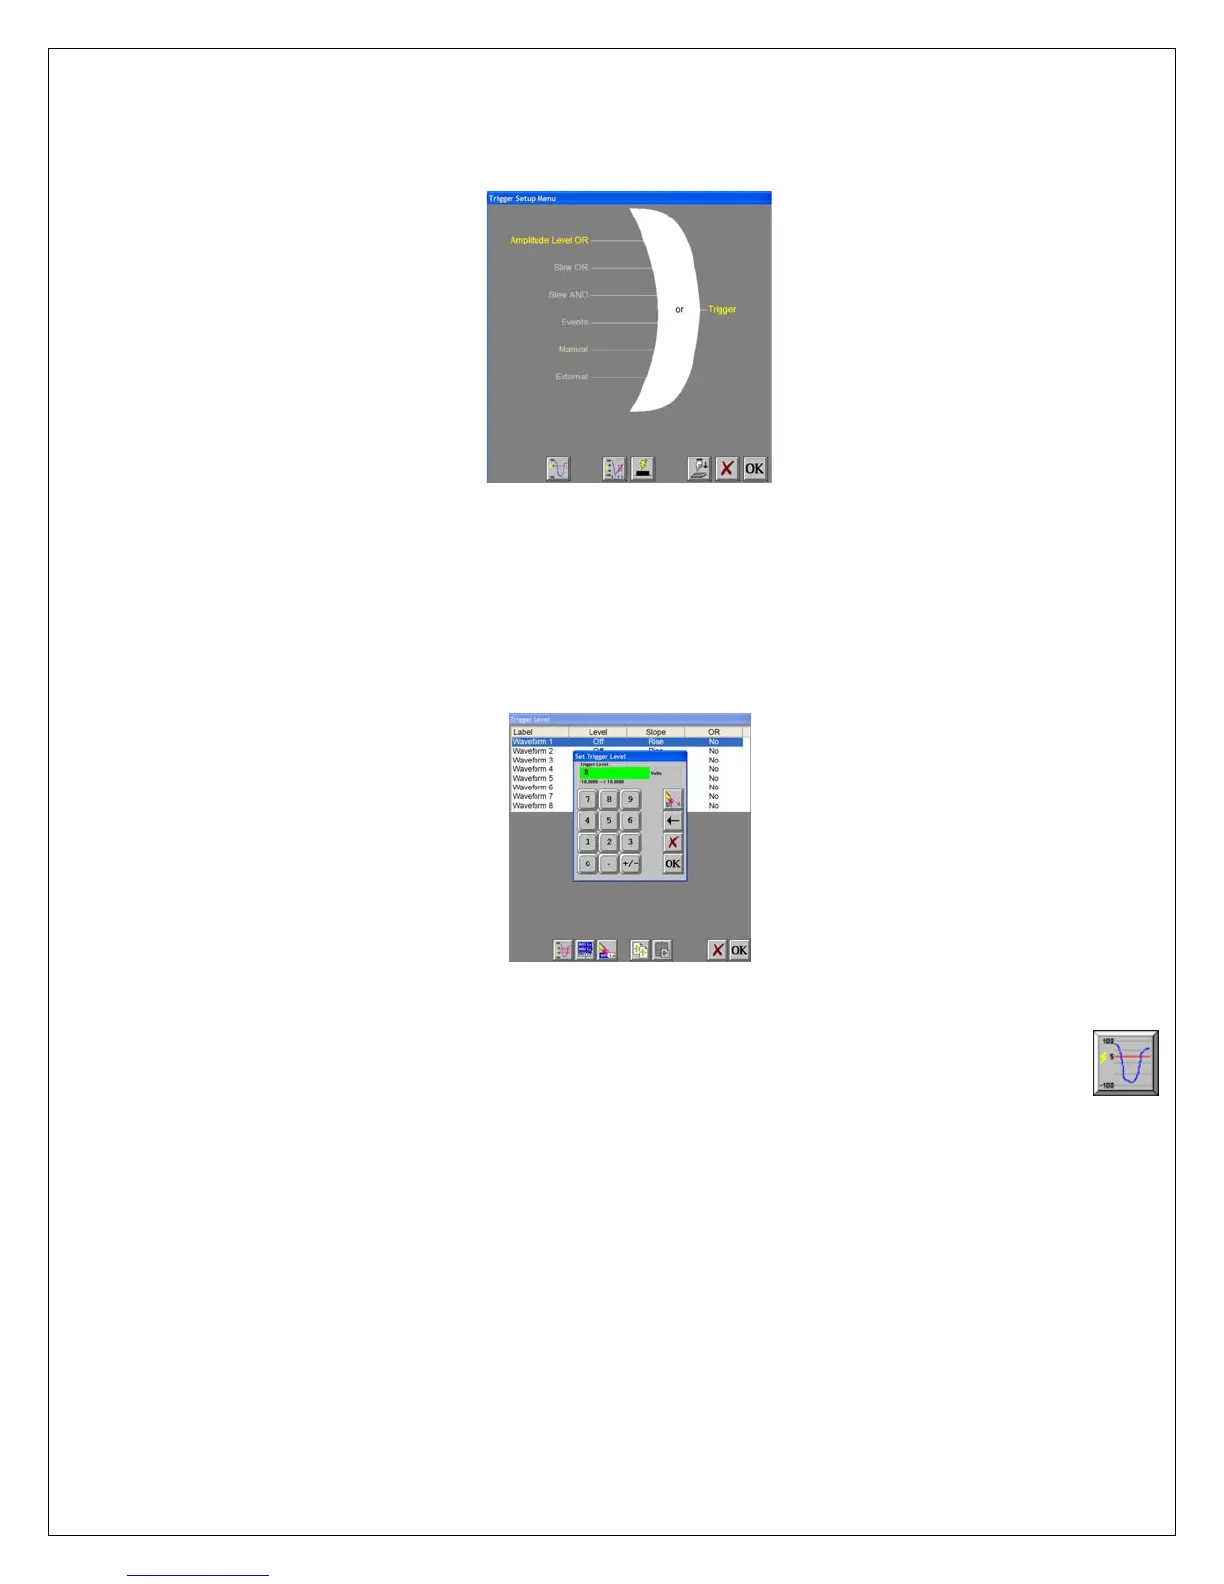
Trigger Settings Menu
ACTION HOW TO (Use the Menu Bar Pull-Down menus)
Enter Trigger Settings
Choose Setup >> Trigger Settings from the menu bar to enter Trigger Settings.
Select level triggering
Press Amplitude Level OR to highlight in yellow. Be sure all other trigger types (other OR
types, AND types, manual, etc. ) are not highlighted. If so, press them to deselect.
Trigger Level
Set to trigger when 9
Volts is applied
Press the Trigger Level icon (1
ST
icon in the row of icons at the bottom). In the
Trigger Level window, highlight Waveform 1.
Press Level. Then press New Value. Press the digit “8”. Press OK.
Press Slope. Then press Rise. Press OR. Then press Yes.
Press OK at the lower right hand corner of the menu.
You have just set the trigger to be asserted when the signal input into
channel one rises past 8 Volts.
Save/exit trigger setup
Press OK. Press OK.
Arm for capture
Choose Capture >> Arm from the menu bar to arm for capture.
The Capture Progress window pops up indicating status.
Input battery voltage into
Channel #1
A trigger should be produced and the capture continues to the end.
While capturing, you should have seen the waveform for Channel #1
increase from the bottom of the channel to near the top of its channel.
This completes the third part of the exercise, Trigger Setup and Data Capture.
 Loading...