II. Data Capture Settings:
Set up a single data capture for 10 seconds. Of the total capture time, two seconds of the capture should show what the
signal looked like before the battery voltage was applied. The sample rate will be 1,000 samples per second.
8
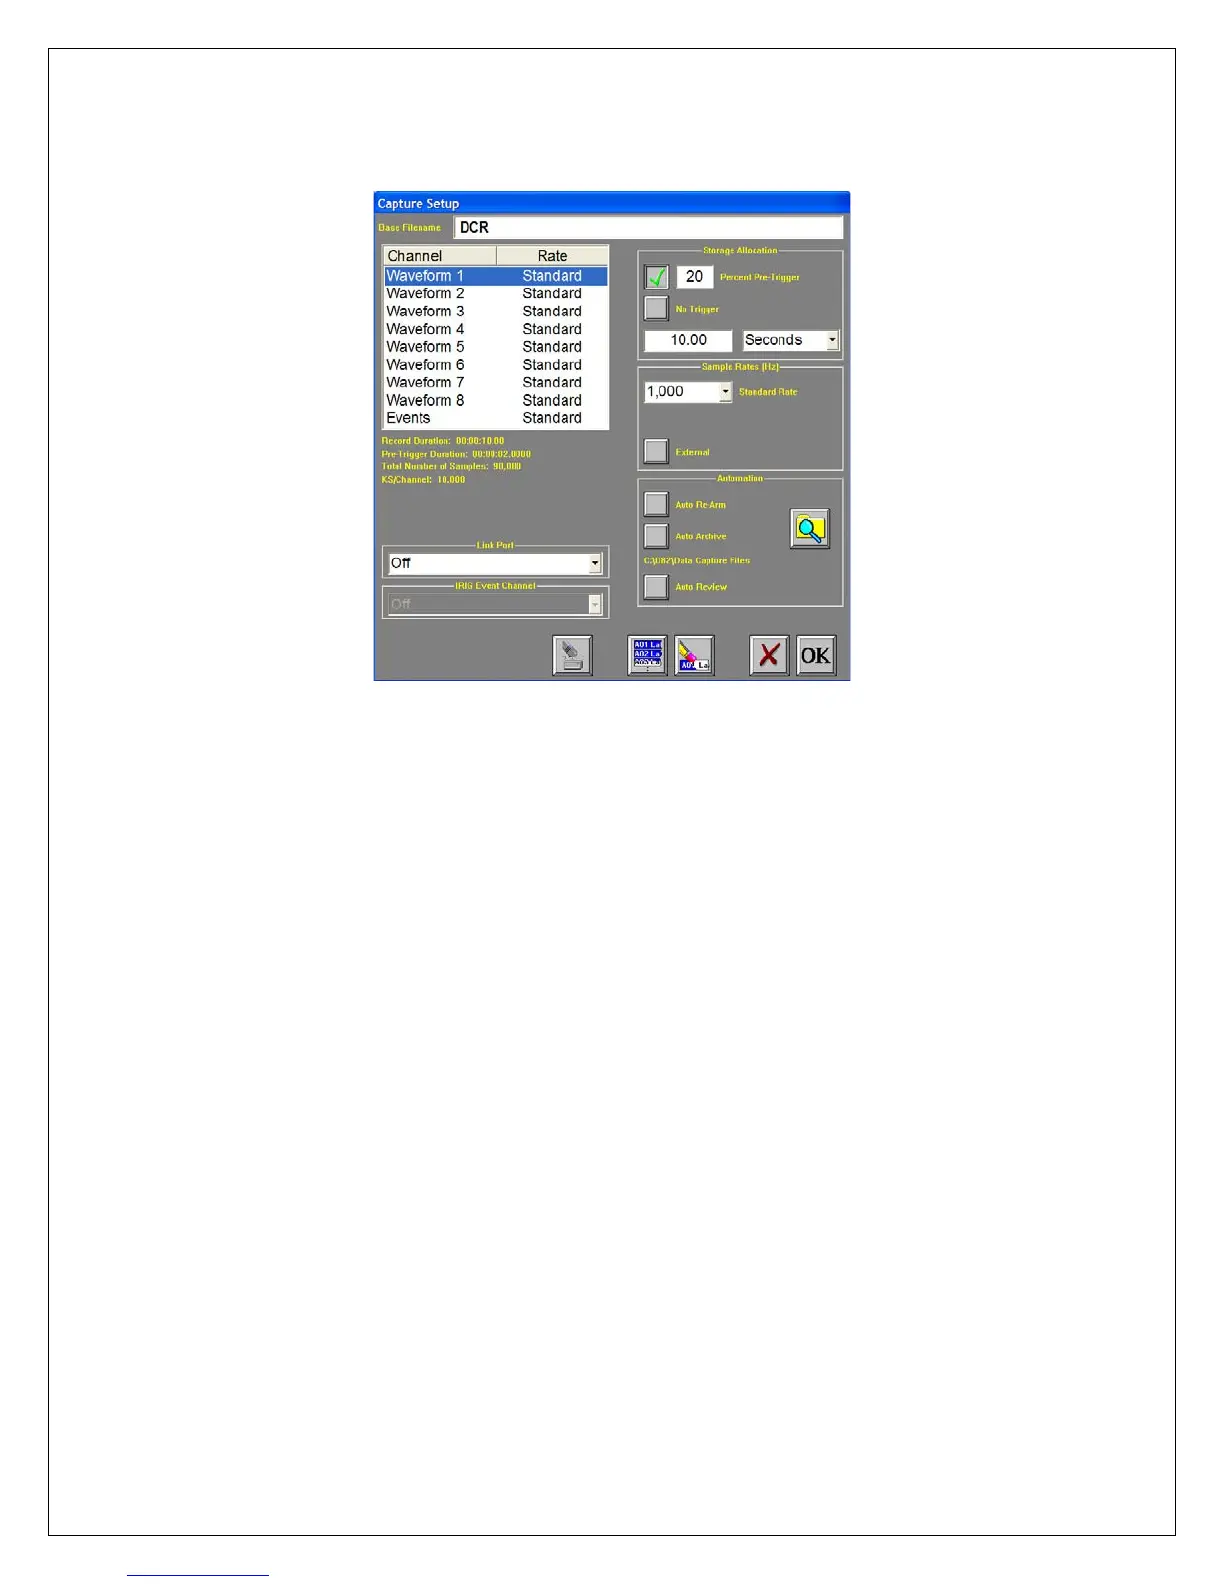
Capture Settings Window
ACTION
Enter data capture setup
Select capture of
Channel 1
HOW TO (Use the Menu Bar Pull-Down menus)
Choose Capture >> Capture Settings from the menu bar for data capture
setup.
Highlight Waveform 1. Be sure the Rate for Channel 1 is Standard. If not,
click on the Rate menu bar and select Standard.
Set sample rate to 1 kHz
In the Sample Rates box, press the down arrow titled Standard Rate.
Scroll down and press 1,000.
Set capture for 10
seconds
In the Storage Allocation box, press the units pull-down box and select
Seconds. (Other choices are minutes, hours and Ksamples).
Press the value box to open the Seconds Window.
Press the digits “1” and “0”. Press OK.
Set trigger point at 20%
In the Storage Allocation box, press the Percent Pre-trigger box. Press the
digits “2” and “0”. Press OK. Be sure there is a green check mark next to
the Percent Pre-Trigger.
Verify time of capture
Below the waveform selection window, in yellow text, the Record Duration
should be 10 seconds, the Pre-Trigger Duration should be 2 seconds.
Set capture for one
record
In the Automation Box, be sure that both the Auto Re-Arm & Auto Archive
are not checked. At this point, your Capture Settings Window should look
like the image above.
Save and exit data
capture setup
Press OK.
This completes the second part of the exercise, Data Capture Settings.
 Loading...