ADR14
MODEL:
PRODUCT TYPE:
Page 3
XL BLIND RIVET ADAPTER KIT
- 1/4" CAPACITY
ll. SAFETY GUIDE:
1. For safety, read the USER’S MANUAL carefully before
use of the riveting adapter.
2. Wear adequate protective gear including ANSI
approved goggles and thick work gloves.
3. Only use the riveting adapter with driving tool that
matches with requirements specified on Product
Technical Data.
4. Switch off the driving tool before installing or
uninstalling the riveting adapter.
5. The objects to be riveted MUST BE SECURELY FIXED
BEFORE riveting in order to avoid possible injury.
Unsecured objects may rotate with the driving tool if not
secured.
6. The driving tool MUST be stopped if user releases the
adapter’s body during riveting.
7. During Maintenance and or when necessary, be
careful in the disassembly of inner plunger tube as
there is a pre-loaded spring inside.
lll. OPERATION GUIDE:
WARNING: WEAR WORK GLOVES (RUBBER COATED
PREFERRED) FOR GRIPPING THE ADAPTER
WARNING: The objects to be riveted MUST BE
SECURELY FIXED BEFORE riveting in order to avoid
possible injury. Unsecured objects may rotate with the
driving tool if not secured.
IMPORTANT: Before using the rivet adapter on your
intended workpiece, use the adapter on a blind rivet
without a workpiece by just holding the tool in the air to
ensure your drill is powerful enough and on the correct
settings to pop a rivet.
• Note that riveting on a work piece will require at least 20
in/lbs more torque than this test.
CRITICAL: Your rivet MUST NOT require more than the
maximum stroke limit of this tool which is 18 mm (0.7").
Ensure your drill is in "driver" mode and not drill mode.
2. Riveting:
2.1 Hold the adapter with one hand and operate your
driving tool with the other in REV until an audible
clicking sound comes from the adapter tool.
2.2 Release the trigger, check and confirm from
inspection hole on front tube that the plunger tube
inside is at the maximum forward position.
2.3 Insert the rivet mandrel into center hole of nose
piece and make sure the size of the rivet exactly
matches the nose piece.
2.4 Make sure there is no space between nose piece
and rivet flange.
2.5 Switch to the FWD direction of the driving tool.
2.6 Hold the adapter with one hand and lightly pull the
trigger of the driving tool with your other hand to have
the mandrel slightly gripped by the adapter, preventing
the inserted rivet from falling out.
2.7 Insert the rivet body into drilled hole where it is to
be riveted and position the adapter aligned with hole as
best you can.
2.8 Grip the adapter firmly (wear work gloves) then pull
the trigger on the driving tool until the mandrel is
popped off of the rivet.
2.9 Reverse direction of the driving tool to release and
expose the left-over rivet mandrel. Depending on the
greasing of the tool's jaw pieces, the mandrel may or
may not fall out on its own.
Tip: Use low RPM's for better control of riveting
quality.
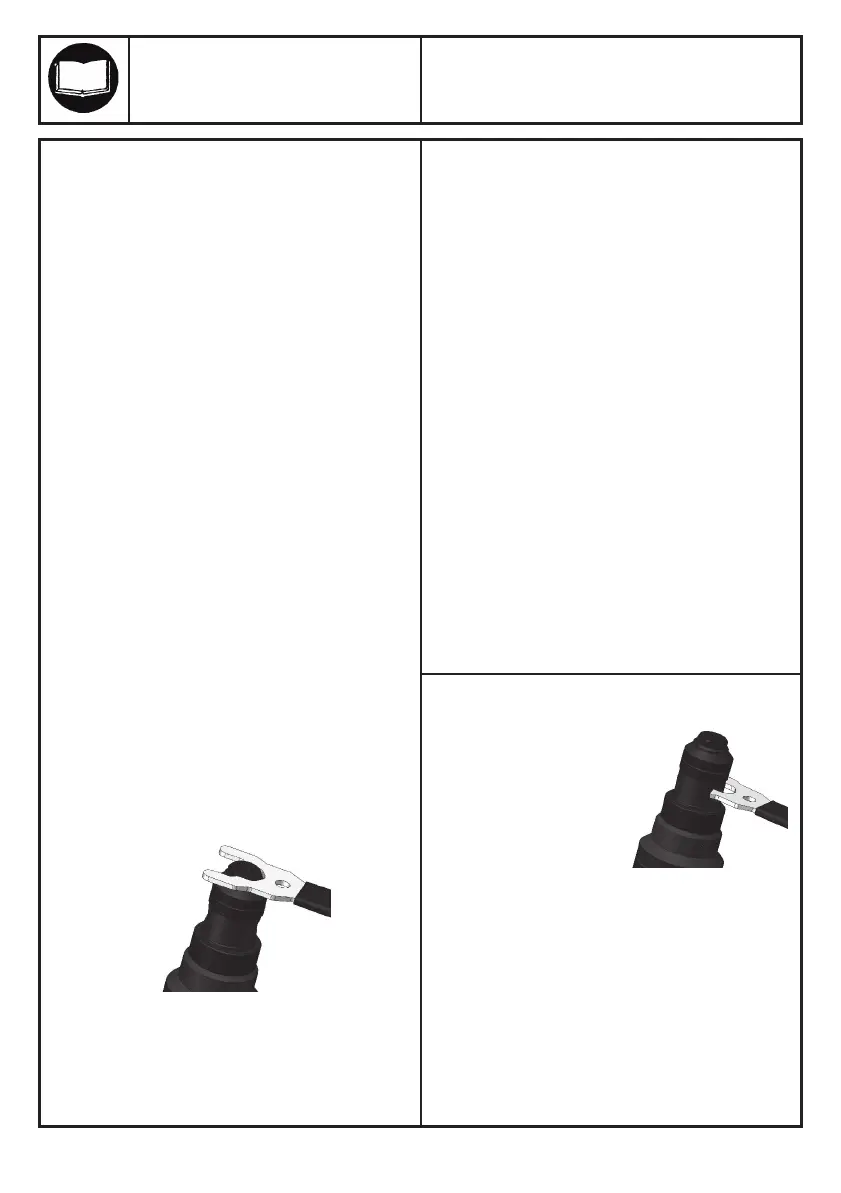
1. Tool Installation:
Swap the nose piece for the rivet size if the installed
one does not match your intended rivet size, then
tighten it onto the adapter with the wrench, check and
confirm other components are tightly fixed in position;
insert the hex shank into driving tool chuck. Tighten
firmly and switch driving tool to low speed mode.
lV. MAINTENANCE:
1. Cleaning and lubricating:
1.1 The riveting adapter
is lubricated before
shipping.
Recommended: cleaning
the components of plunger
tube, and re-lubricating
its parts on a yearly
frequency or earlier.
1.2 Recommended: cleaning the plunger tube and
re-lubricating its parts when replacing worn-out chuck
jaw pieces.
2. Chuck jaw pieces replacement:
Life span of chuck jaw pieces varies with usage
frequency and the uses of different rivet sizes/types.
Recommended: replacing the chuck jaw pieces before
they are worn-out to prevent jams.
 Loading...