2-1/4 GALLON PRESSURE TANK
PT2-4
PT2-4GH
WARNING
MODEL: PRODUCT TYPE:
Page 2
INSTALLATION:
The pressure tank is not designed for highly abrasive, corrosive, or rust inducing materials. If used with such materials, frequent and
thorough cleaning is advised to reduce the necessity for replacement of parts.
AIR PRESSURE LOADS THAT ARE HIGHER THAN DESIGN LOADS, OR ALTERATIONS TO THE
PRESSURE FEED TANK CAN RESULT IN TANK REPTURE OR EXPLOSION.
• A SAFELTY VALVE PROTECTS THE TANK FOR OVER PRESSURIZATION. DURING EACH USE, PULL THE RING ON THE
SAFETY VALVE TO CHECK IF IT OPERTES FREELY AND RELIEVES AIR PRESSURE. IF THE VALVE IS STUCK, DOES NOT
OPERATE FREELY, OR DOES NOT RELIEVE AIR PRESSURE, IT MUST BE REPLACED. DO NOT DISCARD OR MAKE ANY
ALTERATIONS OR SUBSTITUTIONS TO THIS VALVE.
• DO NOT MAKE ANY CHANGES TO THE AIR TANK. TAMPERING IN THE FORM OF DEILLING, WELDING, ETC…WILL
WEAKEN THE TANK.
• THE MAXIMUM OPERATING PRESSURE OF THE TANK IS 80 PSI.
Follow the manufacturer’s directions for the mixing and preparation of material. Strain material using a fine mesh screen in order to
prevent the entry of foreign matter and the clogging of passageways.
1. Always relieve all air pressure in the tank. Pull the ring on safety valve until pressure bleeds down.
2. Loosen thumb screws, tip lid clamps back and remove lid assembly.
3. Pour material into the tank.
4. Replace the lid assembly and tighten clamps and thumb screws securely.
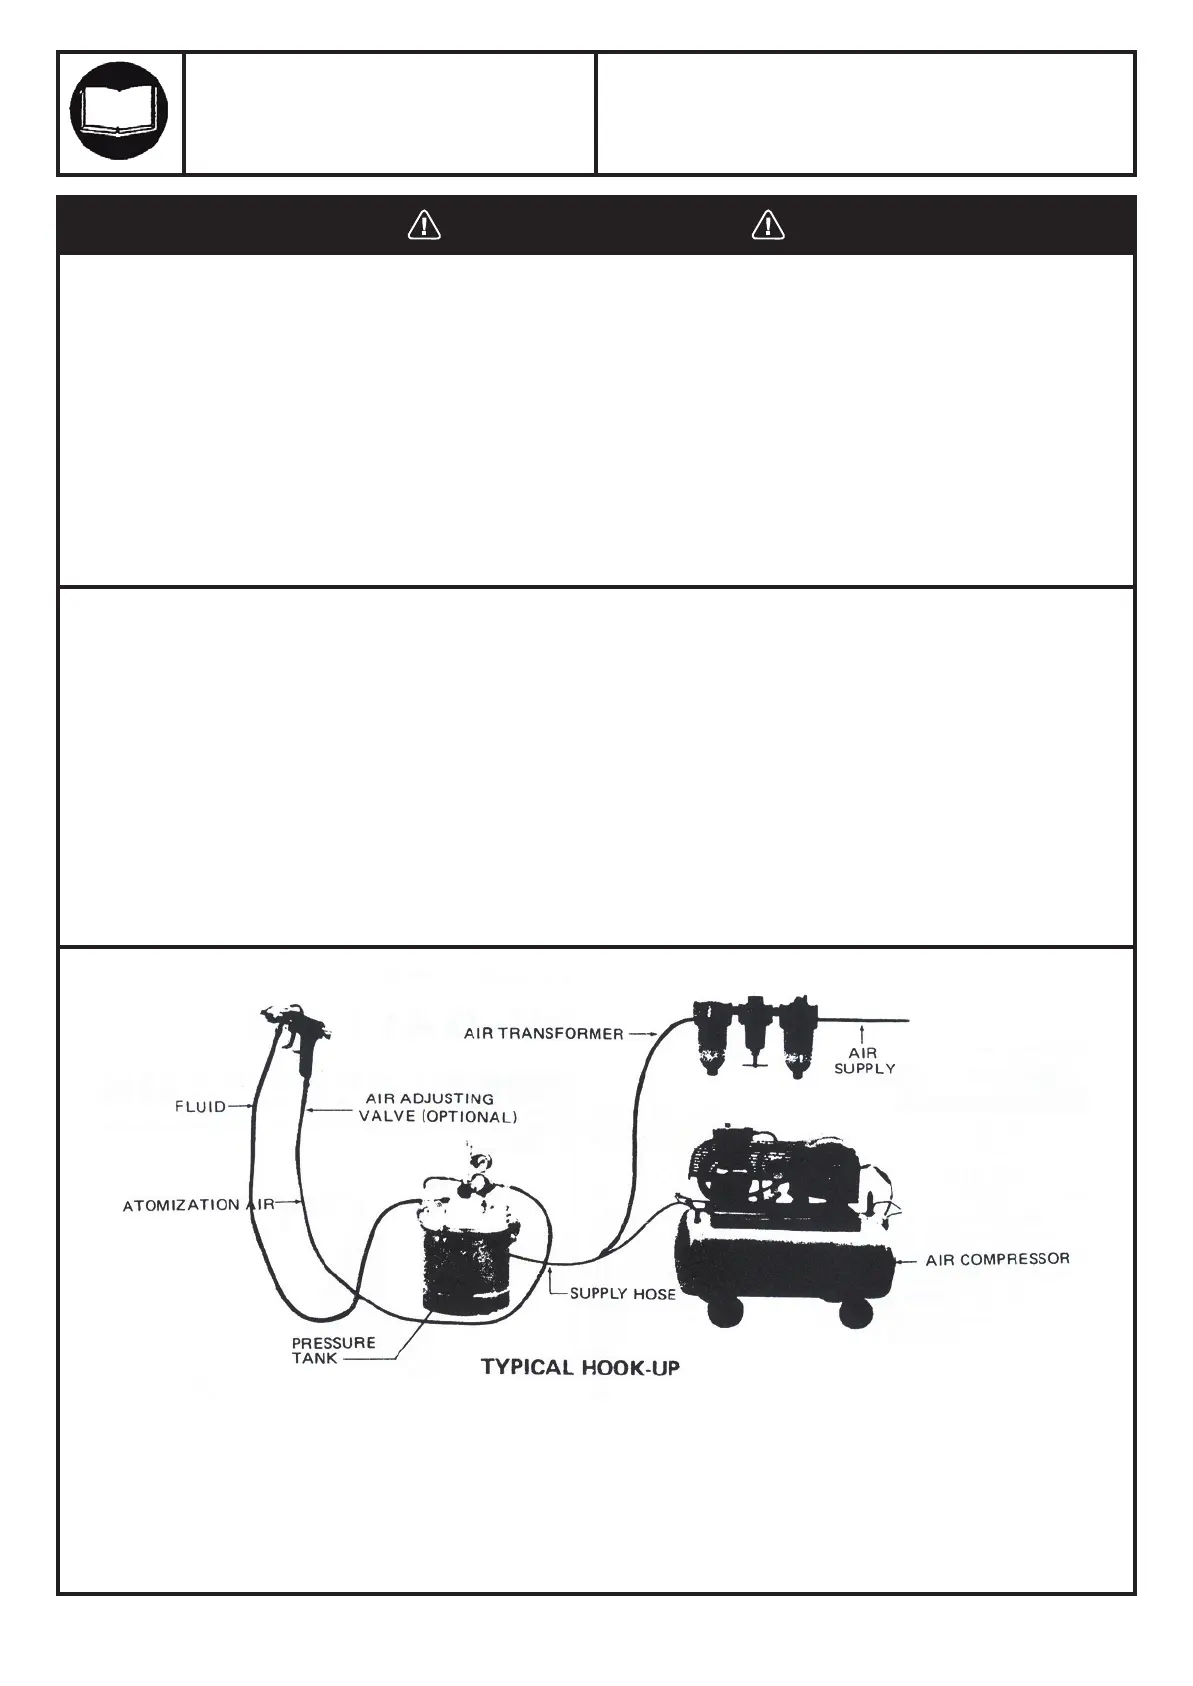
5. It is best for the air supply line to pass through a transformer to filter dirt form air and remove entrained water and oil. Connect the
air supply hose to the air inlet fitting on tank regulator.
6. Attach the atomization air hose to the air outlet fitting which is directly opposite air inlet fitting.
7. Connect material hose to the fluid outlet fitting.
8. Refer to figure below for a typical assembly.
1. Turn on the air supply.
2. Turn Tee-Handle adjusting screw clockwise on the tank regulation to increase material l pressure; turn it counterclockwise
to decrease pressure. Maximum tank pressure is 80 PSI.
3. Atomization air for the spray gun can be adjusted at the gun by means of an air adjusting value or adding an air regulator
kit to the tank. See accessories.
4. Operate Spray Gun according to instructions accompanying gun.
OPERATION:
 Loading...