Do you have a question about the AstroStart XRT and is the answer not in the manual?
Module must be interfaced per vehicle type; factory set to Manual Transmission mode.
Special attention required for manual transmission; use manual interface for safety.
Deliver user manual, post warning labels, and perform final verifications.
Ensure vehicle cannot be remote started in gear or moved from Park without brakes.
Verify manual interface module, door pin switches, parking brake, and gearshift access.
Preferable to complete module installation and test before connecting immobilization interface.
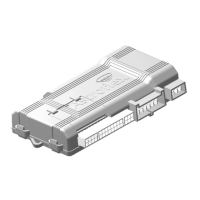
Detailed description of optional P1 connector pin assignments and purposes.
Detailed description of P2 connector pin assignments, inputs, and outputs.
Description of P3 connector for power door lock circuits and its built-in relays.
Description of P4 main harness wire functions, including power and ignition inputs.
Description of P5 connector for a three-pin programmable relay.
List of plug-in accessory connectors (P6-P16) and their purposes.
Lists default features for Stage 1 programming, including transmitters, engine, and anti-theft settings.
Module is factory programmed for manual transmission; notes on alarm and door wiring.
Explains programming using the Multitest II tool or DIP switches.
Explains how to select and program different Stages (1 & 2) and Levels within them.
Detailed description of P1 alarm outputs, including siren, trunk, dome light, and armed outputs.
Details P2 inputs like Hood, Brake, Parking Light/Glow Plug, and outputs.
Description of P2-13 to P2-16 programmable negative outputs and their functions.
Describes P3 harness for interfacing power door lock circuits using on-board relays.
Details P4 main harness wires: Power Input, Accessory, Parking Lights, Ignition, Starter, Starter Cut.
Details P5 connector for an internal automotive-style relay, saving external components.
Details the P6 shock sensor connector for omnidirectional sensitivity.
Details the P7 other sensor connector for various sensors like motion or window breakage.
Details the P9 LED connector for status indication of alarm and antitheft.
Details the P10 trigger input connector for initiating the start-up procedure.
Details for Valet Switch, Manual Interface, and Main Switch connectors.
Details for Receiver and IM/OM/IOM Accessories connectors.
Table detailing default settings and options for transmitter code learning.
Table detailing default settings for tachometer and cylinder configuration.
Procedure for automatic tachometer learning and its considerations.
Settings for parking light, glow plug delay, ignition status, and hood pin switch.
Settings for OEM security rearming, rearming type, accessory start-up delay, and antitheft type.
Configuration options for programmable outputs 1 and 2, including pulse and ground outputs.
Configuration options for programmable outputs 3 and 4, including trunk release and dome light.
Options for the P5 programmable relay, including active while running and pulse outputs.
Settings for pulse durations, auto lock, unlock pulse type, and second lock confirmation.
Settings for utility output durations and panic duration.
Settings for RPM thresholds, pulse before/after start, and engine runtime duration.
Settings for sentinel mode activation temperature and runtime.
Settings for alarm activation, chirp, additional sensor, and OEM alarm detection.
Options for trunk command activation of trunk output or utility output.
Settings for vehicle type (automatic/manual) and safety sequence initialization.
Configuration for accessory output, parking light output, and relay functions.
Settings for start confirmation, turbo mode, and dome light activation when engine stops.
Configuration for the P9 LED to indicate Alarm, Antitheft, or Manual Sequence status.
Table listing diagnostic codes and their reasons for interruption during remote start.
Explains reasons for safety sequence failure and potential causes like open doors or no tach signal.
Procedure to test if all vehicle circuits are properly powered during engine takeover.
Procedure to test the full remote start functionality and safety sequence.
Check all safety devices, functions, and test door breaking the safety sequence for manual transmission.
Method to program remote transmitters using the control module's dip switches.
Method to program remote transmitters without accessing the control module, using the ignition key sequence.
| Brand | AstroStart |
|---|---|
| Model | XRT |
| Category | Control Unit |
| Language | English |