A-18
Notebook PC User Manual
: Se le ct S cr ee n
: Select I te m
Ent er : Se le ct
+/— : Ch an ge O pt .
F1: G en er al H el p
F9: O pt im iz ed D efault s
F10 : Sa ve ES C: Ex it
Ver si on 2 .0 1. 12 08. Co py ri gh t (C ) 20 10 Ame ri ca n Me ga tr en ds , Inc.
A pt io Setup U ti li ty - C op yr ight ( C) 2 01 0 Am er ic an Megat re nd s, I nc .
S ec ur it y
I /O I nt er fa ce Sec ur it y
L AN N et wo rk Inter fa ce [UN LO CK ED ]
W ir el es s Ne twork In te rf ac e [UN LO CK ED ]
H D AU DI O In terfac e [UN LO CK ED ]
S AT A 2n d HD D Inte rf ac e [UN LO CK ED ]
S AT A OD D In terfac e [UN LO CK ED ]
US B In te rf ac e Securi ty
If Lo ck ed , 2n d SATA H DD w il l be
dis ab le d.
SAT A 2n d HD D In terfac e
UNL OC KE D
LOC KE D
3. Select SATA 2nd HDD Interface and set it to LOCKED.
4. Press [F10] to save the configuration and exit.
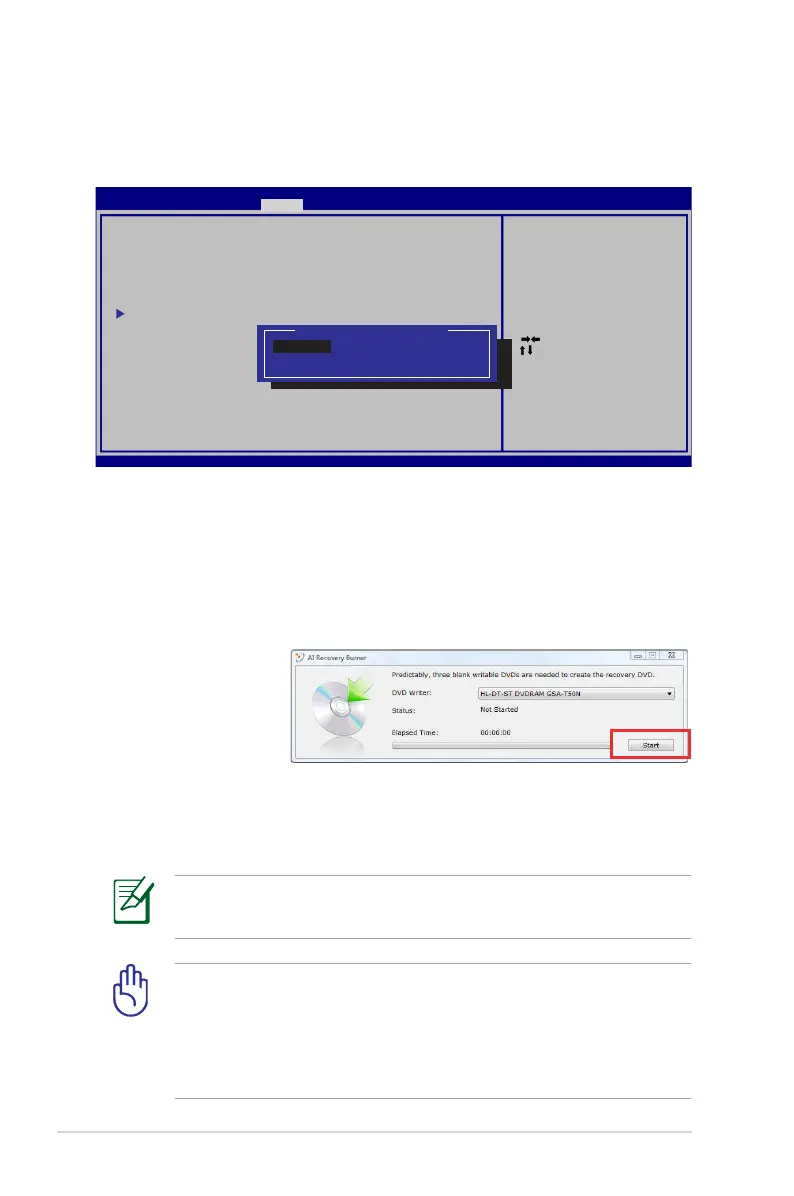
Creating the Recovery DVD:
1. Double-click the AI Recovery Burner icon on the Window
desktop.
2. Insert a blank
writable DVD
into the optical
drive and click
Start to start
creating the Recovery DVD.
3. Follow the onscreen instructions to complete creating the
recovery DVD.
Prepare enough blank writable DVDs as instructed to create the
Recovery DVD.
IMPORTANT! Remove the external hard disk drive before
performing system recovery on your Notebook PC. According
to Microsoft, you may lose important data because of setting up
Windows on the wrong disk drive or formatting the incorrect
drive partition.