Do you have a question about the Asus A8NE-FM and is the answer not in the manual?
Precautions before installing components or changing motherboard settings.
General layout and installation guidance for the motherboard.
How to orient the motherboard in the chassis for correct installation.
Using screws to secure the motherboard to the chassis.
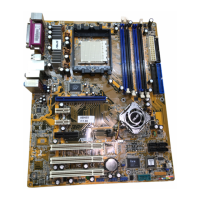
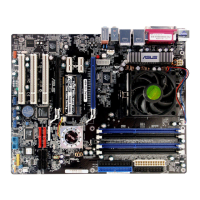
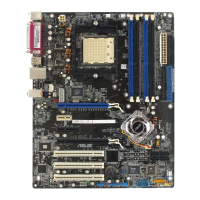
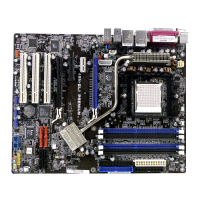
Diagram and labels of motherboard components and connectors.
Lists slots, jumpers, and rear panel connectors with page references.
Core component installation and setup for the CPU.
Step-by-step guide for installing the CPU into the socket.
Guide for attaching the CPU heatsink and fan assembly.
Core component installation and setup for system memory.
Describes the motherboard's DDR DIMM sockets.
Guidance on installing memory modules for optimal performance.
Step-by-step guide for installing memory modules into DIMM sockets.
Steps for safely removing memory modules from DIMM sockets.
Installing peripherals into expansion slots.
Steps for installing expansion cards like graphics or sound cards.
How to configure expansion cards via BIOS and drivers.
Describes the types of cards compatible with standard PCI slots.
Describes compatibility with PCI Express x16 graphics cards.
Explanation and usage of motherboard jumpers for system configuration.
System assembly and connection of components.
Identifies and describes the ports on the motherboard's rear panel.
Details on internal connectors for drives, fans, and front panel.
Essential maintenance procedures for the motherboard BIOS.
Instructions for creating a bootable floppy disk for DOS or Windows environments.
Guide to updating BIOS using the AwardBIOS Flash Utility.
Explains the ASUS CrashFree BIOS 2 utility for BIOS recovery.
Introduction to the BIOS Setup program and how to enter it.
Describes the main menu bar options within the BIOS Setup.
Explains the function keys and navigation keys used in BIOS Setup.
How to access general help screens within the BIOS Setup.
How to use scroll bars for more information in BIOS help windows.
Explains how to navigate and use sub-menus within BIOS Setup.
Primary BIOS configuration screen for system settings.
How to set the system's current time within BIOS.
How to set the system's current date within BIOS.
Setting the type of floppy drive installed for the system.
Displays the amount of conventional memory detected by the system.
Configuration options for Primary and Secondary IDE devices.
Configuration options for SATA hard disk drives.
Access to advanced CPU and system device configurations.
Displays and allows adjustment of CPU-related settings.
Settings related to the motherboard chipset and memory.
Detailed settings for DRAM timing and clock speed.
Configuration settings for Plug and Play devices and PCI/PCIe.
Controls for onboard devices like LAN, Audio, and Serial ports.
Settings for onboard IDE channels and DMA transfer.
Configuration options for the onboard RAID controller.
Options to enable/disable USB controllers and legacy support.
Settings for power consumption reduction and system suspend.
Configuration of Advanced Power Management features.
Displays system temperatures, voltages, and fan speeds.
Operating system boot order and configuration.
Sets the order of devices for system boot-up.
Configuring priority for removable boot devices.
Configuring priority for hard disk boot devices.
Configuring priority for CD-ROM boot devices.
Settings to optimize and configure the system boot process.
Setting supervisor and user passwords for BIOS access.
Saving and exiting BIOS setup with various options.
Saves BIOS configuration changes and exits the setup utility.
| Form Factor | Micro ATX |
|---|---|
| Socket Type | Socket 939 |
| Memory Slots | 4 |
| Memory Type | DDR |
| Maximum Memory | 4 GB |
| Audio Chipset | Realtek ALC850 |
| LAN Chipset | Realtek RTL8201CL |
| PS/2 Ports | 2 |
| Chipset | NVIDIA nForce4-4x |
| Expansion Slots | 1 x PCIe x16, 2 x PCI |
| LAN Speed | 10/100 Mbps |
| USB Ports | 8 x USB 2.0 |
| Audio Channels | 8 Channels |