Do you have a question about the Asus G1-P7P55E and is the answer not in the manual?
Details the intended audience for this user manual, focusing on their technical background.
Explains the structure and content covered in each chapter of the manual.
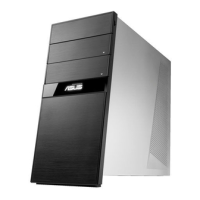
Introductory message welcoming users and introducing the ASUS G1-P7P55E system.
Details components and ports located on the front panel of the ASUS G1-P7P55E system.
Describes various ports and connectors found on the rear panel of the ASUS G1-P7P55E system.
Illustrates and lists the main internal components of the ASUS G1-P7P55E system.
Lists essential components and tools required before beginning system installation.
Provides crucial safety precautions and checks before installing system components.
Step-by-step instructions on how to safely remove the side panel and front assembly.
Covers the overview and installation procedure for the CPU on the motherboard.
Detailed instructions for installing and configuring DDR3 memory modules.
Describes expansion slots and how to install expansion cards.
Guidance on installing optical drives and hard disk drives into the system.
Instructions for reassembling the front panel and side cover after component installation.
Information on installing supported operating systems like Windows XP, Vista, and 7.
Simple instructions on how to power on the system and start the operating system.
Details the contents of the support DVD, including drivers and utilities.
Provides technical information about the motherboard for system upgrades or reconfiguration.
Illustrates the physical layout of the motherboard, identifying key components and connectors.
Explains the function and usage of various jumpers on the motherboard, such as CLRTC.
Details the various connectors on the motherboard for fans, SATA, power, audio, USB, and front panel.
Guides on how to manage, save, and update the motherboard BIOS using utilities.
Explains how to enter and navigate the BIOS setup utility, including menu screens and keys.
Provides an overview of system information displayed in the BIOS Main menu.
Details settings for CPU, chipset, and other system devices in the Advanced BIOS menu.
Covers settings related to Advanced Power Management (APM) and hardware monitoring.
Explains options for configuring system boot devices, settings, and security.
Describes special function configurations like AI NET 2, EZ Flash 2, and Express Gate.
Information on saving/discarding changes, loading default settings, and exiting BIOS setup.
| Model | G1-P7P55E |
|---|---|
| Category | Desktop |
| CPU Socket | LGA 1156 |
| Memory Type | DDR3 |
| Maximum Memory Supported | 16GB |
| Form Factor | ATX |
| Motherboard Chipset | Intel P55 |
| Memory Slots | 4 |
| Audio | Integrated HD Audio |
| LAN | Gigabit LAN |
| Power Supply | ATX |
| Expansion Slots | PCIe x16, PCIe x1, PCI |
| Storage Interfaces | SATA II |
| USB Ports | USB 2.0 |