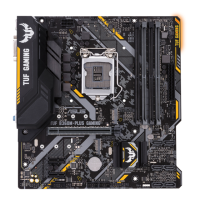
ASUS TUF B360M-PLUS GAMING/BR
1-7
Central Processing Unit (CPU)
ThismotherboardcomeswithasurfacemountLGA1151socket
designedforthe8thGenerationIntel
®
Core™i7/Core™i5/Core™i3,
Pentium
®
andCeleron
®
processors.
UnplugallpowercablesbeforeinstallingtheCPU.
• EnsurethatyouinstallthecorrectCPUdesignedfortheLGA1151socketonly.DO
NOTinstallaCPUdesignedforLGA1150,LGA1155andLGA1156socketsonthe
LGA1151socket.
• Uponpurchaseofthemotherboard,ensurethatthePnPcapisonthesocketand
thesocketcontactsarenotbent.ContactyourretailerimmediatelyifthePnPcap
ismissing,orifyouseeanydamagetothePnPcap/socketcontacts/motherboard
components.
• Keepthecapafterinstallingthemotherboard.ASUSwillprocessReturnMerchandise
Authorization(RMA)requestsonlyifthemotherboardcomeswiththecaponthe
LGA1151socket.
• Theproductwarrantydoesnotcoverdamagetothesocketcontactsresultingfrom
incorrectCPUinstallation/removal,ormisplacement/loss/incorrectremovalofthePnP
cap.
Installing the CPU
1
4
ApplytheThermalInterfaceMaterialtotheCPUheatsinkandCPUbeforeyouinstallthe
heatsinkandfanifnecessary.
2
3
A
B
A
B
C
D
5
4
4
5
 Loading...