Do you have a question about the Asus VANGUARD B85 and is the answer not in the manual?
Precautions to prevent electrical shock hazards.
Guidelines for safe handling and operation of the motherboard.
Information to prevent injury to yourself when completing a task.
Information to prevent damage to components when completing a task.
Instructions that MUST be followed to complete a task.
Details about the Central Processing Unit compatibility and features.
Graphics processor support and output capabilities.
Information on the Intel B85 Express Chipset.
Enumerates all ports available on the rear panel of the motherboard.
Specifications for DDR3 memory modules and dual-channel architecture.
Details on SATA connectors and Intel Rapid Start Technology.
Lists all internal connectors for headers and ports.
Lists the types and number of PCI Express and PCI slots.
Information on the Intel I217V Gigabit LAN controller.
Specifications for the Realtek ALC887 audio codec.
Details on USB 3.0 and USB 2.0 ports and ASUS USB 3.0 Boost.
Safety precautions before installing components or changing settings.
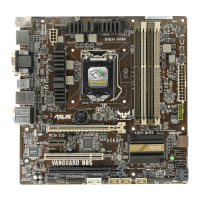
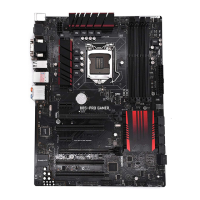
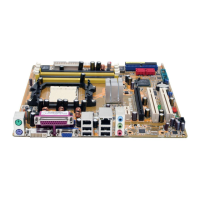
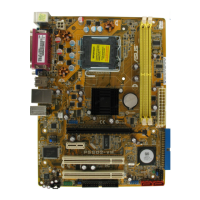
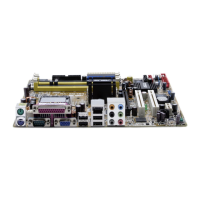
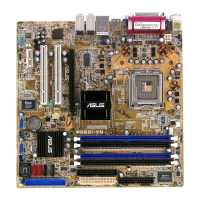
Diagram showing the physical layout of motherboard components and connectors.
A numbered list of connectors, jumpers, slots, and LEDs with page references.
Step-by-step instructions for installing the CPU onto the socket.
Guide for installing the CPU heatsink and fan assembly.
Visual guide for installing the CPU heatsink and fan assembly.
Describes the four DDR3 DIMM sockets and their physical characteristics.
Step-by-step guide for installing a DIMM into a socket.
Details on installing different memory sizes and compatibility.
Step-by-step guide for removing a DIMM from a socket.
Instructions for clearing the CMOS RTC RAM using the CLRTC jumper.
Identifies and describes the connectors on the rear panel.
Details on internal connectors for power and audio.
Connectors for CPU and chassis fans.
Connector for chassis-mounted functions like power/HDD LEDs, reset button.
Connectors for the ATX power supply unit.
How to save and update the motherboard BIOS.
Method to update BIOS without an OS using USB flash drive.
Auto recovery tool to restore BIOS if corrupted during update.
Confirmation and final steps for BIOS update process.
Utility for automatic BIOS updates and boot logo selection.
Utility to update BIOS in a DOS environment.
Instructions for updating BIOS using the ASUS BIOS Updater utility.
Methods to enter BIOS setup during system startup.
Description of the default EZ Mode interface and its functions.
Methods to enter BIOS setup after the system has passed POST.
Overview of the Advanced Mode for detailed BIOS settings.
Optimizes performance for XMP/Manual/User-defined memory.
Manually or automatically set CPU core ratio.
Controls related to DIGI+ VRM power delivery and voltage settings.
Set additional turbo mode CPU core voltage.
Set additional turbo mode CPU graphics voltage.
Set CPU analog I/O voltage offset.
Adjust CPU voltage based on load-line calibration.
Set the CPU core voltage and override settings.
Set total adaptive mode CPU core voltage.
Set total adaptive mode CPU graphics voltage.
Set DRAM timing control features like CAS Latency, RAS to CAS Delay.
Set CPU Cache voltage and override settings.
Set CPU digital I/O voltage offset.
Set the uncore ratio to its minimum value.
Manage CPU power settings like SpeedStep and Turbo Mode.
Set CPU graphics voltage and override settings.
Set CPU system agent voltage offset.
Set the uncore ratio to its maximum value.
Set the CPU input voltage.
Set the DRAM Voltage.
Set the memory operating frequency.
Set the Platform Controller Hub voltage.
Displays CPU-related information detected by BIOS.
Configure PCH settings like PCI Express and DMI Link.
Set SATA configuration mode (IDE, AHCI, Disabled).
Configure USB features like legacy support and xHCI mode.
Configure onboard devices like HD Audio, LAN, Serial Ports.
Configure APM (Advanced Power Management) features.
Configure system agent settings like CPU Audio, DVI Audio, Graphics.
Configure SATA devices, modes, and hot plug support.
Manage and configure CPU power settings.
Displays CPU and motherboard temperatures.
Displays CPU and chassis fan speeds.
Displays voltage outputs from onboard regulators.
Sets the performance level for the CPU fan.
Controls CPU fan speed based on temperature.
Controls chassis fan speed based on temperature.
Accelerates the system boot speed.
Specify the boot device priority sequence.
Configure Windows Secure Boot settings and manage keys.
Configure CSM for better compatibility with VGA, bootable devices.
Utility to run ASUS EZ Flash 2 for BIOS updates.
Load default values for BIOS parameters.
Save selected changes and reset the system.
| Non-ECC | Yes |
|---|---|
| Memory channels | Dual-channel |
| Memory slots type | DIMM |
| Number of memory slots | 4 |
| Supported memory types | DDR3-SDRAM |
| Maximum internal memory | 32 GB |
| Supported memory clock speeds | 1333, 1600 MHz |
| Processor socket | LGA 1150 (Socket H3) |
| Processor manufacturer | Intel |
| Compatible processor series | Intel Celeron, Intel Pentium |
| USB 2.0 connectors | 3 |
| Number of SATA connectors | 6 |
| Number of Parallel ATA connectors | - |
| USB 3.2 Gen 1 (3.1 Gen 1) connectors | 1 |
| eSATA ports quantity | 0 |
| USB 2.0 ports quantity | 2 |
| Component for | PC |
| Power source type | ATX |
| Motherboard chipset | Intel® B85 |
| Audio output channels | 5.1 channels |
| Windows operating systems supported | Windows 7 Home Basic, Windows 7 Home Basic x64, Windows 7 Home Premium, Windows 7 Home Premium x64, Windows 7 Professional, Windows 7 Professional x64, Windows 7 Starter, Windows 7 Starter x64, Windows 7 Ultimate, Windows 7 Ultimate x64, Windows 8, Windows 8 Enterprise, Windows 8 Enterprise x64, Windows 8 Pro, Windows 8 Pro x64, Windows 8 x64, Windows 8.1, Windows 8.1 Enterprise, Windows 8.1 Enterprise x64, Windows 8.1 Pro, Windows 8.1 Pro x64, Windows 8.1 x64 |
| Supported storage drive interfaces | SATA |
| Parallel processing technology support | 4-Way CrossFireX |
| BIOS type | UEFI |
| ACPI version | 5.0 |
| BIOS memory size | 128 Mbit |
| Width | 244 mm |
|---|