Before Setup
AiMesh Setup Steps
One Router Setup Steps
Unplug
Prepare your Modem
01
1
Unplug the power of cable / DSL modem. If it has
a battery backup, remove the battery.
2
Connect your modem to the router with the network cable provided.
3
Power on the modem. Plug modem to the power outlet and power on.
WE SUGGEST...
Modem back
Modem back
4
Check the modem LED lights to ensure the connection is active.
If you are using DSL for internet,
you will need your username
/ password from your Internet
service provider (ISP) to properly
congure your router.
Modem front
Connect your Device
02
1
Power on the router.
Plug in and press the power switch
at the back of your router.
2
Check that the LED turns solid
blue to indicate that the hardware
connection is ready for setup.
3
[Web] Connect your PC
to the router using an
additional network cable.
[App] Or you can use a
phone or pad to complete
the setup via ASUS Router
App.
Login and Connect
03
[Web]
1
Refer to ONE ROUTER SETUP STEPS to connect
your AiMesh router to your PC and modem, and
then log in into the web GUI.
AiMesh router
03
Modem
AiMesh Router AiMesh Node
2
Go to Network Map page, click AiMesh icon
and then Search for your extending AiMesh
node.
3
Click Search, it will automatically search for your
AiMesh node nearby. When the AiMesh node shows
on this page, click it to add it into the AiMesh system.
** If you cannot nd any AiMesh node, please go to
TROUBLE SHOOTING.
4
A message is displayed when synchronization is
completed.
5
Congratulations! You
will nd the pages
below show up when an
AiMesh node has been
successfully added to the
AiMesh network.
Successfully added RT-ABCDE to your AiMesh system, it
will take awhile to show up as connected in the AiMesh
router list.
OK
[App] Log in to your existing router via ASUS Router App and choose “Add AiMesh Node” to complete the setup.
Setting up an AiMesh WiFi system
02
1
Prepare two or more ASUS routers supporting AiMesh.
2
Assign one as AiMesh router, and another one as AiMesh node.
** If you have multiple AiMesh routers, we recommend using the router with the highest
specications as your AiMesh router and the others as AiMesh nodes.
3
Go to AiMesh SETUP STEPS.
Setting up a standalone router
01
1
Go to ONE ROUTER SETUP STEPS.
One Router Setup
Download free ASUS Router App to
set up and manage your router(s)
03
AiMesh Setup Steps
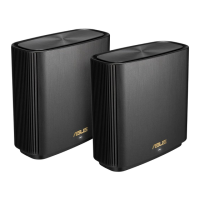
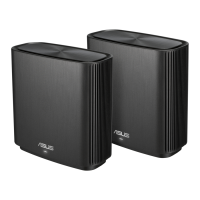
AiMesh routerAiMesh node
Prepare
01
Place your AiMesh router and node in the same room and at least 1 meter apart during the setup process.
AiMesh node
02
Keep your AiMesh node powered on and standby for AiMesh system settings.
1
[Web] Open a web browser.
You will be redirected to the ASUS Setup Wizard. If not, navigate to
http://www.asusrouter.com.
[App] Launch ASUS Router App and follow the instructions to
complete the setup.
E23923
1
Plug the adapter into the DCIN port, and press the power switch.
2
The LED indicator will light up when your hardware is ready.
Hardware Explanations
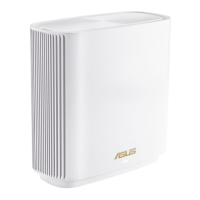
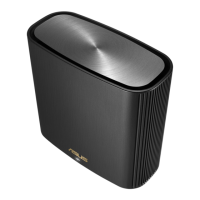
ASUS ZenWiFi BT8
BE14000 Tri Band WiFi Router
Model: BT8
Quick
Start Guide
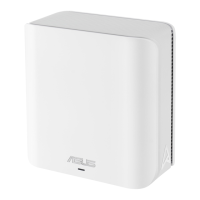
ZenWiFi BT8 Overview
2.5G WAN port
Connect your optical modem to the 2.5G WAN
port with a network cable.
LAN1-3 ports
Connect your PC to a LAN port with a network
cable.
DC Power adapter DC Output: +12V with max 3A current
Operating Temperature 0~40
o
C Storage 0~70
o
C
Operating Humidity 50~90% Storage 20~90%
Specications:
USB 3.0 port
LED Indicator
* If no 6GHz SSID is displayed, please check whether your OS and client device are fully
licensed to support the newly released 6GHz band. You can check with your OS and
client device provider for Wi-Fi 6E driver release schedule.
LAN1-2 ports
Power (DCIN) port
2.5G WAN port
Power switch
At least 1 meter
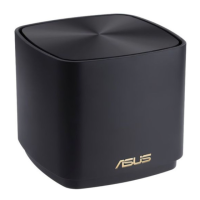
AiMesh node
AiMesh router
2.5G LAN3 port