3
Battery installation and charging
Once you have installed the battery, the screen indicates the battery
status. For best performance, keep the handset in the telephone base or
charger when not in use. The battery is fully charged after 10 hours of
continuous charging.
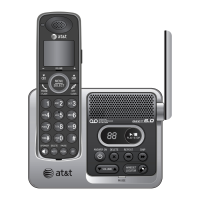
Step 1
Plug the battery
connector securely
into the socket inside
the handset battery
compartment, matching
the color-coded label.
Insert the supplied
battery with the label
THIS SIDE UP facing up
as indicated.
Step 2
Align the cover flat
against the battery
compartment, then
slide it upwards until
it clicks into place.
NOTE: If you are on a phone call in low battery mode, you hear four short beeps
every minute.
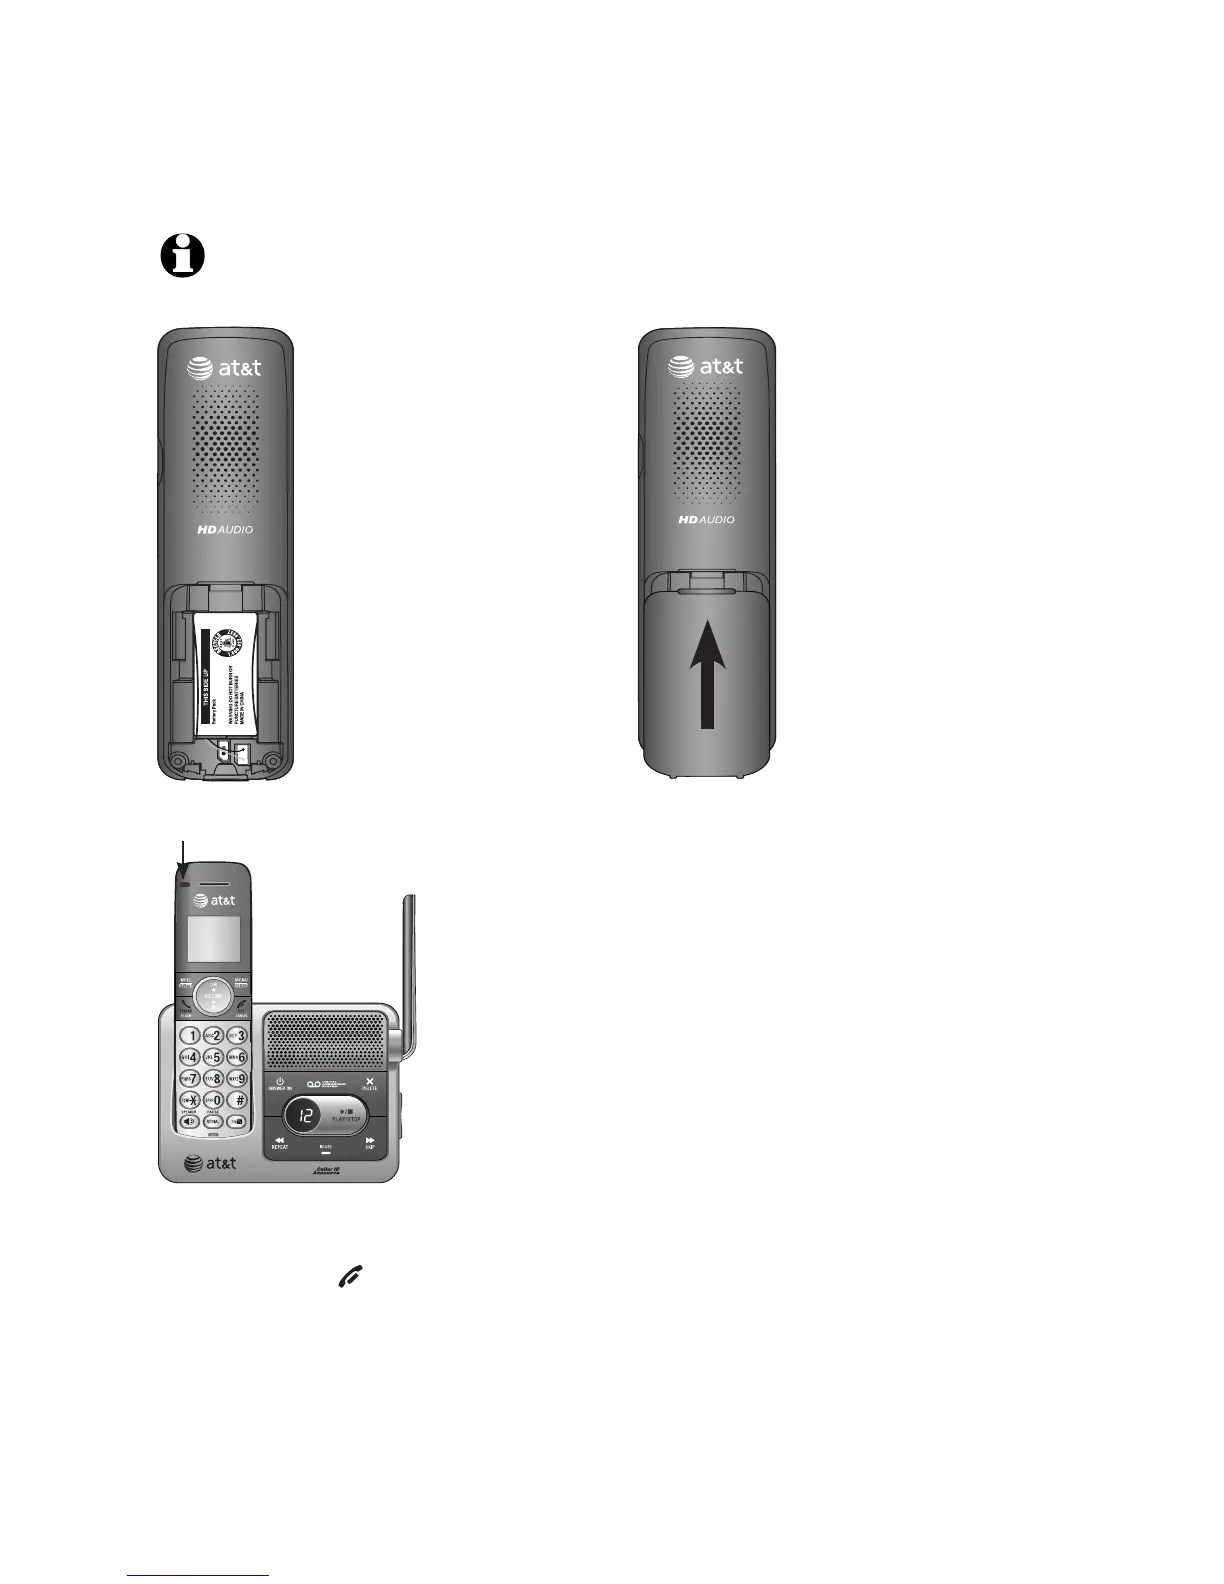
Step 3
Charge the handset by placing it face forward in the
telephone base or charger. The CHARGE light on the
top of the handset is on during charging.
IMPORTANT INFORMATION
1. Use only the supplied rechargeable battery or replacement battery (model BT166342).
To order, visit our website at www.telephones.att.com or call
1 (800) 222-3111. In Canada, dial 1 (866) 288-4268.
2. If you do not use the handset for a long time, disconnect and remove the battery
to prevent possible leakage.
After you install your telephone or power returns following a power outage,
the handset will prompt you to set the date and time. To skip setting the date
and time, press OFF/CANCEL.
CHARGE light
 Loading...