EasyManua.ls Logo

AT&T SportsNet User Manual

AT&T SportsNet
2 pages
To Next Page IconTo Next Page
Page #1 background imageLoading...
Page #1 background image
AT&T SportsNet & ROOT SPORTS - XOS - Quick Start Guide
C. Power on the Laptop.
- In a web browser (Google Chrome), type the IP address ( https://192.0.2.2 )
and press Enter.
D. Enter the following credentials and click Log in:
- Login: xos
‐Password:xos-user
E. Select the Platform Configuration tile and click Launch.
F. Select the Network tab followed by the IP config tab.
G. You can change the IP parameters for the following ports
based on your IP plan or keep the default IP addresses:
- Management 01 port (GbE01 – Default: 192.168.1.200)
- Data GbE03 port (Default: 192.168.2.200)
H. Click Save.
I. Remove the USB-Ethernet adapter from the front panel of
the XOS.
J. Install the front bezel.
Contacting Harmonic:
ATT‐RSN‐HELP@harmonicinc.com
ATT RSN SUPPORT Phone# (408) 490-6521
7 a.m. to 4 p.m. Pacific Time, Monday through Friday
1. Unpacking and Racking
2. Cabling
Quantity Description
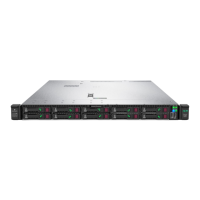
1 XOSServer‐1UHPEDL360G10
2Powercable
4 MicroBNCtoBNCcable
1Frontbezel
1 Rackmountingkitfor1UHPEDL360G10
1 USBtoEthernetadapter
1 QuickStartGuide
A. Please use this list to ensure that your order is complete.
B. Remove the XOS and associated accessories from the
box.
C. Mount the XOS in the rack.
The XOS can be mounted in a 19" rack.
- Ensure that it is secured in the rack.
- Maintain air flow around the XOS.
- Do not place another device directly on the top of the XOS.
3. Configure IP addresses
A. Follow the diagram below to perform the XOS cabling.
A. Use the USB to Ethernet adapter to connect a laptop to the
USB port on the front panel as shown below:
B. Power on the XOS.
- Connect the power cord to the power supply on the rear panel.
- Connect the cable to the power source and turn on the power.
- Wait for the XOS to complete the boot process.
-
Make sure that the LEDs (x3 at the top-right) are green, as shown in the picture above.
- The Management and Data switches are not
pprovided by Harmonic
- The Management PC is recommended
If you don’t have a Management PC, keep the laptop
connected until you complete the configuration (Step 6).
Question and Answer IconNeed help?

Do you have a question about the AT&T SportsNet and is the answer not in the manual?

AT&T SportsNet Specifications

General IconGeneral
BrandAT&T
ModelSportsNet
CategoryNetwork Hardware
LanguageEnglish

Summary

Unpacking and Racking

Remove XOS and Accessories

Remove the XOS server and its associated accessories from the box.

Mount XOS in Rack

Mount the XOS server securely in a 19-inch rack, ensuring airflow.

XOS Cabling Instructions

Configure IP Addresses

Connect Laptop via USB-Ethernet

Connect a laptop to the XOS front panel USB port using a USB-Ethernet adapter.

Power On XOS

Connect power and turn on the XOS, verifying green LEDs.

Power On Laptop and Access GUI

Power on the laptop and access the XOS Web GUI via browser.

Login and Launch Configuration

Log in with default credentials and launch Platform Configuration.

Configure Network IP Settings

Navigate to Network tab, IP config, and adjust IP parameters.

Save and Finalize Configuration

Save IP changes, remove USB adapter, and install front bezel.

Check RF Connection Status

Verify Connection Messages

Check for 'Connected' or 'Controlled' messages; address red errors.

Upgrade and Configuration Waiting

Launch Broadcast Configuration

Select and launch the Configure Broadcast tile in the UI.

Expand Multiplexer Details

Click a multiplexer to view the list of authorized programs.

Final Configuration Steps

Assign Multiplexer to IP Output

Configure multiplexer for IP output, setting multicast IP and UDP port.

Assign Multiplexer to ASI Output

Configure multiplexer for ASI output, specifying the ASI port.

Check XOS Outputs

Connect Decoder and TV

Connect a professional decoder to XOS and then to the TV's HDMI port.

Power On Decoder and TV

Turn on the connected decoder and the TV.

Access Documentation

Full User Guide Access

Access the full user guide and other documentation online.