Do you have a question about the ATC SCM7 and is the answer not in the manual?
Guidance on connecting the subwoofer via line or hi-level inputs.
Details on the trigger input for remote power-up functionality.
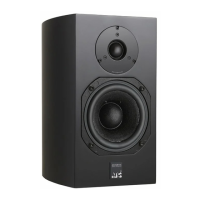
Adjusting input sensitivity and crossover frequency for optimal integration.
Correcting phase issues and managing front panel display behavior.
This document describes a subwoofer, likely part of the "Entry Series Subwoofer" from Acoustic Engineers, designed to enhance low-frequency audio reproduction in a sound system.
The subwoofer's primary function is to reproduce low-frequency sounds, complementing main loudspeakers. It offers versatile connectivity options to integrate into various audio setups, including stereo and 5.1 systems. It can be remotely powered up via a trigger input. All settings are controlled via a rotary encoder on the front panel or a supplied IR remote control.
1. Connections: * Line Level Inputs: Connects to preamp outputs or integrated amplifier preamp outputs. Use both connections for stereo, or one (left or right) for a 5.1 system. * Hi-Level (Speaker Level) Inputs: Connects directly to a stereo pair of speakers, either via amplifier outputs or loudspeaker input terminals. Polarity must be maintained. * Remote Trigger Input: A 3.5mm mini-jack allows remote power-up. The 'tip' pin connects to the trigger signal, and the 'ring' to ground. * Important Note: Only one type of input (line level or hi-level) should be used at any given time.
2. Functions/Settings (Controlled via Rotary Encoder or IR Remote): * Level ('L'): Adjusts the overall input sensitivity. Initial setting should be around the center (50) and fine-tuned after setting the filter cut-off frequency. * Filter Frequency ('Fr'): Varies the upper low-pass crossover frequency. This is crucial for integrating the subwoofer with satellite/main loudspeakers. It should be set at or just above the cut-off frequency of the main loudspeakers. Recommended initial settings for ATC satellite/main loudspeakers are provided (e.g., SCM7: 60, SCM11: 56, SCM19: 54, SCM40: 48). * Phase ('Ph'): Changes the phase of the acoustic output signal relative to the input signal. This helps improve integration by correcting phase problems caused by different distances from the listener to the subwoofer and main loudspeakers. Users can set this by listening to familiar material and choosing the preferred setting, or by using a test tone at or near the crossover frequency. When using a test tone, flip the phase setting and choose the one that yields the highest total output, or measure with a sound level meter. * Display Brightness ('Br'): Adjusts the brightness of the front panel display. Higher numbers result in a brighter display. * Display On/Off ('Sc'): Offers three options for display behavior: * 0: Display stays lit all the time. * 1: Display stays lit at the selected brightness, then automatically dims to minimum brightness after 30 seconds. * 2: Display stays lit at the selected brightness for 30 seconds, then turns off.
The device manual does not explicitly detail user-level maintenance features beyond the initial setup and configuration. The rear panel indicates "NO USER SERVICEABLE PARTS INSIDE," suggesting that any internal maintenance or repair should be performed by qualified service personnel. The presence of a fuse (3.15A for 230V, 6.3A for 115V) implies a basic level of electrical protection, and fuse replacement would be a user-serviceable item if it blows, though the manual doesn't provide instructions for this.
General Usage Note: The quality and level of low-frequency sounds can vary significantly within a room. It is recommended to listen or measure at multiple locations to achieve optimal setup, especially in larger listening areas.