3
PREPARATION
Before assembling your Folding Creeper, make sure all parts are present. Compare parts with package contents
list and illustrations. If any part is missing or damaged, do not attempt to assemble, install or operate the product.
Contact your disributor for replacement parts. Packaging contents: (1) creeper body with cushions, (6) casters
(6) caster lock nuts.
ASSEMBLY
d Locking Pins.
CAUTION: Folding components can present pinch and crush hazards during normal use of this product. Exercise
caution when performing adjustments and while assembling and using this equipment.
OPERATION
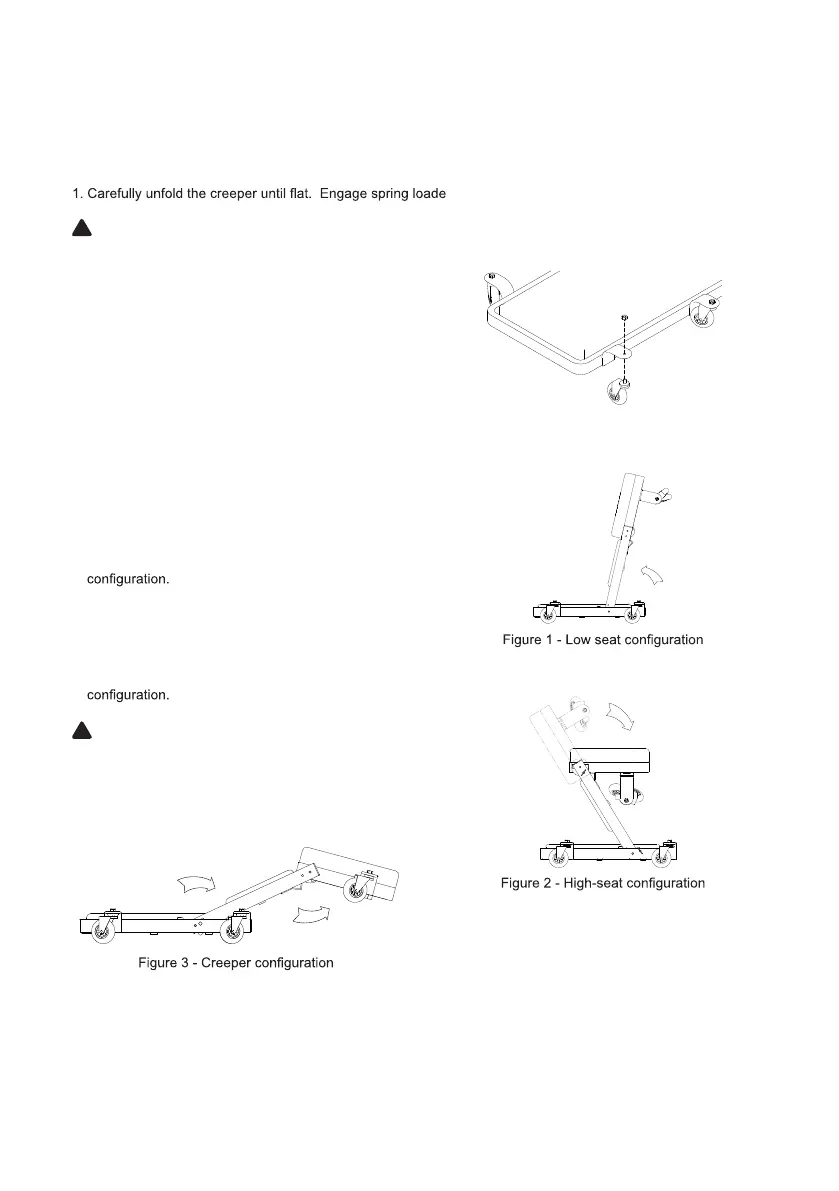
1. Locate and unlock spring loaded locking pin for
middle section by pulling out until disengaged.
Then rotate head frame and middle frame up -
ward as shown in Fig. 1 until the locking pin can
engage hole in creeper seat locking plate (ensure
lock pin is fully engaged). This is the low seat
2. Disengage lock pin for middle frame and rotate
further forward. Engage locking pin. Disengage
lock pin for head frame section and rotate
backwards as shown in Fig. 2. Adjust hinged
caster brackets as required. This is the high seat
CAUTION: Ensure all lock pins are properly
engaged before using creeper.
3. Adjust hinged caster brackets so wheels will con-
tact ground properly. Unlock spring loaded lock
pins, then reverse steps 1 and 2, as shown in Fig.
3, to convert creeper seat into creeper.
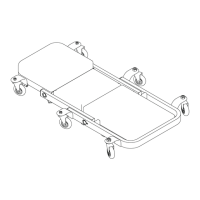
2. Attach casters to creeper frame caster brackets
using 17mm nuts.
!
!
!